

Be sure you are operating the newest model
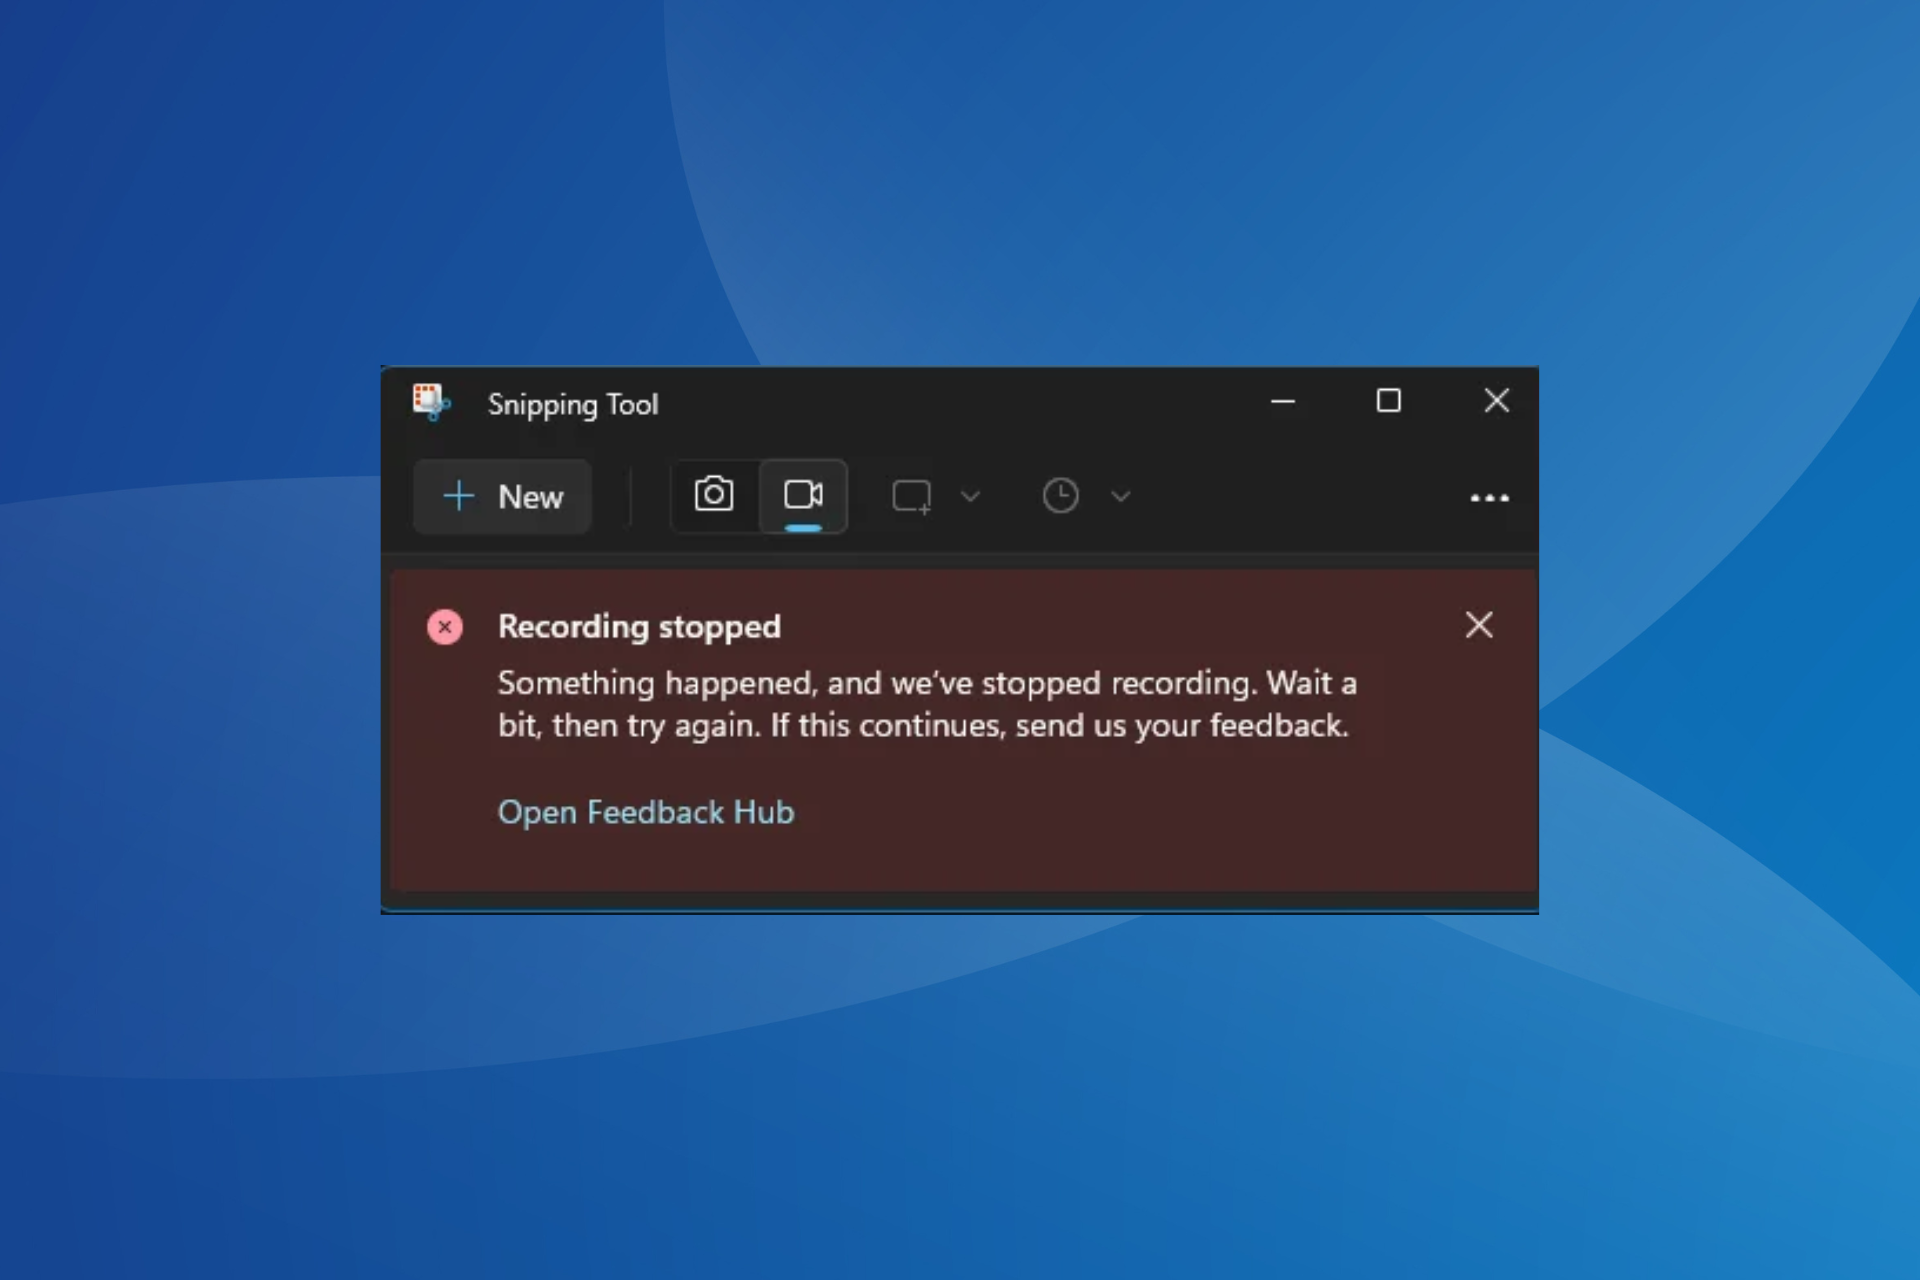
Snipping Device is Home windows’ built-in display screen seize and recording utility. However when utilizing the latter performance, many received the Recording stopped error with a message that learn, One thing occurred and we’ve stopped recording. Wait a bit, then attempt once more. If this continues, ship us your suggestions.
The Recording stopped error primarily affected units operating Home windows 11. What occurs is, once you click on the Report button, the Snipping Device app will begin the countdown after which instantly freeze whereas displaying the error message.
Why does Snipping Device randomly cease working?
This is because of a bug within the app, given the excessive variety of customers dealing with the problem. Extra so, many reported that the Snipping Device could robotically begin working after a restart. In addition to, conflicts with the graphics adapter (card) or misconfigured projection mode may also set off the error.
How we take a look at, assessment and fee?
We’ve labored for the previous 6 months on constructing a brand new assessment system on how we produce content material. Utilizing it, we now have subsequently redone most of our articles to supply precise hands-on experience on the guides we made.
For extra particulars you’ll be able to learn how we take a look at, assessment, and fee at WindowsReport.
Earlier than we begin with the marginally advanced options, attempt these fast ones:
On this article
1. Replace Snipping Device
Press Home windows + S to open Search, kind Microsoft Retailer within the textual content subject, and click on on the related consequence.
Click on the Library icon close to the bottom-left nook.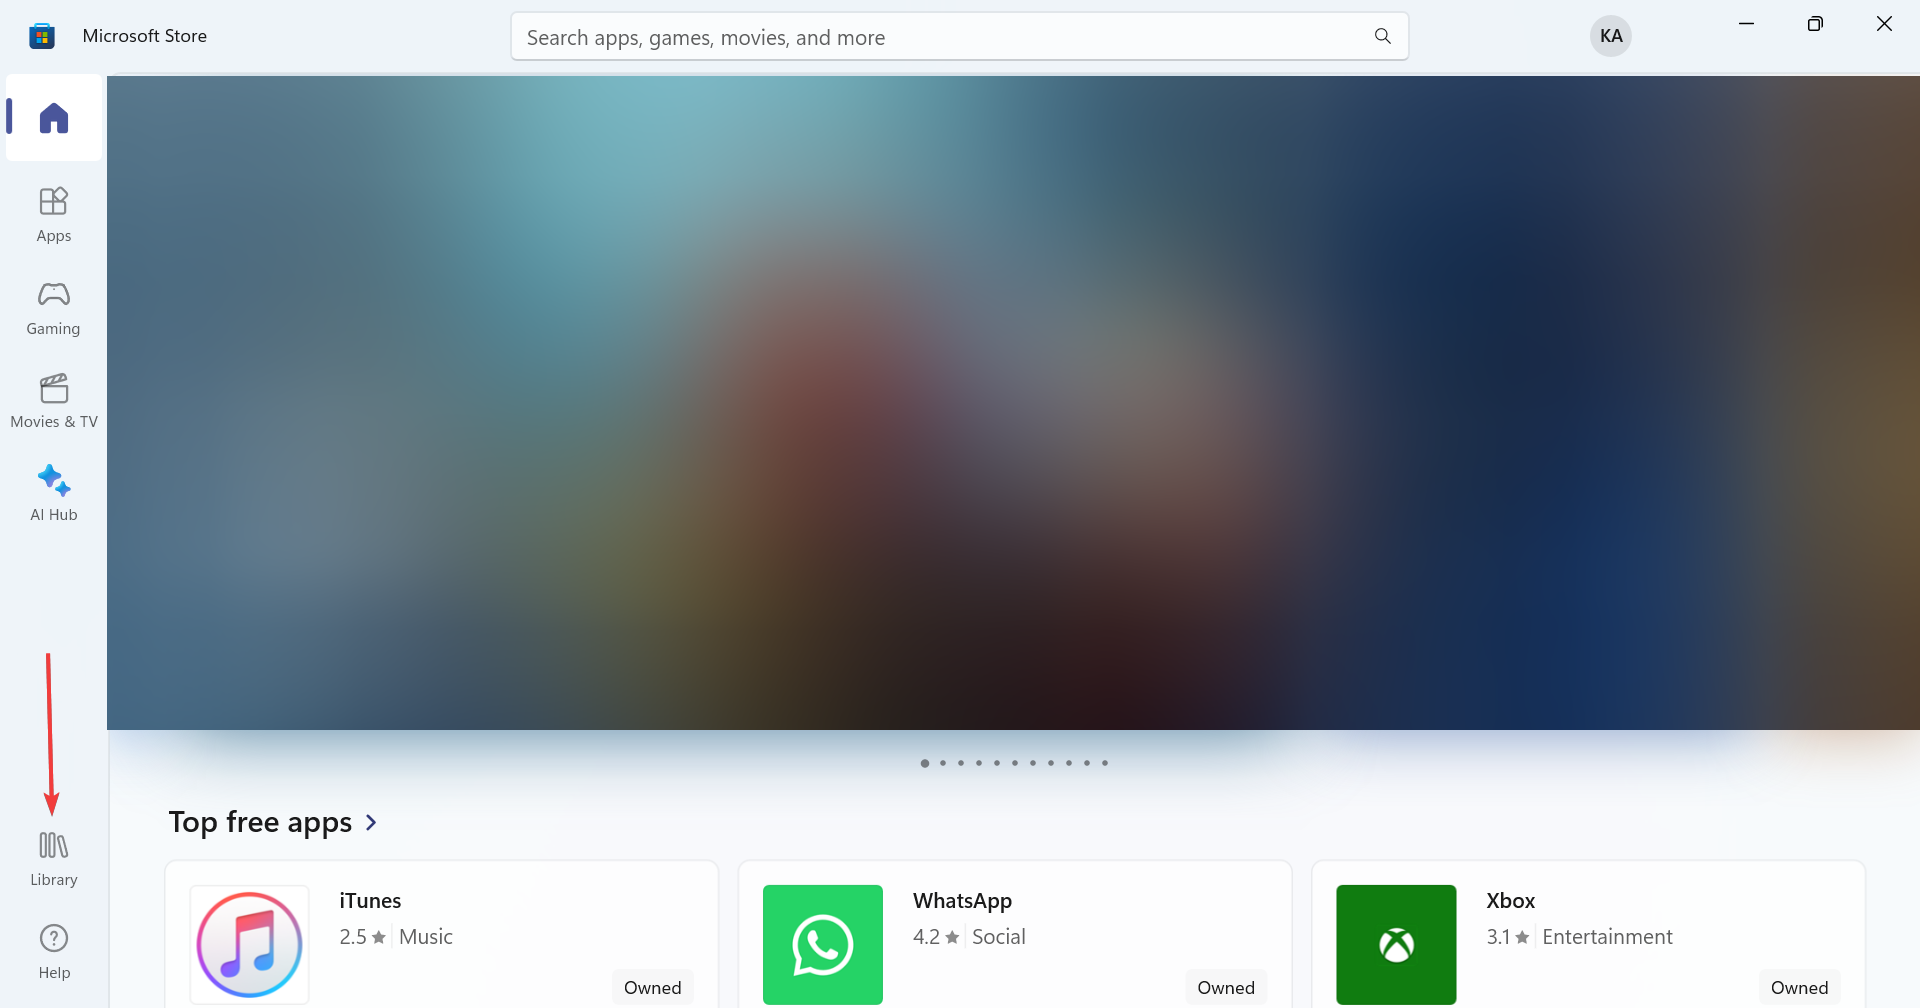
Now, click on the Get updates button.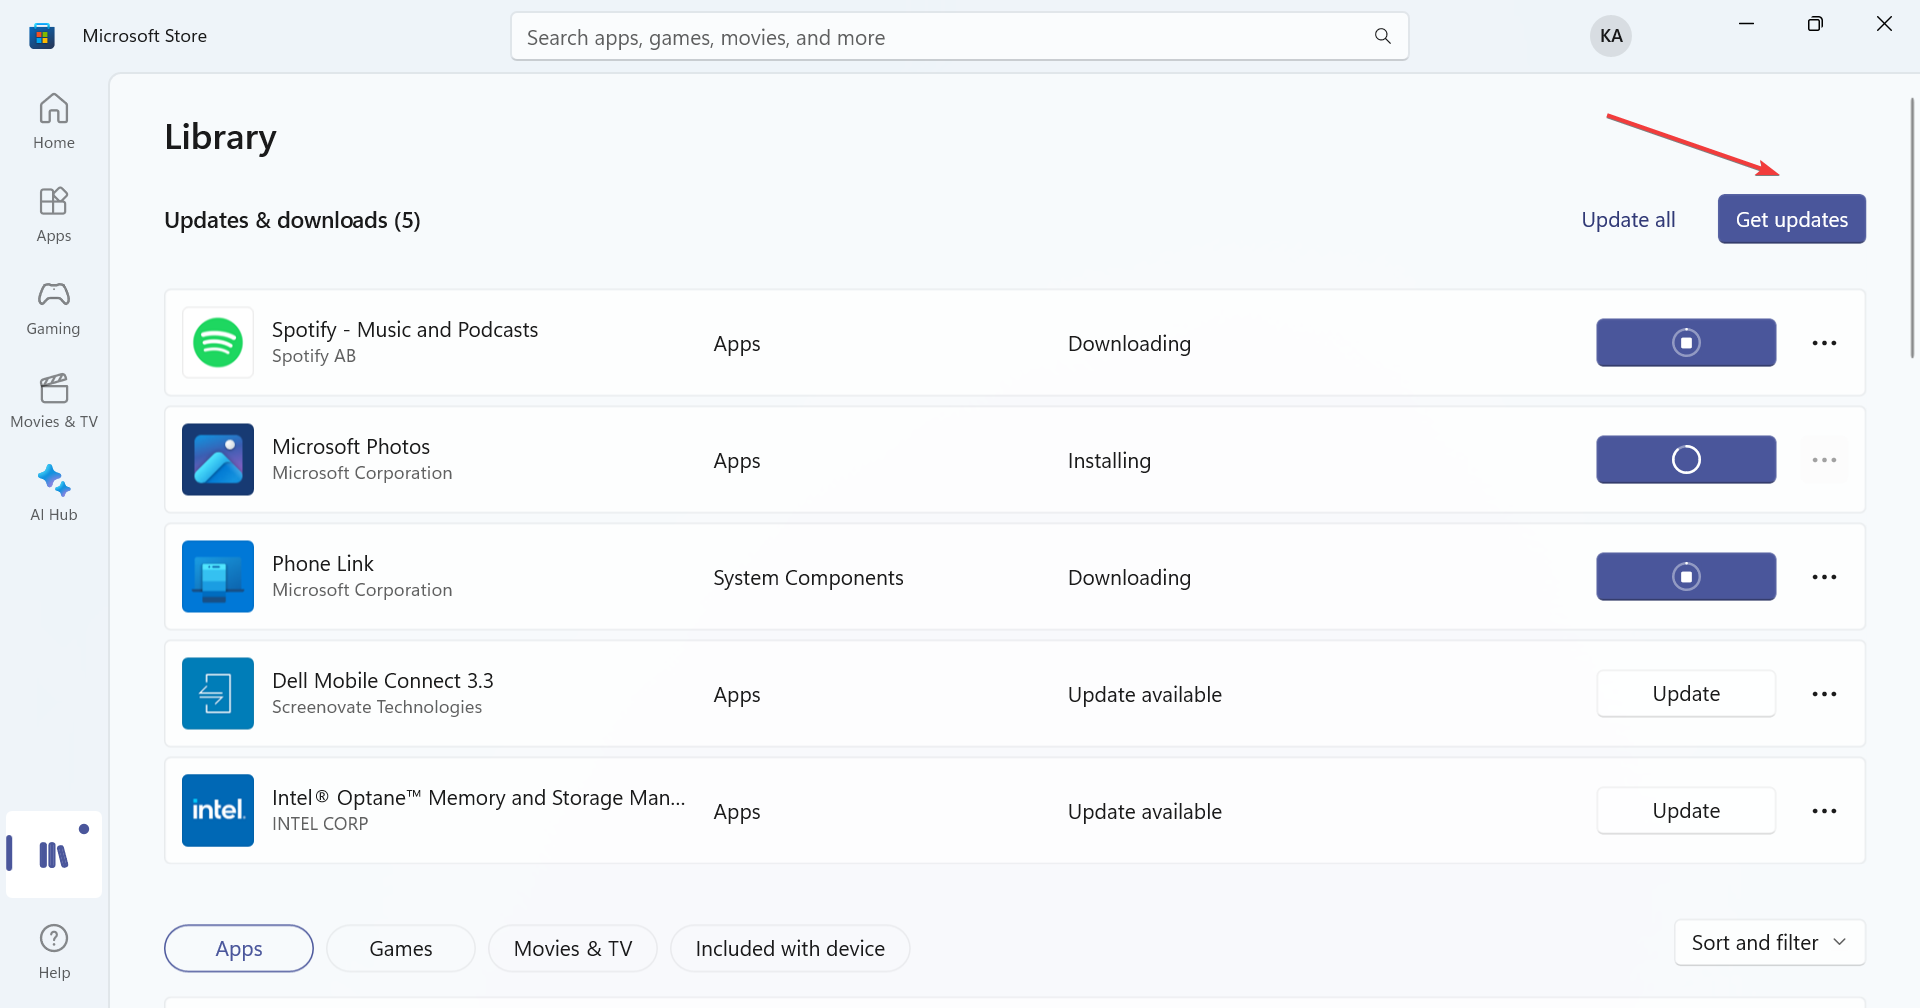
If an replace is listed for the Snipping Device, ensure that to obtain it after which examine for enhancements.
2. Restore/reset the app
Press Home windows + I to open Settings, go to Apps from the navigation pane, after which click on on Put in apps.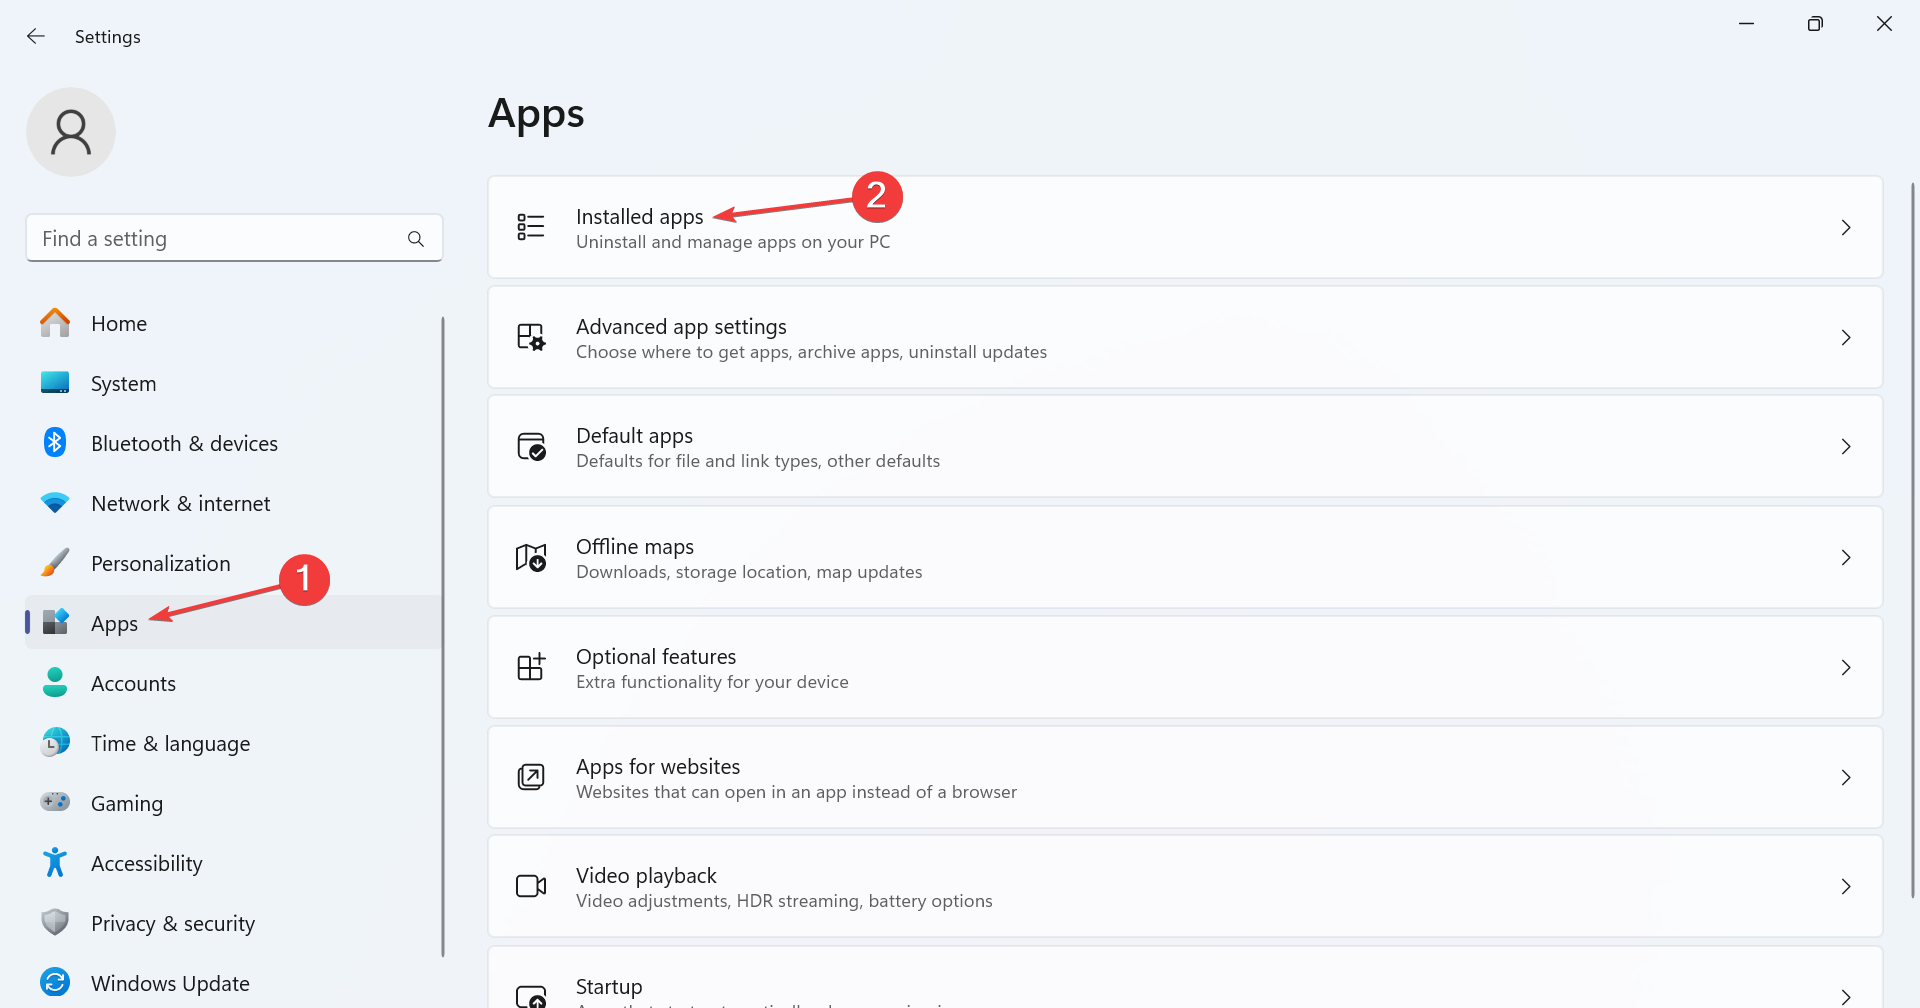
Click on the ellipsis subsequent to Snipping Device, and choose Superior choices from the flyout menu.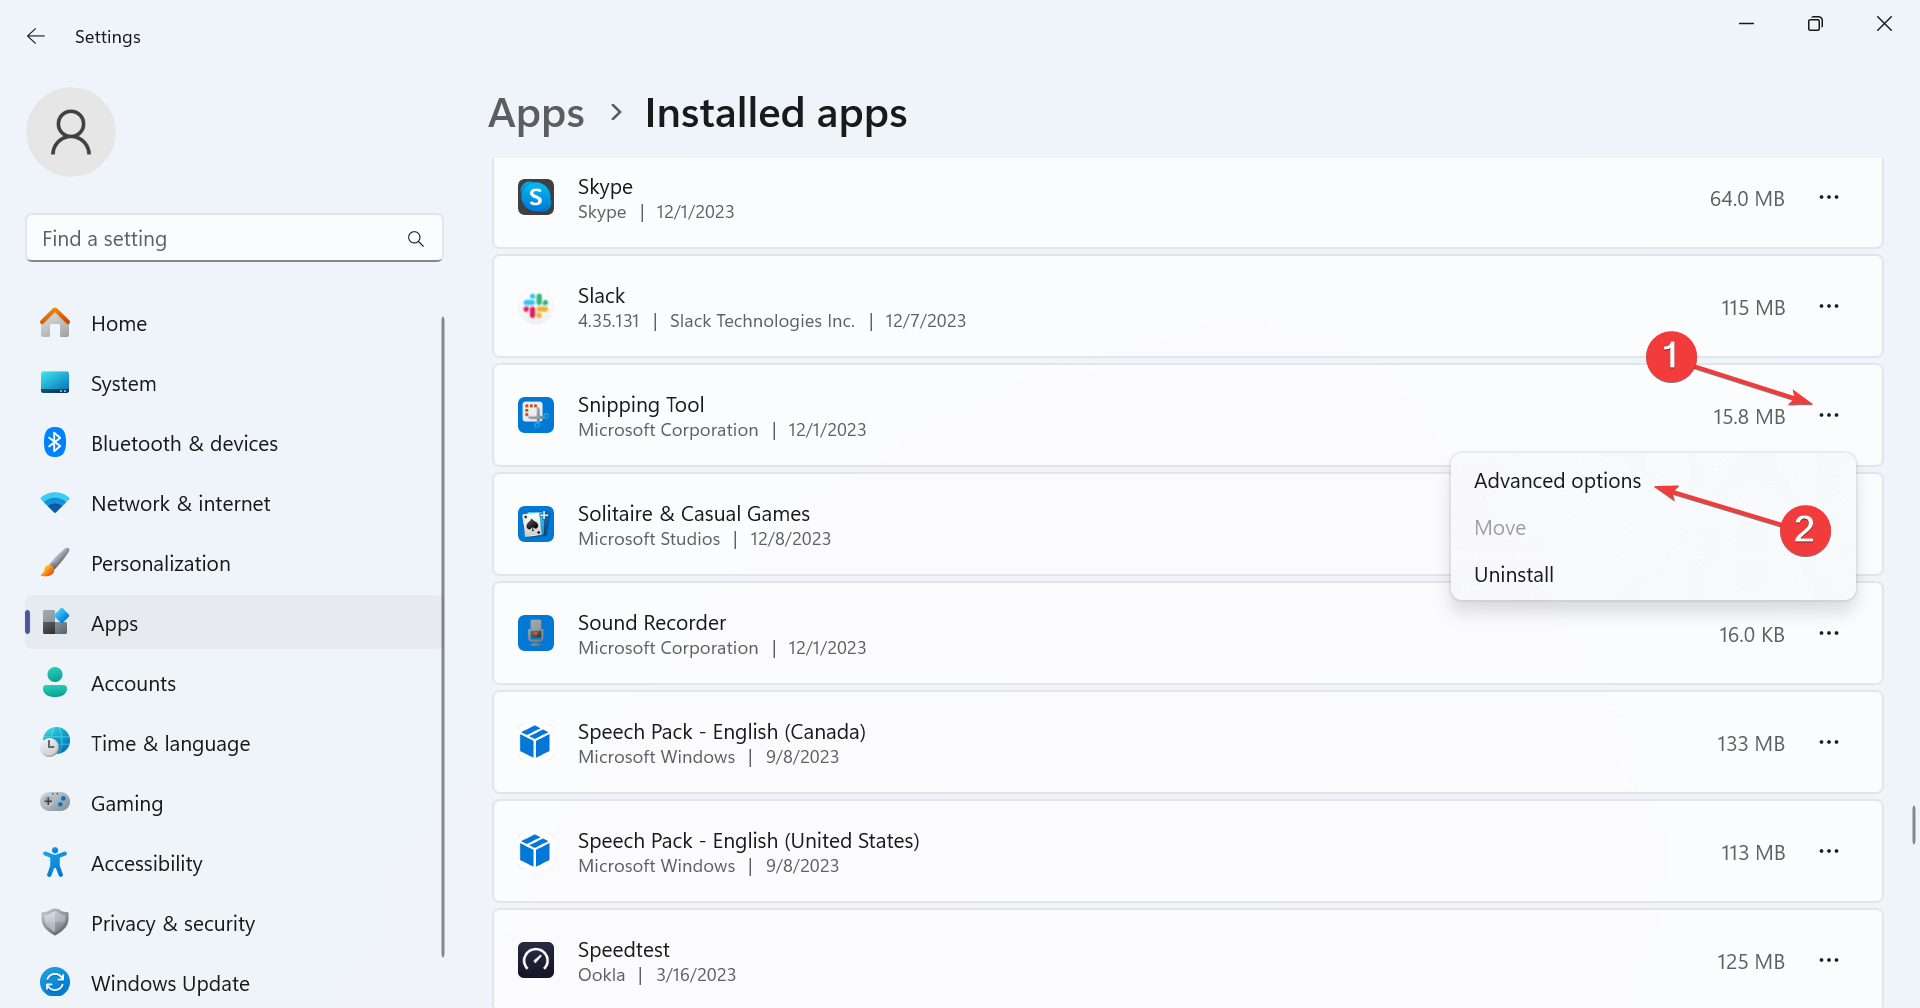
Scroll down, click on the Restore button, and as soon as finished, examine for enhancements.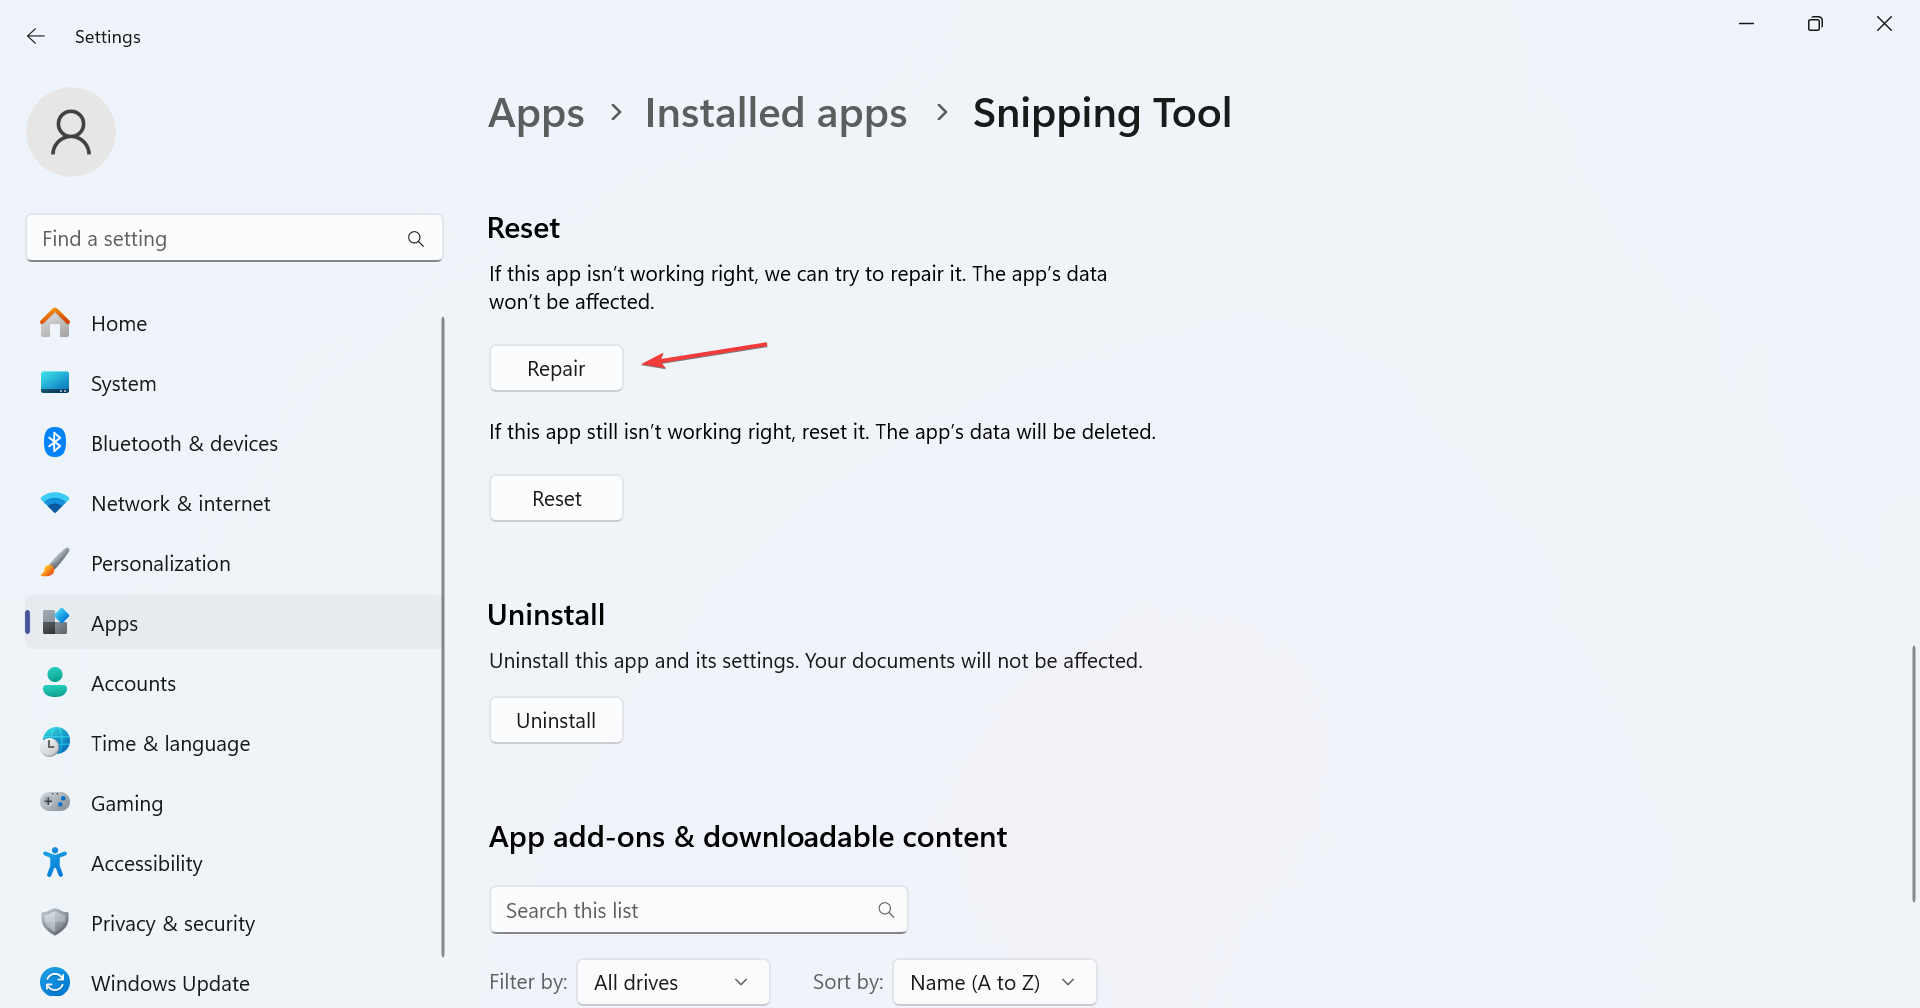
If the error persists, click on on Reset.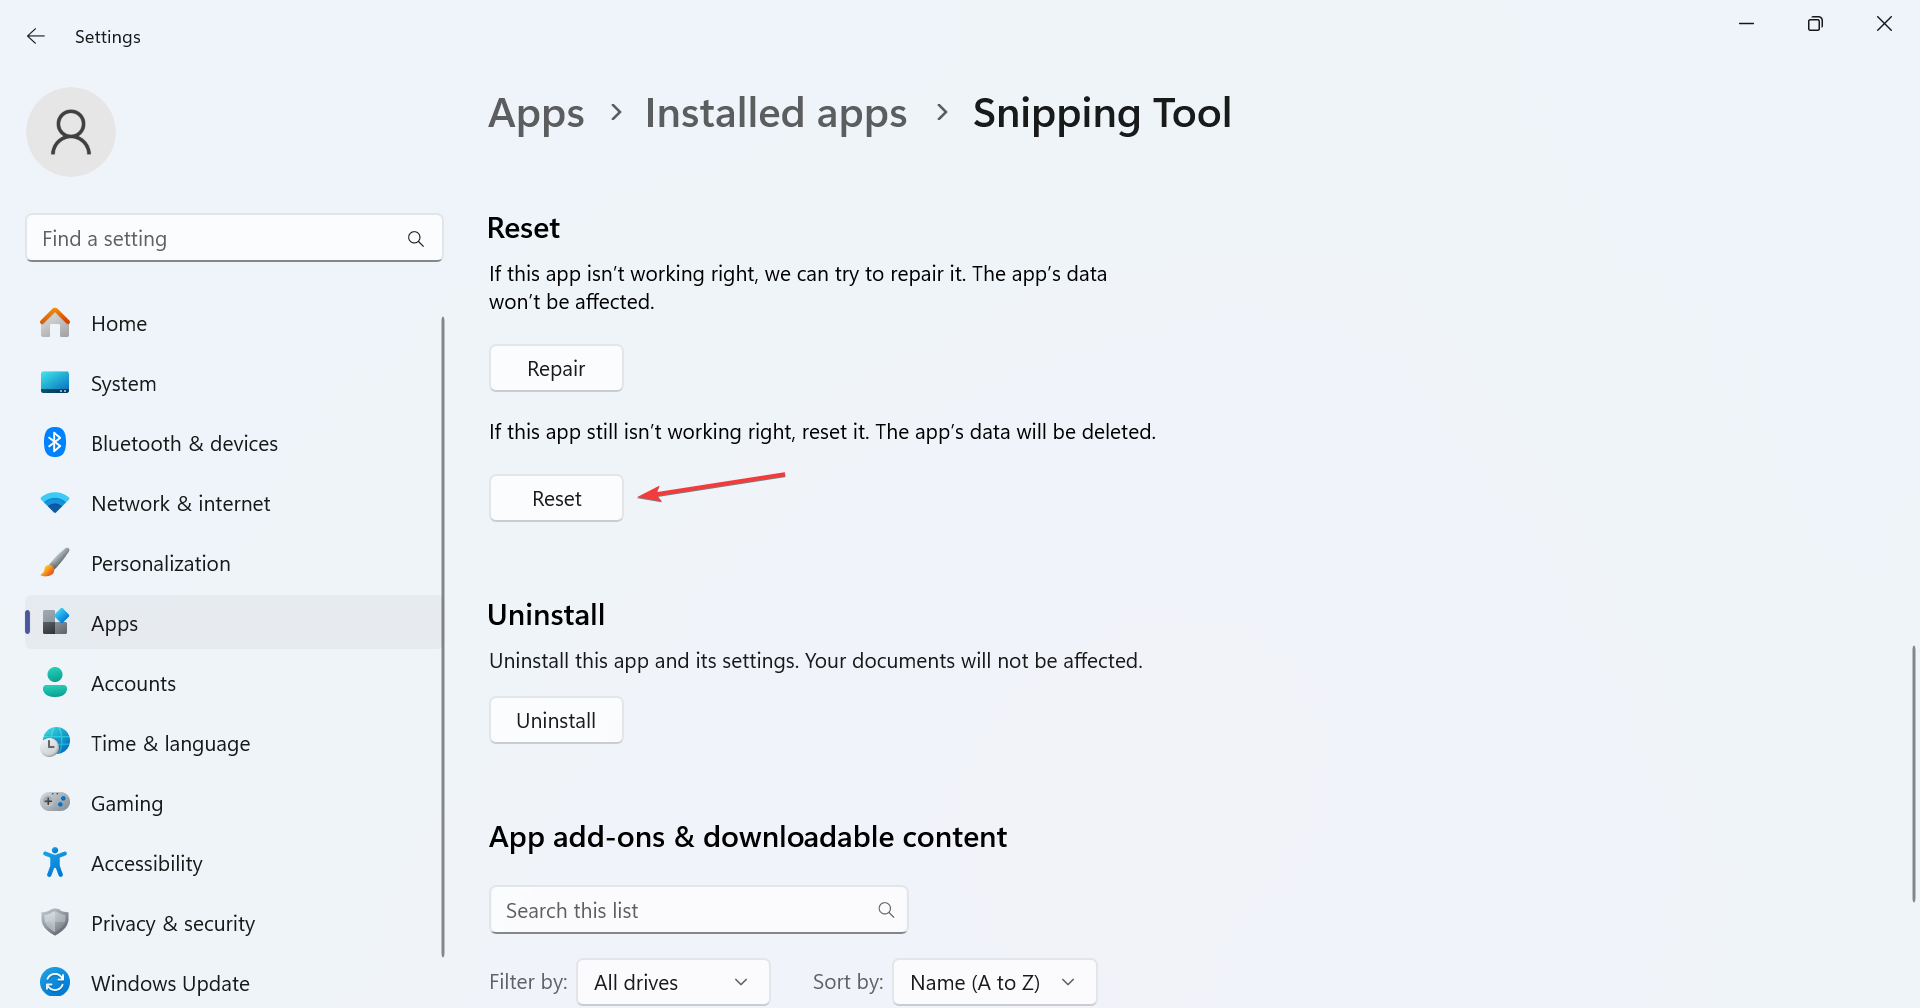
Once more, click on Reset within the affirmation immediate.
Repairing or resetting the app typically fixes points with it. With the latter, you principally reinstall the app and set the configured settings to default, which is likely to be the rationale behind the Snipping Device Recording stopped error. This additionally helps when Snipping Device is just too sluggish.
3. Change to high-performance GPU
Press Home windows + I to open Settings, go to System from the left pane, after which click on on Show.
Scroll all the way down to the underside and click on on Graphics below Associated settings.
Choose Microsoft Retailer app from the Add an app dropdown menu, and click on the Browse button.
Choose Snipping Device from the record.
Click on the Choices button below Snipping Device.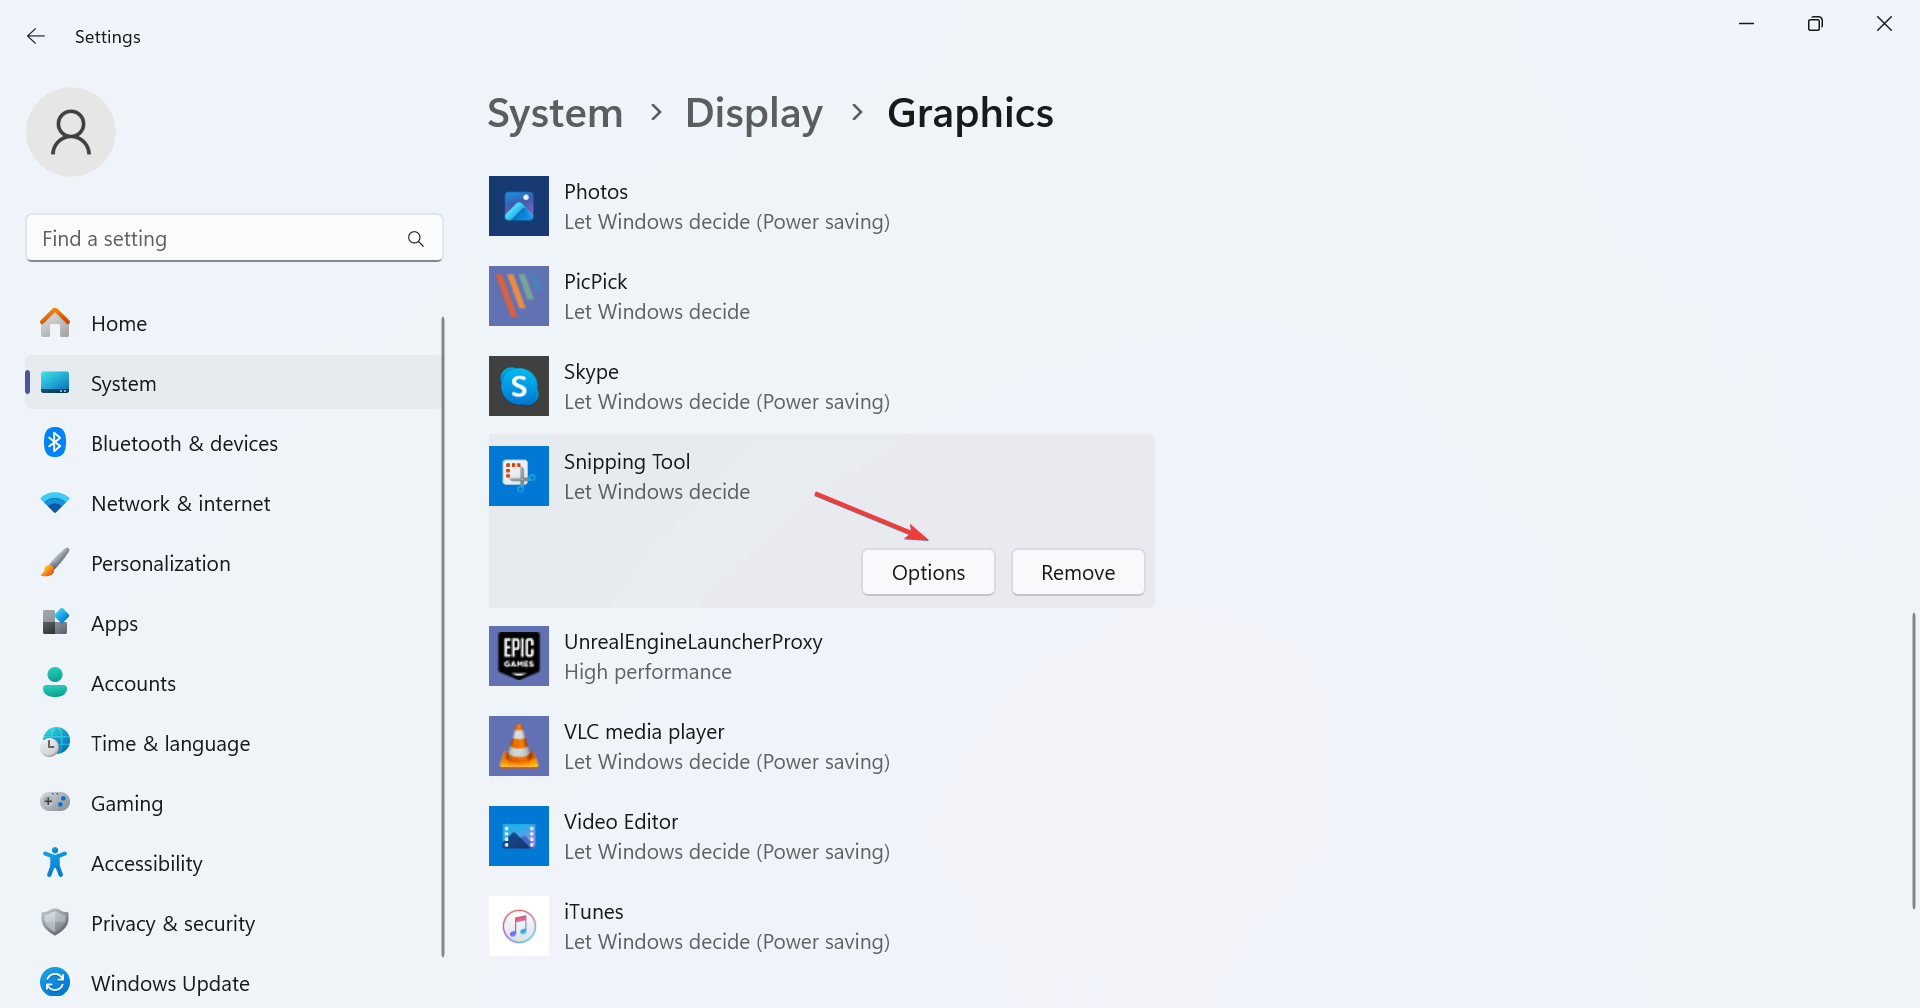
Choose Excessive efficiency after which click on on Save.
Restart the pc and examine for enhancements.
For those who even have the Particular GPU choice, check out the totally different graphic adapters listed below it and confirm whether or not the Snipping Device’s Recording stopped one thing occurred error message goes away.
4. Disable further graphics adapters

NOTE
This answer solely applies when you might have a number of show adapters accessible. If there’s only one, transfer to the following methodology.
Press Home windows + X to open the Energy Consumer menu, and choose Machine Supervisor from the record of choices.
Increase the Show adapters entry, right-click on any one of many graphics adapter, and choose Disable system.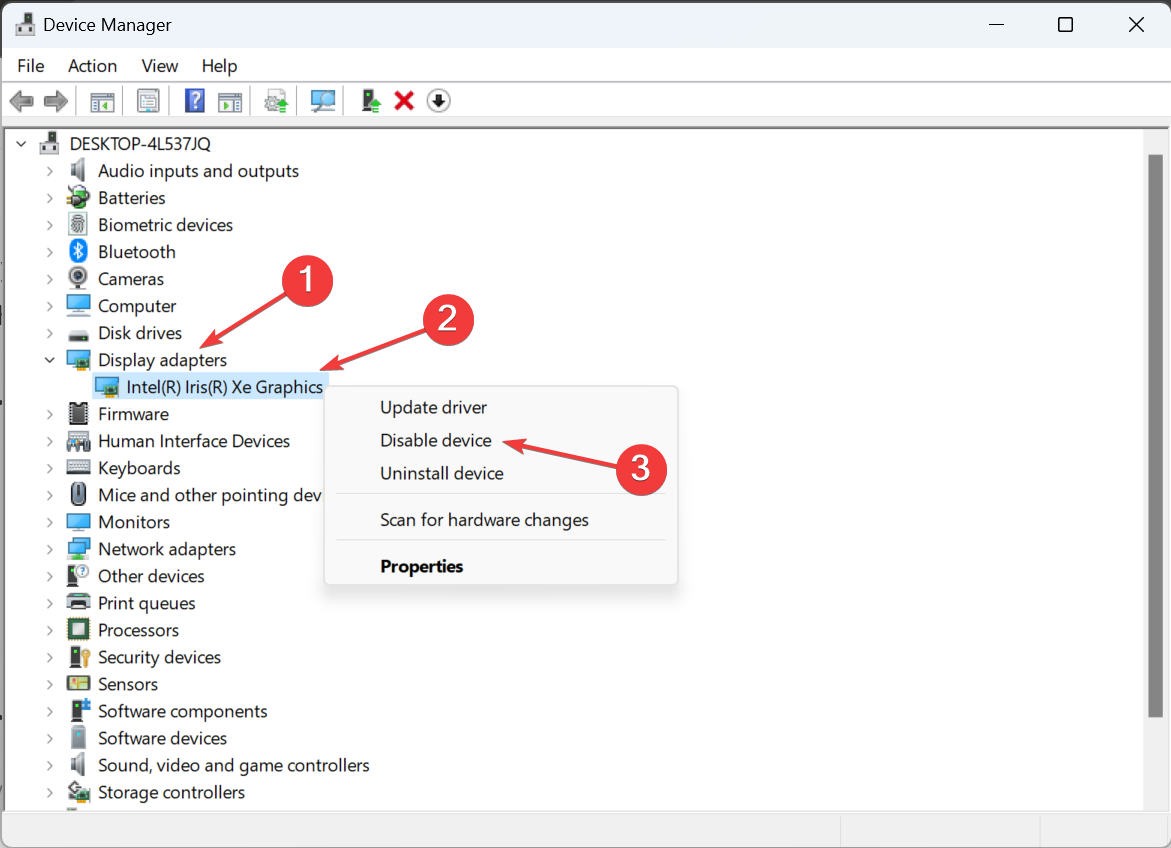
Click on Sure within the affirmation immediate.
When you’ve got a number of graphic playing cards accessible, disable every individually whereas operating only one. For some, disabling Intel Graphics did the trick, whereas others received issues up and operating after disabling the NVIDIA adapter.
Learn extra about this subject
5. Change the projection mode
Go to the desktop and press Home windows + P.
Choose PC display screen solely from the listed projection modes.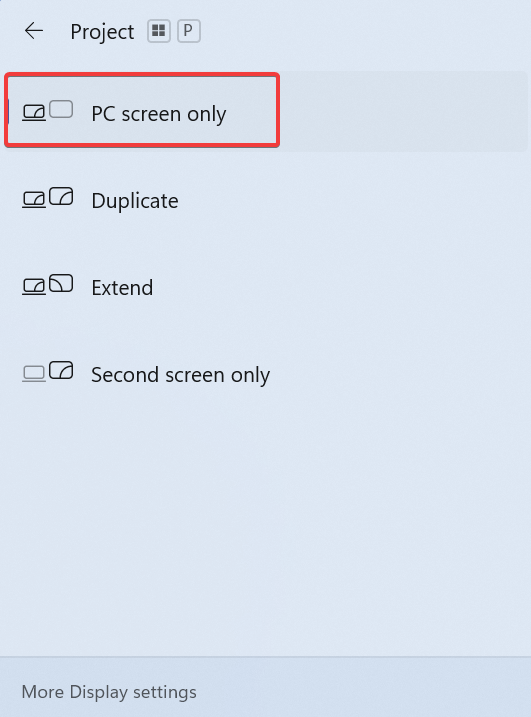
Launch Snipping Device and check out recording once more.
6. Change the file save location
Press Home windows + E to open File Explorer, paste the next path within the handle bar whereas changing Username with the present profile title and hit Enter:C:UsersUsername
Proper-click on the Movies folder and choose Properties.
Go to the Location tab and click on on Transfer.
Select one other path for the listing, and click on on Choose Folder.
As soon as finished, click on Apply and OK to avoid wasting the modifications.
For some customers, the recordings had been saved to the Captures folder below Movies. On this case, it’s best to change its location as a substitute.
7. Carry out an in-place improve
Go to Microsoft’s official web site, choose the OS version and product language, after which obtain the Home windows 11 ISO.
Double-click the ISO file and click on Open within the affirmation immediate.
Run the setup.exe file.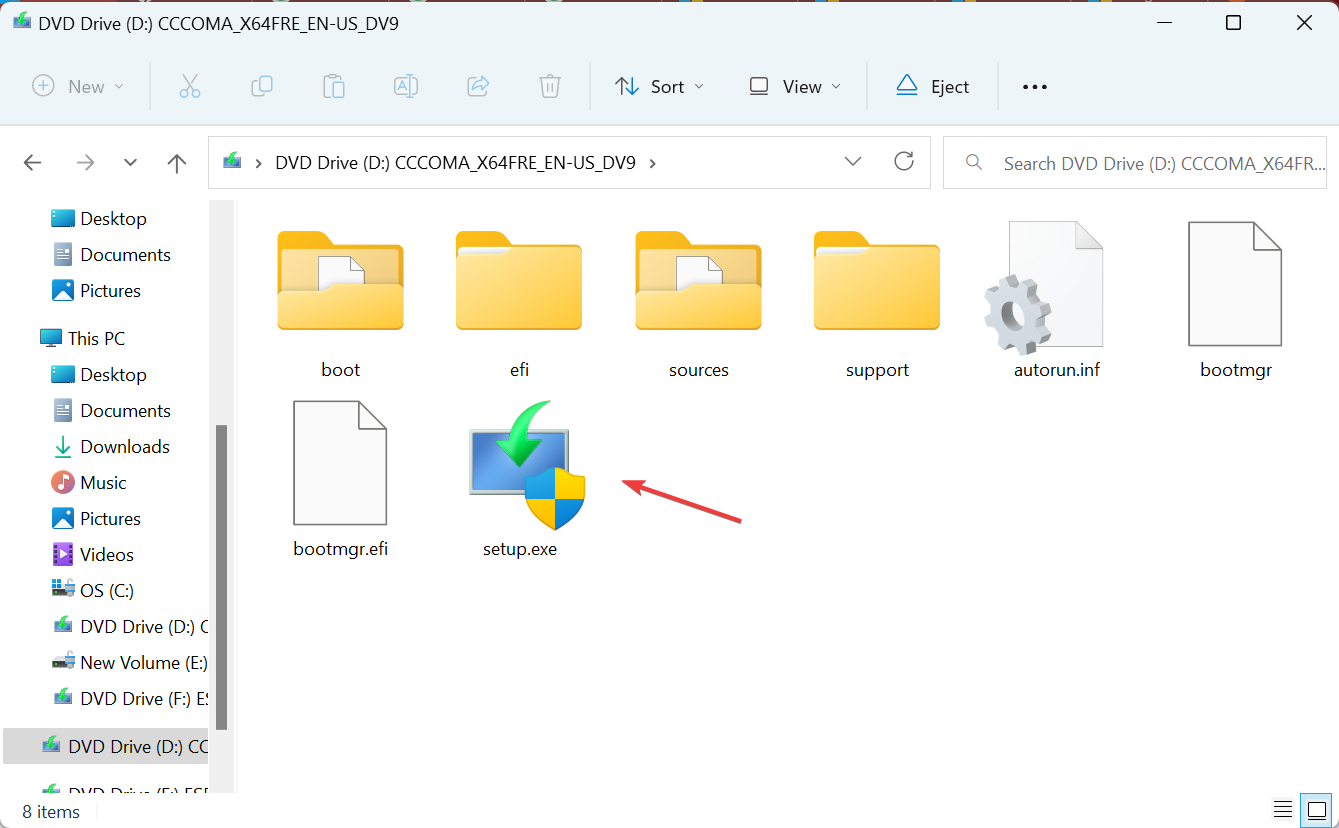
Click on Sure within the UAC immediate.
Click on Subsequent within the Home windows 11 Setup to proceed.
Test the license phrases, and click on on Settle for.
Be sure that the setup says, Hold private recordsdata and apps, and click on on Set up.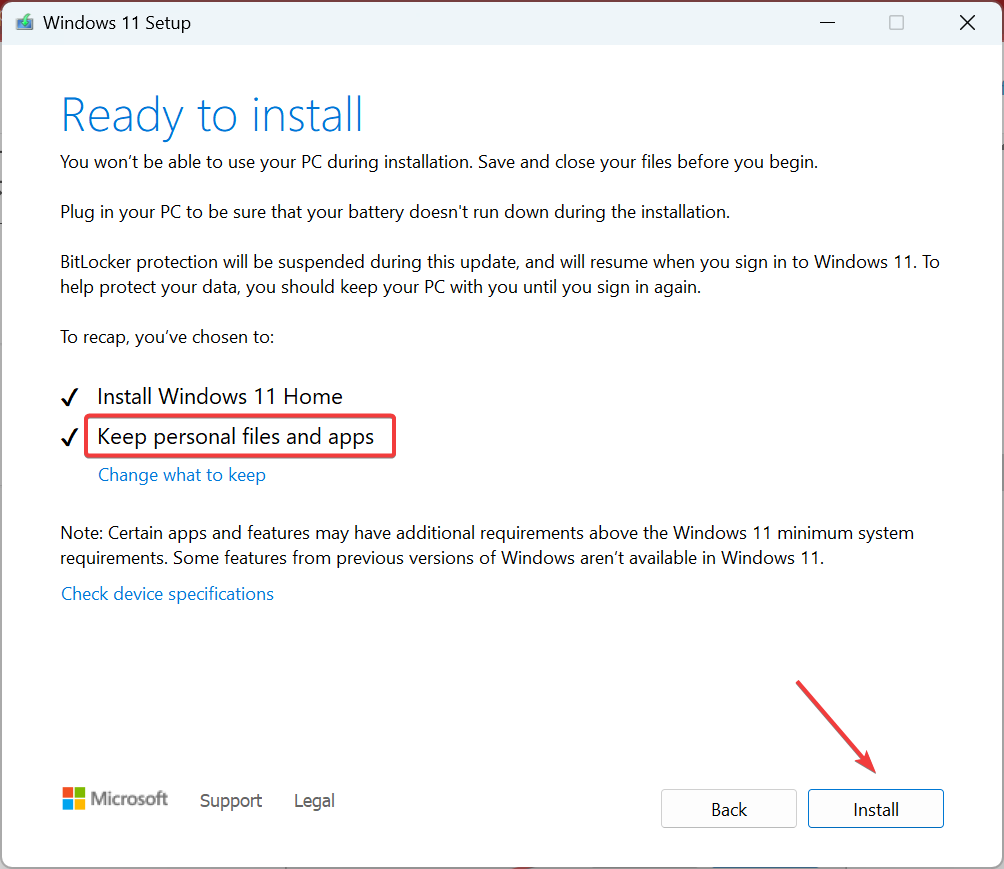
Now, anticipate the method to finish. It could take just a few hours.
When nothing else helps, and Snipping Device retains freezing in video mode or throws an error, the final choice is to carry out a restore improve. This is identical as reinstalling Home windows however doesn’t have an effect on the saved recordsdata and apps.
By now, it’s best to have mounted the Snipping Device Recording stopped one thing occurred error. If the issue persists, anticipate Microsoft to launch a patch since that is most probably an issue with the app itself.
In the interim, change to an efficient snipping software for Home windows. These are even higher in most methods!
For any queries or to share what labored for you, drop a remark beneath.
Thanks!
Begin a dialog


![[SOLVED] ShareFile for Outlook Has Fired an Exception Error](https://mspoweruser.com/wp-content/uploads/2024/07/sharefile-for-outlook-has-fired-an-exception.png "[SOLVED] ShareFile for Outlook Has Fired an Exception Error")


")

")


")
