

IPFire is an open-source Linux distribution that works as a firewall, VPN gateway, proxy server, DHCP server, time server, caching identify server, Wake-on-LAN, DDNS, OpenVPN, monitoring instrument, and so forth.
IPFire is launched beneath a GPL license and is designed for use free of charge. The builders prioritized safety when constructing IPFire. Since IPFire connects on to the web, there’s a threat of hackers and threats attacking it.
To keep away from these threats and assaults, the Pakfire package deal supervisor helps directors maintain the package deal database up-to-date in IPFire.
IPFire was constructed utilizing an excellent kernel with numerous menace detection, assault prevention, and compromise options and has a wealthy graphical interface. IPFire has the function to make use of Samba and vsftpd file companies. IPFire helps VDSL, ADSL, SDSL, Ethernet, and 4G/3G sorts of dial-ups.
We are able to use IPFire in any type of digital surroundings corresponding to KVM, VMware, XEN, Qemu, Microsoft Hyper-v, Oracle VirtualBox, Proxmox, and so forth., and could be run in ARM Processor construct machines corresponding to Raspberry Pi.
Throughout IPFire set up, the community is configured into numerous segments. This segmented safety scheme signifies that there’s a appropriate place for every system within the community and it may be enabled individually as per our necessities.
Every phase acts as a bunch of machines that share a typical safety degree, which is described in 4 completely different colours of zones i.e. Inexperienced, Purple, Blue, and Orange.
Inexperienced – This represents that we’re in a secure space. Shoppers within the Inexperienced space shall be with none restrictions and linked internally/domestically.
Purple – This means that we’re at risk or disconnected from the surface world; nothing shall be allowed by way of the firewall until particularly configured by the admins.
Blue – This represents the ‘wi-fi‘ community, which is used for the native space community.
Orange – This refers back to the ‘DMZ‘ (demilitarized zone). Any servers which are accessible publicly are separated from the remainder of the community to attenuate safety breaches.
IPFire not too long ago launched its 2.29 core replace 186 model, which comes with a brand new graphical consumer interface that was utterly re-designed and comes with huge new performance.
IPFire {Hardware} Necessities
Processor x86_64 or ARM64 CPU with 1 GHz or higher or a supported ARM SBC.
Reminiscence 1GB or higher.
Storage at the least 4GB of disk storage.
Community at the least two Ethernet community adapters, which is crucial for IPFire to operate correctly as a firewall and router.
A USB stick (at the least 1GB in dimension) or a CD/DVD burner to create a bootable set up media.
Primary information of networking and Linux.
My Surroundings Setup
Host identify : ipfire.tecmint.com
IP deal with : 192.168.1.1
Arduous disk dimension : 4 GB
Ethernet Playing cards : 2 No’s
This text covers the set up of IPFire with the issues that you will want to configure throughout set up. The set up and configuration process is not going to take greater than 10 to fifteen minutes relying on the velocity of your laptop.
Step 1: Create Bootable Media
1. To create bootable IPFire media, go to the official IPFire Obtain web page and seize the IPFire ISO picture as per your system structure that matches your {hardware} (sometimes x86_64 for contemporary PCs).
2. Subsequent, insert your USB stick into your laptop and create a bootable picture utilizing the USB creation instrument or use a instrument just like the dd command as proven.
sudo dd if=ipfire-2.29-core186-x86_64.iso of=/dev/sdX bs=4M standing=progress && sync
Substitute ipfire-2.29-core186-x86_64.iso with the precise model of your downloaded ISO file and /dev/sdX together with your USB gadget (guarantee you choose the right gadget to keep away from knowledge loss).
Step 2: Set up IPFire Linux Distribution
3. Now that you’ve got created a bootable USB drive, you’ll want to boot from it by deciding on the system’s boot choices (often by urgent F2, F12, or the Del key) and choose the USB Drive because the boot gadget.
Upon getting booted from the USB drive, you can begin the set up course of by selecting the “Set up IPFire” choice.
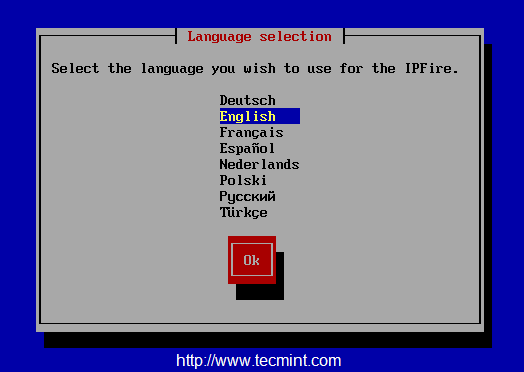
4. Subsequent, select the Language as respective to your area.
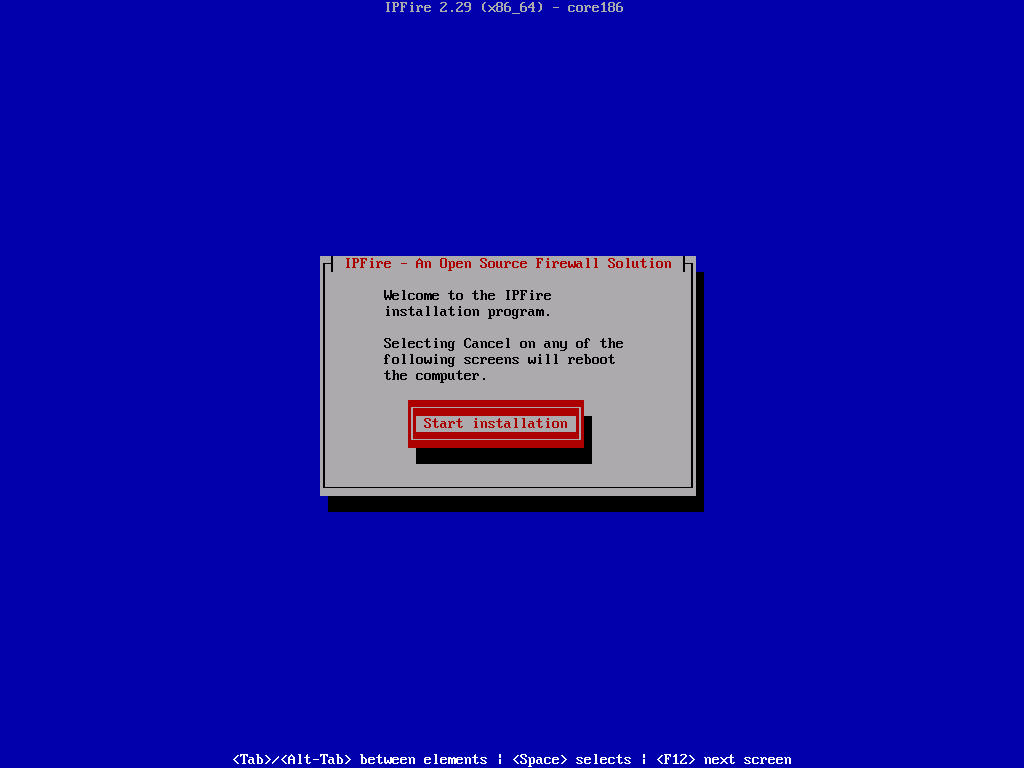
5. At this step, you possibly can see that, if you don’t want to proceed the setup you possibly can Cancel the setup and reboot the machine.
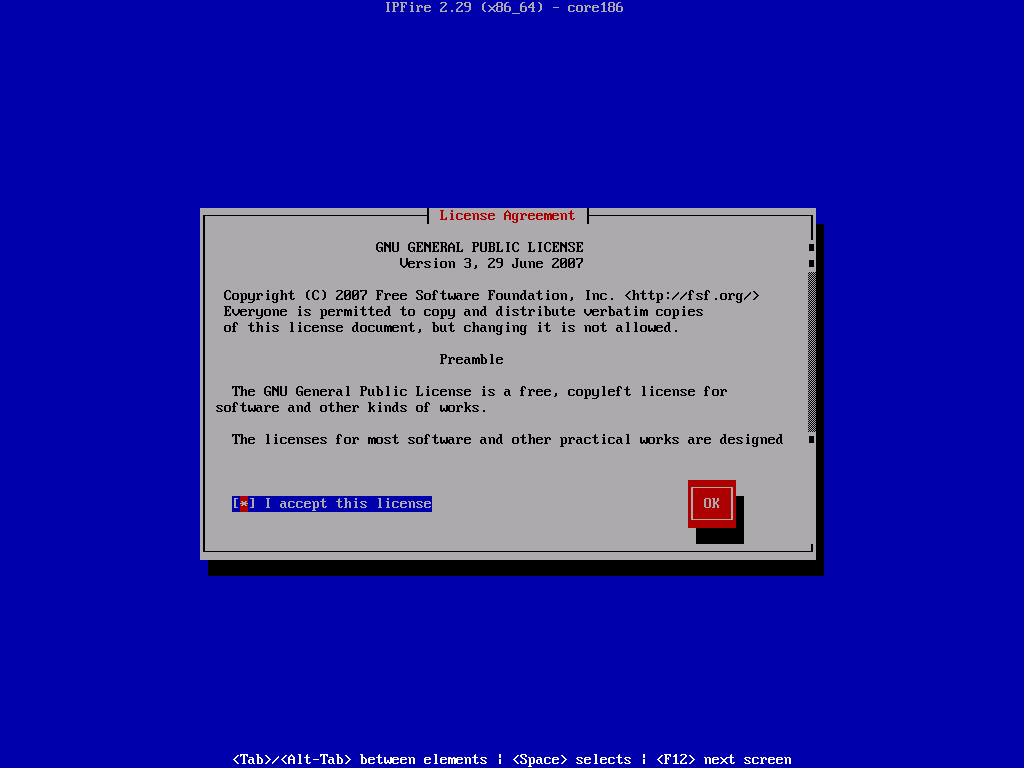
6. Settle for the license by urgent the Area bar to decide on, and press OK to proceed.
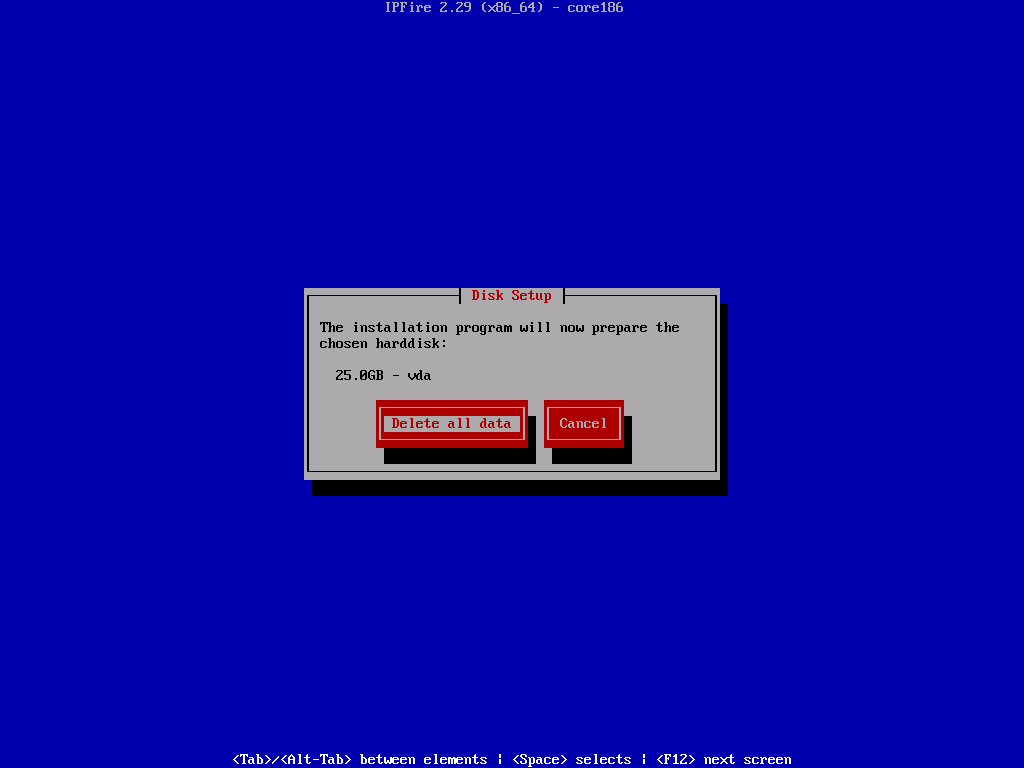
7. Within the subsequent step, the system will format your disk to put in the IPFire system. Please be aware that every one knowledge on the disk shall be erased.
8. Subsequent, select the file system as EXT4 and proceed to the longer term steps.
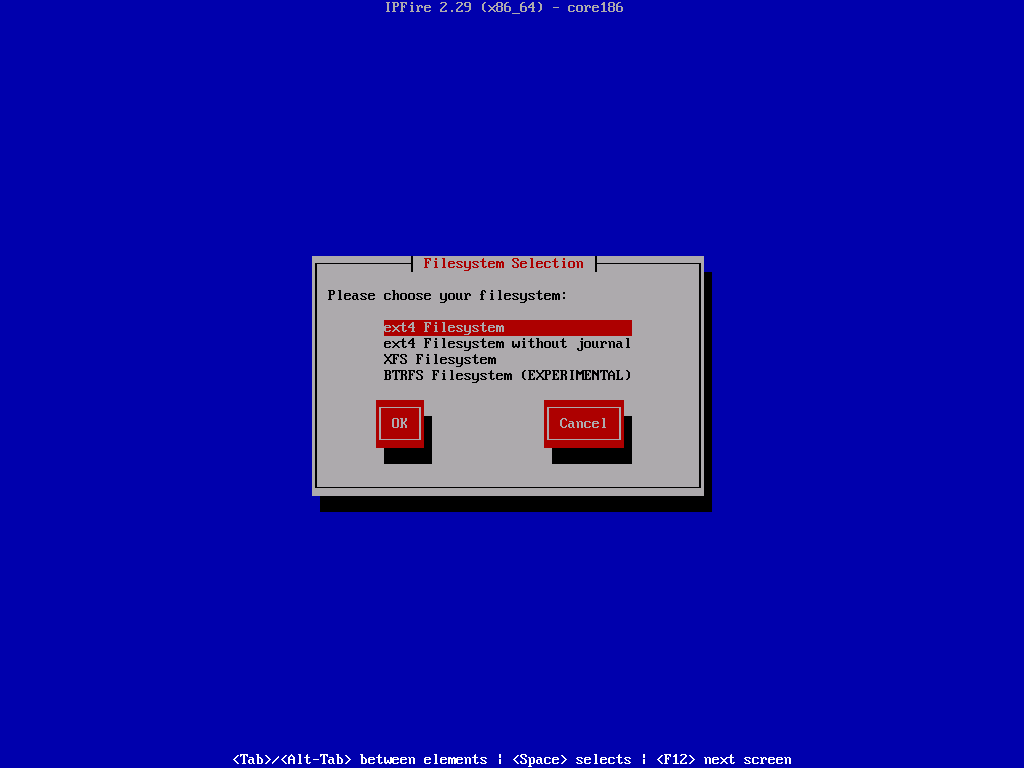
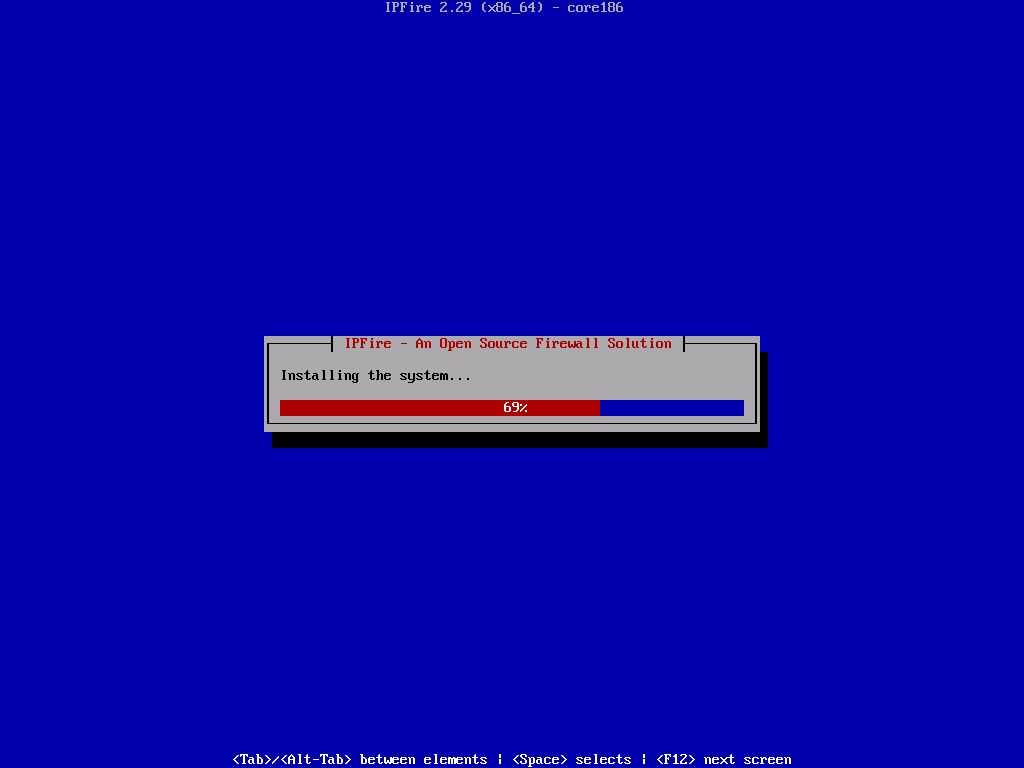
9. As soon as, you choose the filesystem kind, the set up begins and disk shall be formatted and system recordsdata shall be put in.
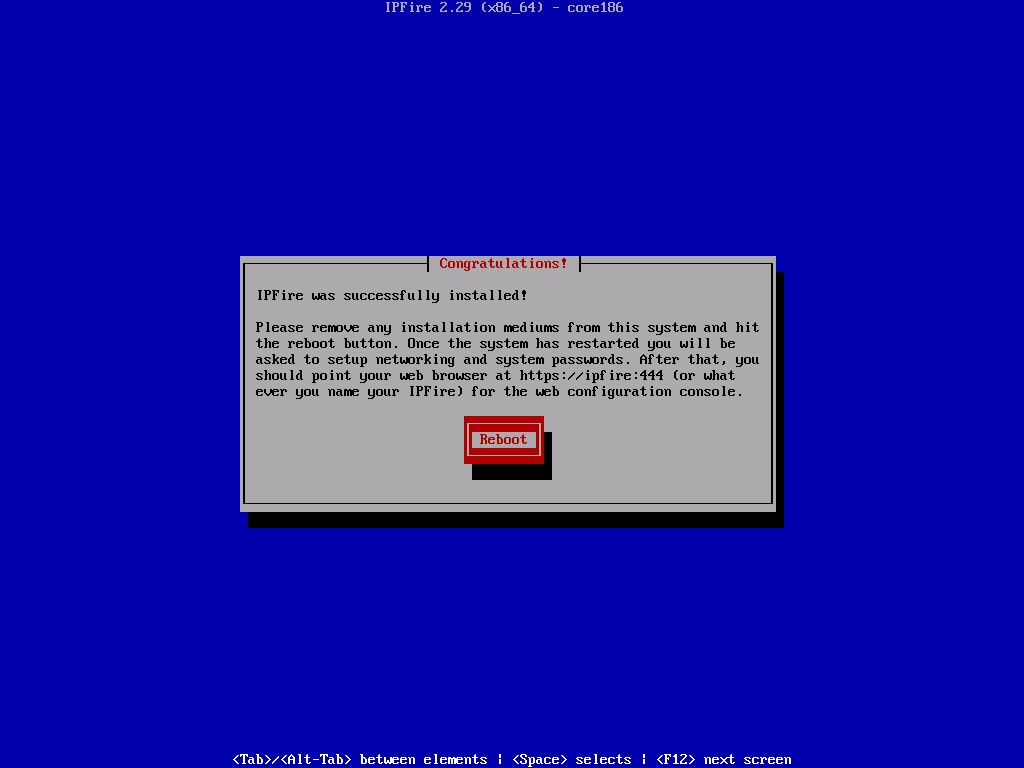
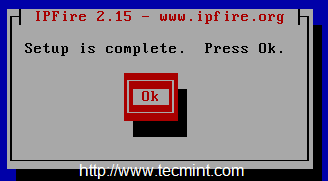
10. As soon as set up completes, press OK to reboot to finalize the set up and proceed with the additional set up to configure ISDN, community playing cards, and system passwords.
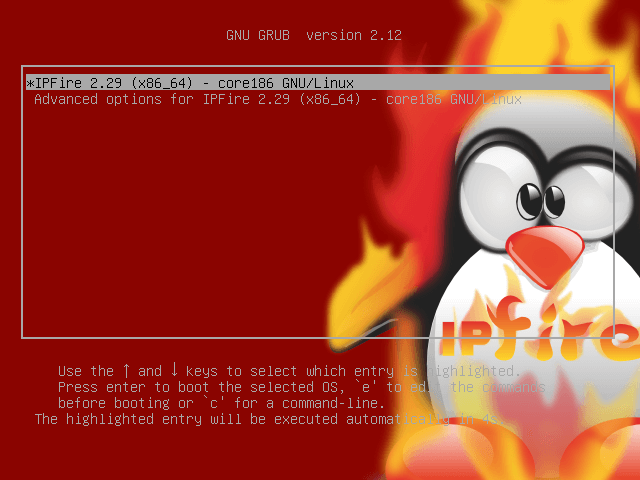
11. After the system reboot, it should immediate you IPFire boot menu choice, choose the default choice by urgent the enter key.
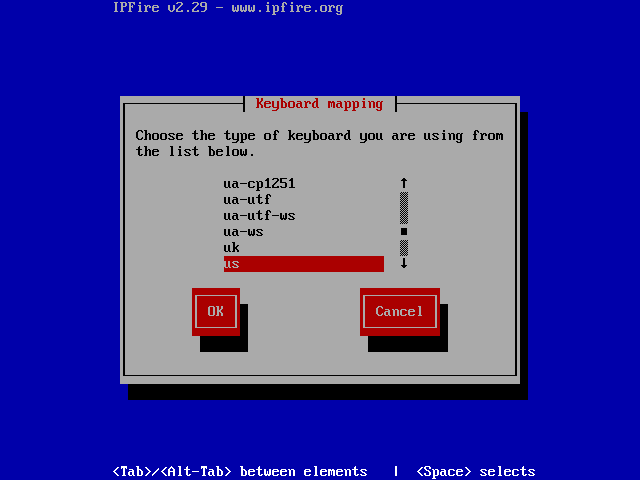
12. Subsequent, choose the kind of Keyboard mapping Language from the drop-down record as proven beneath.
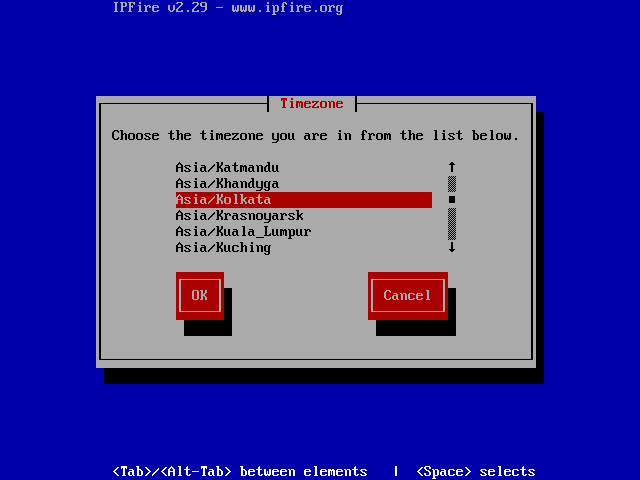
13. Subsequent, select the timezone from the record, Right here I’ve chosen “India” as my timezone area.
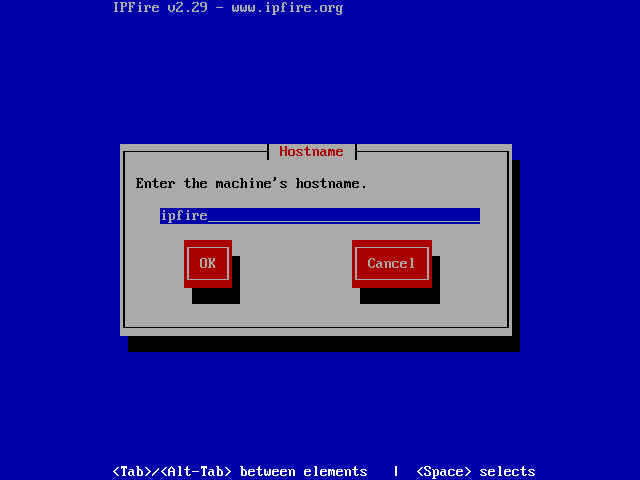
14. Select a hostname for our IPFirewall machine. By default, it will likely be ipfire. I’m not going to make any modifications in these steps.
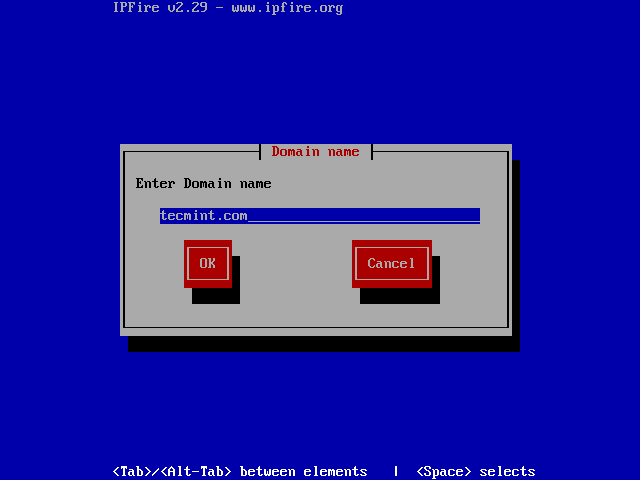
15. Give a sound area identify, if in case you have a neighborhood DNS server or we will outline it later. Right here, I’m utilizing “tecmint.com” as my native DNS server area identify.
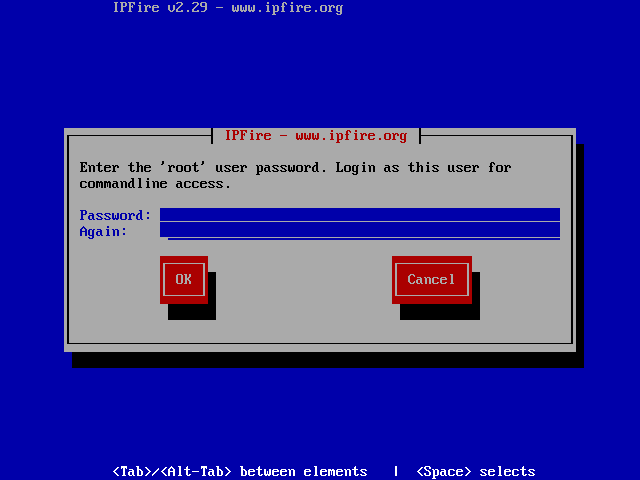
16. Enter a password for the basis consumer, This shall be used for command-line entry. I’ve used redhat123$ as my password.
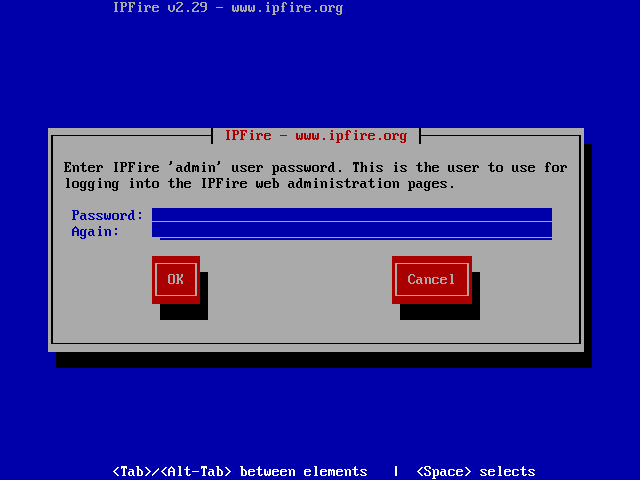
17. Now right here we have to present a password for the admin consumer for the IPFire GUI internet interface. The password have to be completely different from the command line entry credentials for safety causes.
Step 3: IPFire Community Configuration Settings
18. Right here, we’re utilizing 2 Ethernet playing cards in our system. Every Ethernet card must be assigned individually for every community, by default it should select GREEN + RED which implies It connects to the native space community and WAN reference to Web entry.

19. Subsequent, choose GREEN + RED shade for our two community playing cards and select OK to proceed.
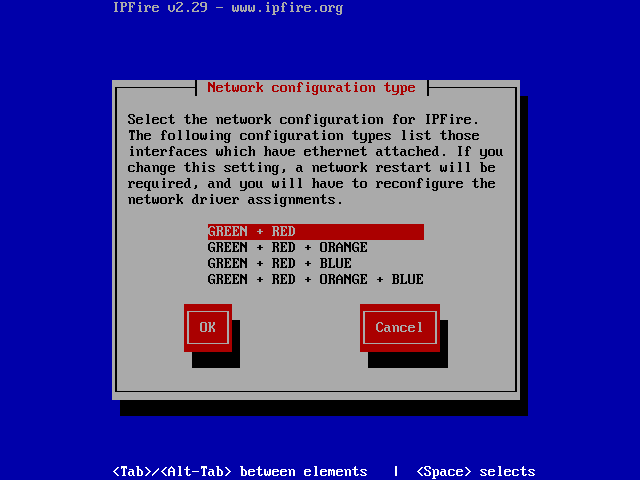
Now we will see the present config as GREEN + RED it’s with native, WAN.
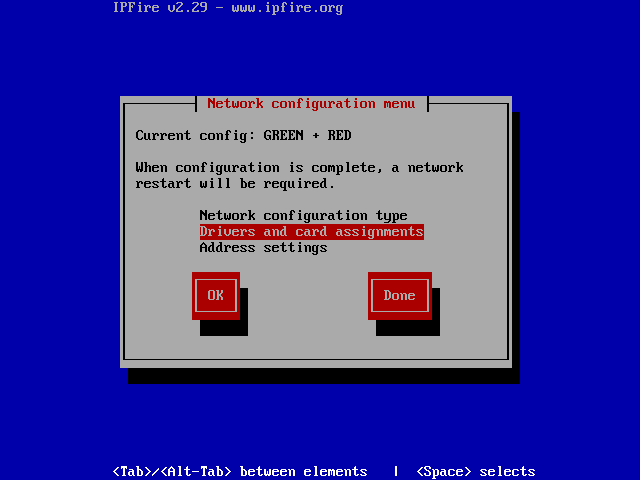
Step 4: IPFire Drivers and Card Assignments
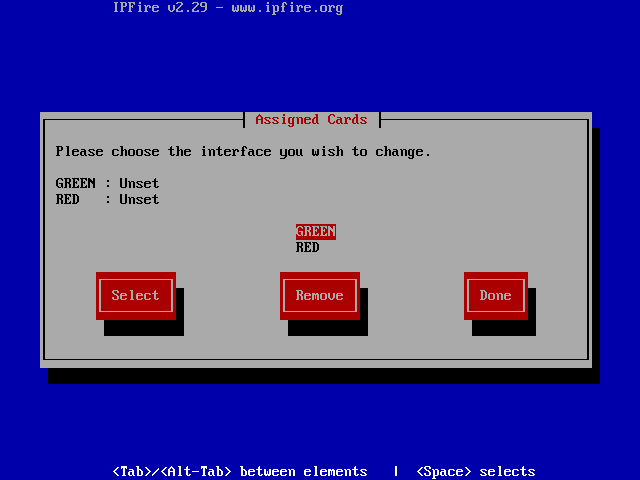
20. From right here, select Drivers and card assignments kind to decide on the Community, which goes to be assigned for LAN and WAN interfaces.
21. Subsequent, select GREEN and press Choose to allow an Interface for all two community playing cards.
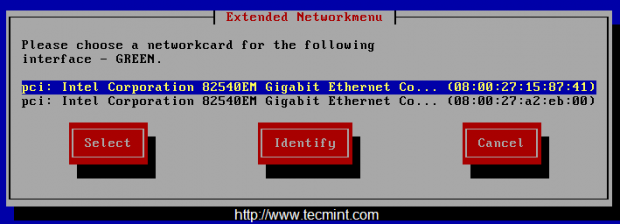
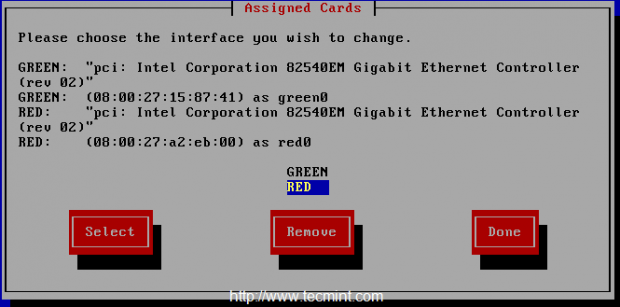
22. Repeat the identical above steps for RED interfaces and on the last step, we will see beneath.
Step 5: Assign IP Addresses for Community Interfaces
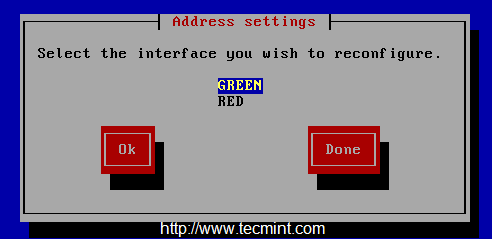
23. Now time to assign an IP deal with for every interface. Right here we’ve got solely 2 interfaces and we have to assign IP addresses in several sub-nets.
If we use 192.168.0.100 for the RED interface, we should use completely different IP and community for different interface. For the RED interface we going to make use of DHCP.

GREEN interface – 192.168.1.1
RED interface – DHCP
24. Select GREEN and supply the IP, Whereas selecting we are going to get a Warning that our Native space connection shall be dropped if we modify the IP.
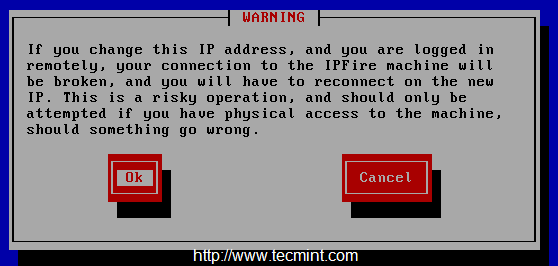
25. Subsequent, present the IP 192.168.1.1 for the GREEN community interface for our Native/Inside community.

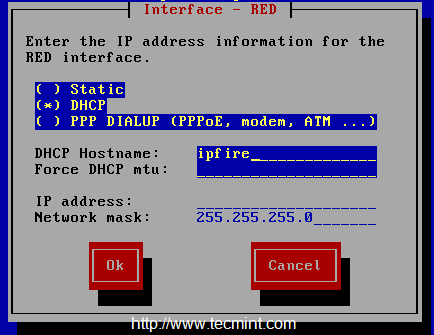
26. Select RED interface and select DHCP to get an IP from our ISP are we will assign a handbook IP. That is our WAN interface which is uncovered to the Web.
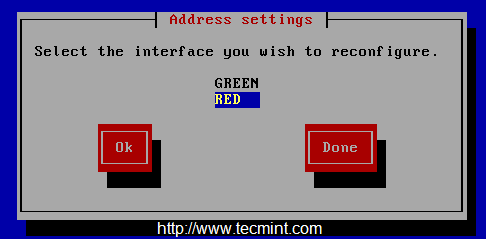
27. Right here we have to configure whether or not our web connection is with a Static IP or PPPOE or DIALUP methodology. I’m utilizing DHCP for the WAN interface. Select OK and reserve it by selecting DONE.
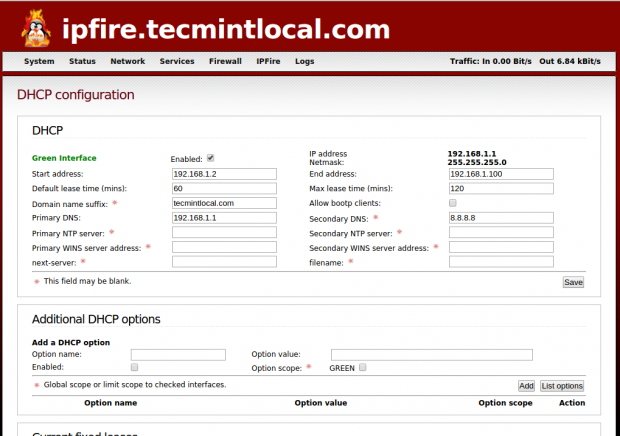
Step 6: DHCP Server Configuration
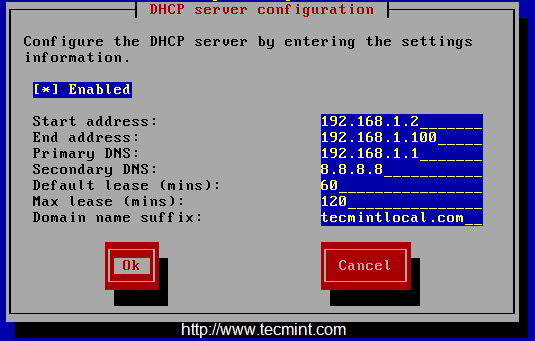
28. We have to configure DHCP settings for our GREEN interface for the LOCAL/INTERNAL interface. To get IP for shopper machines from DHCP.
DHCP pool vary shall be from 192.168.1.2 to 192.168.1.100
29. We now have nearly accomplished our setup, Select OK to finish the IPFire setup.
Step 7: Put up Set up Setup
30. After reboot, we are going to get the command line entry utilizing the basis credentials that we supplied throughout setup.
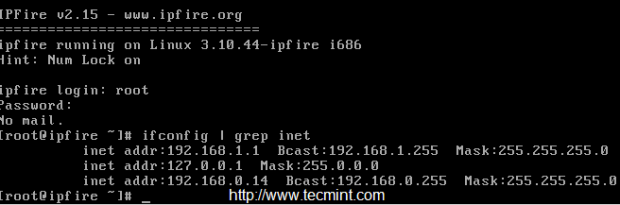
31. To entry the online interface use the beneath URL, Which we used for the GREEN interface native/inside shall be used for the WEB interface. Enter the username as “admin” and the password that we’ve set at #step 16 above.
https://192.168.1.1:444/

32. When you log in, you’ll get the Dashboard of the online Interface in IPFire.
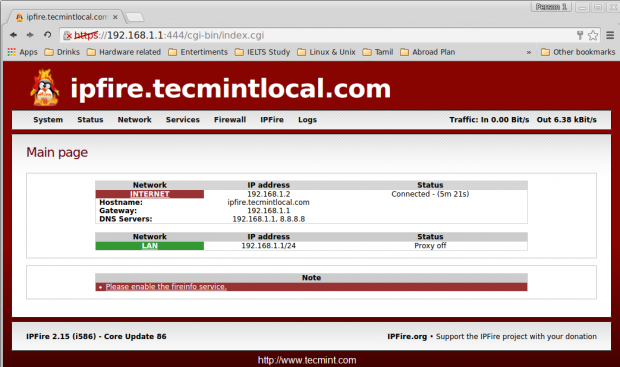
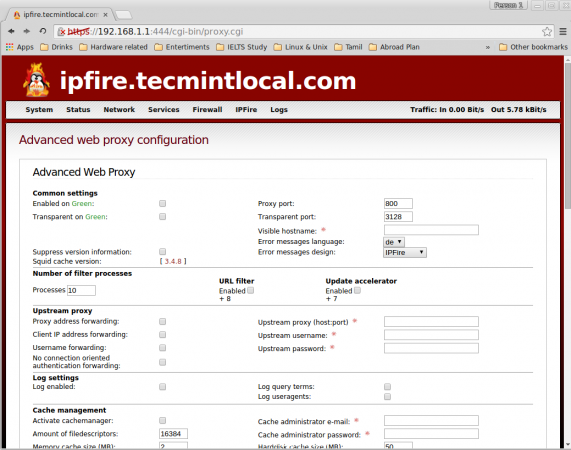
There are lots of options included in IPFire they’re as follows, Internet Proxy with squid, URL filter, Replace accelerator, DHCP server, Connection scheduler, DNS Server, DNS forwarding, Static Routes, Wake-ON-LAN, Open VPN, Dynamic DNS (DDNS), Time server, Bandwidth monitoring, Reminiscence utilization, Log collector for each companies, Syslog, Firewall guidelines, P2P networks, iptables, Backup choices and restore for configurations, Shutdown and so forth..
Following are the screenshots of IPFire options.

Conclusion
We now have seen find out how to shield our workplace or residence community with IPFire firewall/Router, IPFire was a German-based Linux distribution solely centered on safety.
Hope you could have discovered this text easy and straightforward to put in and configure the firewall to your workplace or residence surroundings. Don’t overlook to fireplace your feedback beneath after working round with IPFire.


![[SOLVED] ShareFile for Outlook Has Fired an Exception Error](https://mspoweruser.com/wp-content/uploads/2024/07/sharefile-for-outlook-has-fired-an-exception.png "[SOLVED] ShareFile for Outlook Has Fired an Exception Error")


")

")


/cdn.vox-cdn.com/uploads/chorus_asset/file/25661290/Screenshot_2024_10_06_at_10.48.36_AM.png "Trailers of the week: Nosferatu, The Franchise, and Squid Game 2")


