

LiveCode is a programming language that first appeared in 1993. Its principal purpose is to permit all people to code; it lets you create massive functions simply utilizing a easy, high-level, English-like programming language that’s dynamically typed.
Utilizing LiveCode, you may write the identical software for all out there platforms like Home windows, Mac, Linux, iOS, Android, BSD, and Solaris, and the code will work on all of these platforms with out the necessity to change something within the code-same code on all.
You possibly can even create net functions utilizing LiveCode. Its builders name it “The Revolution Programming Language” because it permits all people to code due to its high-level language. LiveCode can also be used quite a bit in faculties to show college students the way to code simply.
There are two variations of LiveCode: one is business and closed-source, and the opposite is open-source and free. The open-source model was launched in 2013 after a profitable Kickstarter marketing campaign raised greater than £350,000.
Nevertheless, there are some core options which are solely included within the closed model, like constructing functions for iOS (it’s because Apple doesn’t permit GPL software program to be uploaded to the App Retailer, and all applications made by the LiveCode runtime should be licensed below GPL).
A lot of the options can be found within the free and open-source model, which we’ll be speaking about on this submit.
Livecode Options
Excessive-level programming language.
Really easy to put in and use.
The installer works on any Linux distribution.
You possibly can develop the identical functions for all platforms with the identical code.
Home windows, Linux, Mac, and Android are supported.
Giant documentation tutorials and how-to’s can be found without spending a dime.
Free help from the LiveCode neighborhood.
Many different options that you will notice your self.
Step 1: Putting in LiveCode in Linux
To begin creating apps, step one is to put in LiveCode in your Linux system by visiting the official LiveCode web site and downloading the newest model appropriate for Linux.
Open a terminal and navigate to the listing the place you downloaded the installer and run the next instructions to put in LiveCode.
chmod +x LiveCodeInstaller-9_6_13-Linux.x64
sudo ./LiveCodeInstaller-9_6_13-Linux.x64
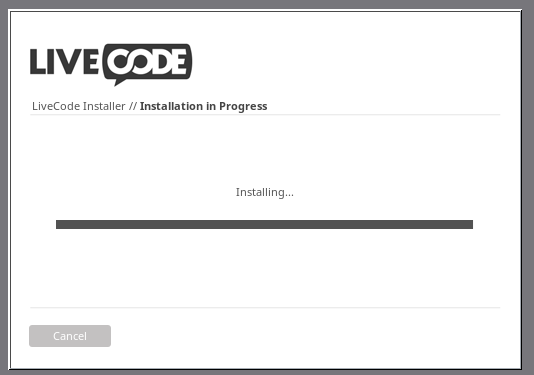
After the set up is full, you may launch LiveCode out of your functions menu or by typing livecode within the terminal.
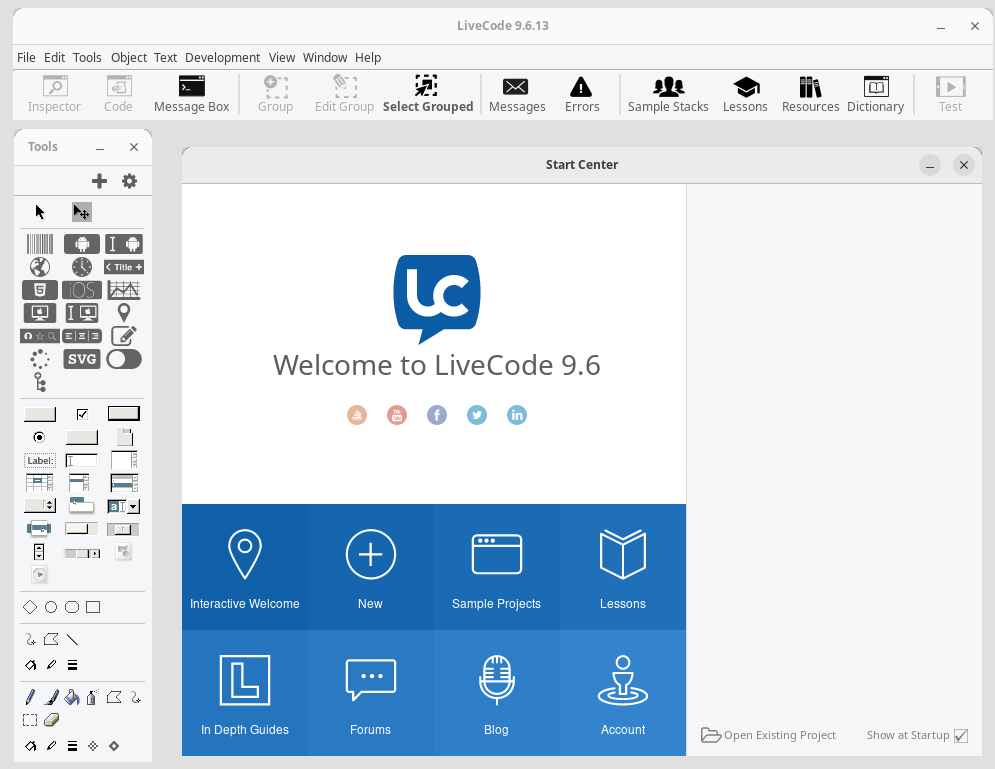
Whenever you open LiveCode, you’ll see its Built-in Improvement Setting (IDE), which incorporates the primary elements:
Stack: That is your challenge space the place you design your app’s person interface.
Instruments Palette: Incorporates varied UI components like buttons, textual content fields, and pictures you could drag onto your stack.
Code Editor: The place you write scripts to outline how your app behaves.
Familiarizing your self with these elements will assist streamline your improvement course of.
Step 2: Constructing a Easy App for Linux
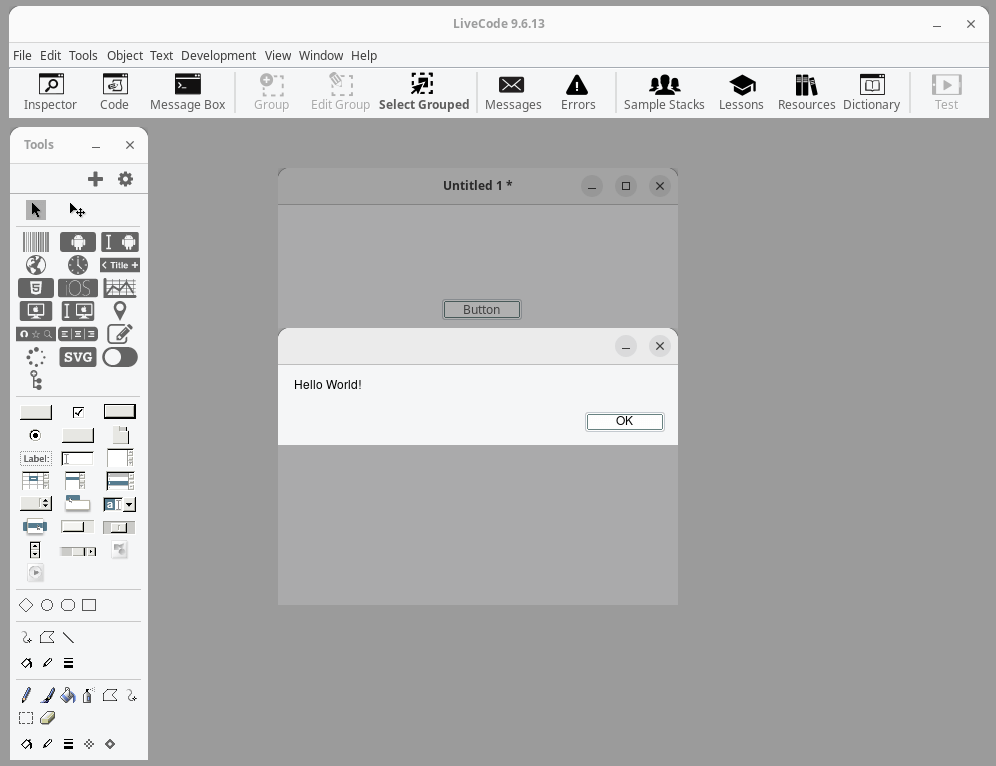
Let’s create a fundamental “Whats up World” software as our first challenge.
Create a New Stack – Within the menu bar, click on on File > New Stack and select Default Measurement and click on OK.
Add a Button – From the Instruments Palette, drag a button onto your stack and double-click on the button to open the Code Editor.
Write Your Script – Within the Code Editor, you’ll see a default on the mouseUp occasion handler. Modify it to show a message when clicked.
on mouseUp
reply “Whats up World!”
finish mouseUp
Click on Apply to avoid wasting your modifications.
Lastly, swap to Run Mode by clicking on the Run button within the toolbar, it ought to show a dialog field with “Whats up World!“.
Step 3: Creating an App for Android
Now that you just’ve created an app for Linux, let’s transfer on to Android.
You want the Android Software program Improvement Equipment (SDK) put in in your system, so obtain it from Android Developer and extract it to a listing of your alternative.
Subsequent, open LiveCode and go to Edit > Preferences, and below Cellular Help, set the trail to your Android SDK listing.
To create an Android app, create a brand new stack by choosing File > New Stack identify it appropriately, and choose Android because the platform.
So as to add UI Parts, drag a button onto your stack similar to earlier than and open its Code Editor, and enter:
on mouseUp
reply “Whats up Android!”
finish mouseUp
Save your challenge.
To construct and take a look at your app, do the next:
Choose File > Standalone Utility Settings.
Select Android from the choices and configure any further settings required.
Join an Android gadget or begin an emulator.
Click on Improvement > Take a look at Goal, then choose your gadget.
Deploy your app by clicking on the Take a look at icon within the IDE3.
Step 3: Creating an App for iOS
To create an iOS app utilizing LiveCode:
Set Up iOS Improvement Setting – You want entry to macOS for constructing iOS apps resulting from Apple’s restrictions.
Create Your iOS App – Comply with related steps as creating an Android app however choose iOS in Standalone Utility Settings.
Testing Your iOS App – Use Xcode or an precise iOS gadget for testing since emulators are usually not out there on Linux.
Conclusion
LiveCode supplies a strong but easy means for anybody to create functions for a number of platforms together with Linux, Android, and iOS without having in depth programming information.
By following this information, you’ve discovered the way to arrange LiveCode, create fundamental functions, and put together them for deployment throughout totally different gadgets.
As you turn out to be extra conversant in LiveCode, you may discover its in depth documentation and neighborhood sources to reinforce your expertise additional.
With observe, you’ll be capable to develop extra advanced functions tailor-made to your wants or these of others in as we speak’s mobile-driven world


![[SOLVED] ShareFile for Outlook Has Fired an Exception Error](https://mspoweruser.com/wp-content/uploads/2024/07/sharefile-for-outlook-has-fired-an-exception.png "[SOLVED] ShareFile for Outlook Has Fired an Exception Error")


")

")


")


