

Apache net server is without doubt one of the hottest and broadly used net servers for internet hosting recordsdata and web sites. It’s straightforward to put in and configure to fulfill your internet hosting wants. Nevertheless, the default settings will not be safe to supply the much-needed safety that your web site wants.
On this information, we take a look at among the Apache server hardening suggestions and methods you could implement to strengthen the safety of your net server.
1. Learn how to Cover Apache Model and OS Info
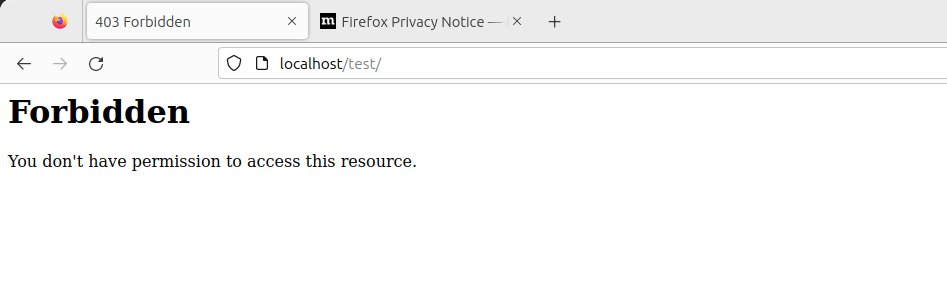
By default, the Apache net server shows its model in case you browse the unsuitable URL of a web site. Under is an instance of an error web page indicating that the web page can’t be discovered on the location. The final line signifies the Apache model, the host OS, the IP deal with, and the port it’s listening on.
It’s not by no means good concept to show your net server’s data as this could be a good reward to hackers of their reconnaissance mission. So as to add a layer of safety and make it more durable for hackers, it’s advisable to cover the net server data.
To do that, open the default Apache configuration file on Debian-based distributions.
$ sudo vim /and so forth/apache2/apache2.conf
For RHEL-based methods equivalent to RHEL, Fedora, CentOS, Rocky, and AlmaLinux.
$ sudo vim /and so forth/httpd/conf/httpd.conf
Add the next traces on the finish of the file.
ServerTokens Prod
ServerSignature Off
Save the modifications and restart the Apache net server.
$ sudo systemctl restart apache2 [On Debian, Ubuntu and Mint]
$ sudo systemctl restart httpd [On RHEL/CentOS/Fedora and Rocky/AlmaLinux]
Now reload the location and, this time round, the net server data won’t be displayed.
2. Disable Listing Itemizing in Apache
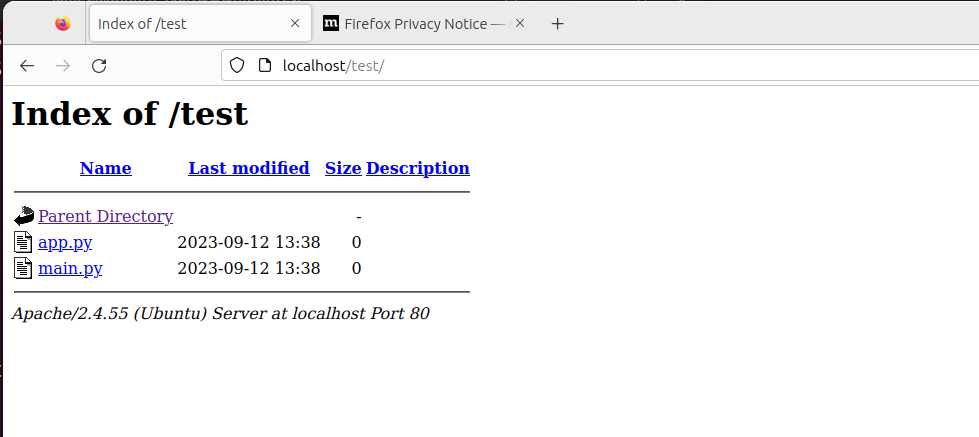
By default, Apache permits listing itemizing, and guests may see no matter recordsdata or directories you might need in your Doc Root listing.
To show this, we’ll create a listing referred to as take a look at.
$ sudo mkdir -p /var/www/html/take a look at
Subsequent, we’ll navigate into the listing and create a number of recordsdata.
$ cd /var/www/html/take a look at
$ sudo contact app.py predominant.py
Now, if we entry the URL, http://localhost/take a look at we will view the listing itemizing.
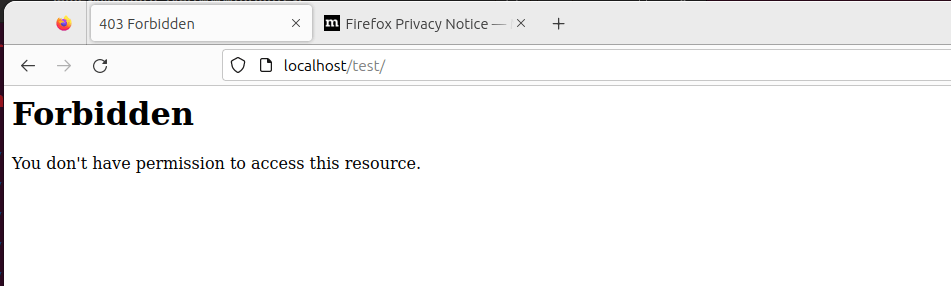
To disable listing itemizing, head over to Apache’s predominant configuration file and seek for the ‘Listing‘ attribute. Set the ‘Choices‘ parameter to ‘-Indexes’ as proven.
<Listing /decide/apache/htdocs>
Choices -Indexes
</Listing>
Reload Apache, and this time round, if you go to the URL, the directories will not be displayed.
3. Often Replace Apache
It’s at all times advisable to maintain all of your purposes updated, as the most recent purposes include bug fixes and safety patches that deal with underlying vulnerabilities current in older software program variations.
As such, frequently upgrading your purposes to their newest variations is advisable.
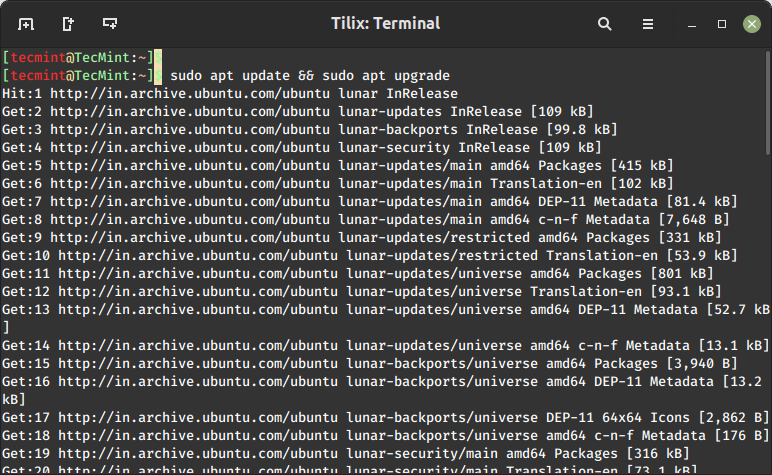
$ sudo apt replace && sudo apt improve [On Debian, Ubuntu and Mint]
$ sudo dnf improve [On RHEL/CentOS/Fedora and Rocky/AlmaLinux]
4. Use HTTPS Encryption on Apache
Apache, by default, makes use of HTTP protocol which is a weak and insecure protocol that’s susceptible to eavesdropping. To enhance your web site’s safety and, extra so, enhance your Google search engine marketing rankings, think about encrypting your web site utilizing an SSL certificates.
By so doing, it switches the default HTTP protocol to HTTPS, thereby making it more durable for anybody to intercept and decipher communication being despatched forwards and backwards from the server.
Take a look at the best way to safe the Apache net server utilizing Let’s Encrypt SSL on Linux.
5. Allow HTTP/2 on Apache
In 2015, HTTP/2 was launched, which is a brand new model of the HTTP protocol that seeks to handle or resolve a number of issues that the creators of HTTP/1.1 didn’t foresee.
Whereas HTTP/1.1 continues to be broadly in use, it’s related to efficiency points related to the usage of a number of TCP connections to course of a number of requests from the browser, which ends up in excessive useful resource overhead on the shopper aspect, resulting in degraded community efficiency.
As purposes grew in complexity and performance, HTTP/2 was created to unravel the shortcomings of HTTP/1.1 which embody lengthy HTTP headers, sluggish net web page loading speeds, and common efficiency degradation.
HTTP/2 offers extra safety and privateness than its predecessor. Equally vital, is enhanced efficiency by way of the usage of multiplexed streams of knowledge. With HTTP/2 a single TCP connection ensures efficient bandwidth utilization, even when transmitting a number of streams of knowledge.
Take a look at the best way to allow HTTP/2 on the Apache net server utilizing:
6. Prohibit Entry to Delicate Directories in Apache
One other safety measure you may take is to restrict entry to directories that may comprise delicate data equivalent to consumer information, logs, and configuration recordsdata. Utilizing the “Enable” and “Deny” attributes, we are able to limit entry to, for instance, the foundation listing as proven.
<Listing />
Choices None
Order deny,permit
Deny from all
</Listing>
Let’s take a look at these choices in nearer element.
“None” – This restricts customers from enabling any optionally available options.
Order “deny”, “permit” – The “Deny” directive takes priority, adopted by the “permit” directive.
Deny from all – Restricts everybody from accessing the foundation listing.
Save the modifications and exit the file. Then restart Apache for the modifications to return into impact.
7. Disable the ServerSignature Directive in Apache
The ServerSignature directive within the Apache configuration file appends a footer to server-generated paperwork that bear details about your net server’s configuration such because the model and the OS on which it’s operating. Exposing essential particulars about your net server to malicious actors will considerably improve the probabilities of an assault.
To stop publicity of such data, you want to disable this directive within the Apache configuration file:
ServerSignature Off
Save the modifications and as soon as once more restart Apache for the modifications to return into impact.
$ sudo systemctl restart apache2
8. Set the ‘ServerTokens’ Directive to ‘Prod’
The ‘ServerTokens‘ directive controls what data the server sends together with Apache model (main and minor model), OS, and the kind of net server operating.
The least quantity of data that you’d need to expose to the general public is that the net server is Apache. Anything would solely expose your server to potential assaults. Due to this fact, it’s advisable to set the ‘ServerTokens‘ directive within the Apache configuration file to ‘prod‘.
ServerTokens Off
As at all times save the modifications and be sure you restart Apache.
9. Safe Apache with Fail2ban
Fail2ban is an open-source intrusion prevention utility that protects Linux methods from exterior threats together with DoS and brute-force assaults. It really works by consistently monitoring methods logs for nefarious exercise and banning hosts that match patterns that mimic assault conduct.
Fail2ban might be configured to guard Apache from DoS assaults by consistently monitoring Apache logs for failed login makes an attempt and quickly banning offending IPs.
Take a look at the best way to set up Fail2ban on Linux utilizing:
10. Disable Pointless Modules
Apache modules are merely packages which are loaded to increase the performance of the net server Features prolonged by modules embody fundamental authentication, content material caching, encryption, safety, and so forth.
It’s at all times advisable to disable all these modules that aren’t in use at present to reduce the probabilities of falling sufferer to an assault.
To view all enabled modules, run the command
$ apache2ctl -M

To examine if a particular module is enabled, for instance, the rewrite module, run the command.
$ apache2ctl -M | grep rewrite

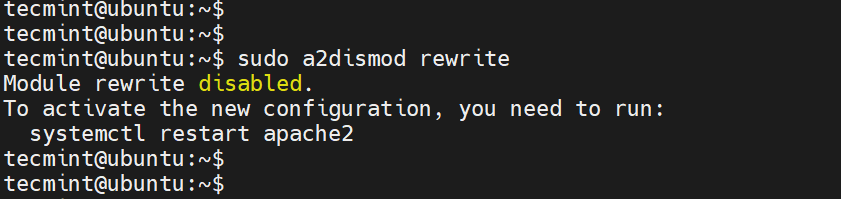
To disable the module, run the command:
$ sudo a2dismod rewrite
11. Use mod_security and mod_evasive Modules to Safe Apache
You’ll be able to allow the mod_security and mod_evasive modules to safe Apache towards brute-force assaults or DDoS assaults.
The mod_security module acts like an online utility firewall (WAF) and blocks suspicious and undesirable visitors to your web site.
The mod_evasive module safeguards your server from brute drive and denial of service assaults (DoS).
Learn extra on the best way to defend Apache utilizing mod_security and mod_evasive modules.
12. Restricted Undesirable Companies in Apache
To additional safe Apache, think about disabling sure companies equivalent to symbolic hyperlinks and CGI execution if not at present required. By default, Apache follows symlinks, we are able to flip off this characteristic in addition to the -Contains characteristic and CGI in a single line.
To do that, add the road ‘-ExecCGI -FollowSymLinks -Contains’ for the ‘Choices’ directive within the ‘Listing‘ part.
<Listing /your/web site/listing>
Choices -ExecCGI -FollowSymLinks -Contains
</Listing>
This will also be achieved at a listing stage. For instance, right here, we’re turning off Contains and Cgi file executions for the “/var/www/html/mydomain1” listing.
<Listing “/var/www/html/mydomain1”>
Choices -Contains -ExecCGI
</Listing>
Save the modifications and restart Apache.
13. Restrict File Add Measurement in Apache
One other means of securing your net server is to restrict the full dimension of the HTTP request physique despatched to the net server from a shopper. You’ll be able to set it within the context of server, per-directory, per-file, or per-location.
For example, if you wish to permit file add to a particular listing, say /var/www/area.com/wp-uploads listing, and limit the scale of the uploaded file to 4M = 4194304Bytes, add the next directive to your Apache configuration file or .htaccess file.
<Listing “/var/www/area.com/wp-uploads”>
LimitRequestBody 4194304
</Listing>
Save the modifications and keep in mind to restart Apache.
You’ll be able to set it within the context of server, per-directory, per-file, or per-location. The directive wards off irregular shopper request conduct which typically could be a type of denial-of-service (DoS) assault.
14. Allow Logging in Apache
Logging offers all the main points about shopper requests and some other data pertaining to the efficiency of your net server. This offers helpful data in case one thing goes awry. Enabling Apache logs, particularly in digital host recordsdata means that you can pinpoint a problem in case one thing goes unsuitable with the net server.
To allow logging, you want to embody the mod_log_config module, which offers two predominant logging directives.
ErrorLog – Specifies the trail of the error log file.
CustomLog – Creates and codecs a log file.
You should utilize these attributes in a digital host file within the digital host part to allow logging.
<VirtualHost 172.16.25.125:443>
ServerName instance.com
DocumentRoot /var/www/html/instance/
ErrorLog ${APACHE_LOG_DIR}/error.log
CustomLog ${APACHE_LOG_DIR}/entry.log mixed
</VirtualHost>
The {APACHE_LOG_DIR} directive in Debian methods is outlined as /var/log/apache2 path.
15. Run Apache as a Separate Consumer and Group
Operating Apache as a separate consumer and group is a typical safety apply. By doing so, you’ll be able to isolate the net server course of from different system processes and decrease potential injury if the net server is compromised.
First, you’ll need to create a brand new consumer and group particularly for Apache.
$ sudo groupadd apachegroup
$ sudo useradd -g apachegroup apacheuser
Subsequent, you’ll must edit the Apache configuration file to specify the brand new consumer and group.
Consumer apacheuser
Group apachegroup
Because you’re altering the consumer and group that Apache runs as you may must replace the possession of net directories and recordsdata to make sure that Apache can nonetheless learn them.
$ sudo chown -R apacheuser:apachegroup /var/www/html
After making these modifications, restart Apache to use them:
$ sudo systemctl restart httpd # For RHEL/CentOS
$ sudo systemctl restart apache2 # For Debian/Ubuntu
16. Defend DDOS Assaults and Hardening
Properly, it’s true you could’t absolutely defend your web site from DDoS assaults. Nevertheless, listed here are some pointers that may provide help to mitigate and handle them.
TimeOut – This directive means that you can specify the length the server will look forward to sure occasions to finish earlier than returning an error. The default worth is 300 seconds. For websites inclined to DDoS assaults, it’s advisable to maintain this worth low. Nevertheless, the suitable setting largely is determined by the character of requests your web site receives. Word: A low timeout may trigger points with some CGI scripts.
MaxClients – This directive units the restrict on the variety of connections that may be served concurrently. Any new connections past this restrict shall be queued. It’s obtainable in each the Prefork and Employee MPMs. The default worth is 256.
KeepAliveTimeout – This directive specifies the length the server will look forward to a subsequent request earlier than closing the connection. The default worth is 5 seconds.
LimitRequestFields – This directive units a restrict on the variety of HTTP request header fields accepted by shoppers. The default worth is 100. If DDoS assaults are occurring as a result of an extreme variety of HTTP request headers, it’s advisable to scale back this worth.
LimitRequestFieldSize – This directive units a dimension restrict for the HTTP request header.
Conclusion
These are among the Apache hardening suggestions you could implement in your net server to supply an additional layer of safety and preserve intrusions at bay.


![[SOLVED] ShareFile for Outlook Has Fired an Exception Error](https://mspoweruser.com/wp-content/uploads/2024/07/sharefile-for-outlook-has-fired-an-exception.png "[SOLVED] ShareFile for Outlook Has Fired an Exception Error")


")


")

")


/cdn.vox-cdn.com/uploads/chorus_asset/file/25661290/Screenshot_2024_10_06_at_10.48.36_AM.png "Trailers of the week: Nosferatu, The Franchise, and Squid Game 2")


