

Celeste is a graphical person interface (GUI) file synchronization consumer that enables customers to hook up with varied cloud suppliers and handle their information seamlessly.
It’s backed by rclone, offering a dependable and battle-tested approach to sync information wherever. It’s written in Rust, which makes it tremendous quick to make use of and is designed with GTK4 and Libadwaita, so it matches proper in with the opposite apps in your desktop.
Celeste Options
Celeste affords a number of key options that make it a robust device for managing information throughout completely different cloud suppliers:
Two-Method Sync: Celeste permits for two-way synchronization, guaranteeing that information are up to date on each native and distant techniques.
Battle Decision: If each your native file and the cloud one modified because the final sync, Celeste enables you to select resolve conflicts.
Exclusion: Customers can select to not sync sure information or folders, which helps them handle their information extra exactly.
Multi-Supplier Help: Celeste can connect with many cloud providers without delay, like Dropbox, Google Drive, Nextcloud, Owncloud, pCloud, Proton Drive, and WebDAV.
Putting in Celeste on Linux
Celeste will be put in through a number of strategies:
Flatpak
Celeste will be discovered on Flathub, earlier than you start, be sure to have Flatpak arrange in your system, after which, simply run the next command.
flatpak set up flathub com.hunterwittenborn.Celeste
Snap
Celeste will be discovered on the Snap Retailer and will be put in on any system that has Snap put in.
snap set up celeste
Prebuilt-MPR (Debian/Ubuntu)
When you’re utilizing Ubuntu 22.10 or Debian 11, or a more moderen model, you’ll be able to set up Celeste from the Prebuilt-MPR.
Nevertheless, just be sure you have the Prebuilt-MPR arrange in your system. If it’s not arrange but, comply with the directions offered to set it up.
wget -qO – ‘https://proget.makedeb.org/debian-feeds/prebuilt-mpr.pub’ | gpg –dearmor | sudo tee /usr/share/keyrings/prebuilt-mpr-archive-keyring.gpg 1> /dev/null
echo “deb [arch=all,$(dpkg –print-architecture) signed-by=/usr/share/keyrings/prebuilt-mpr-archive-keyring.gpg] https://proget.makedeb.org prebuilt-mpr $(lsb_release -cs)” | sudo tee /and so forth/apt/sources.record.d/prebuilt-mpr.record
sudo apt replace
As soon as Prebuilt-MPR is put in, you’ll be able to run the next command to put in Celeste.
sudo apt set up celeste
Setting Up Celeste on Linux
As soon as Celeste is put in, you’ll be able to launch it by trying to find it in your system’s search bar or by navigating to the Functions menu. Alternatively, you’ll be able to run the next command to begin it.
celeste
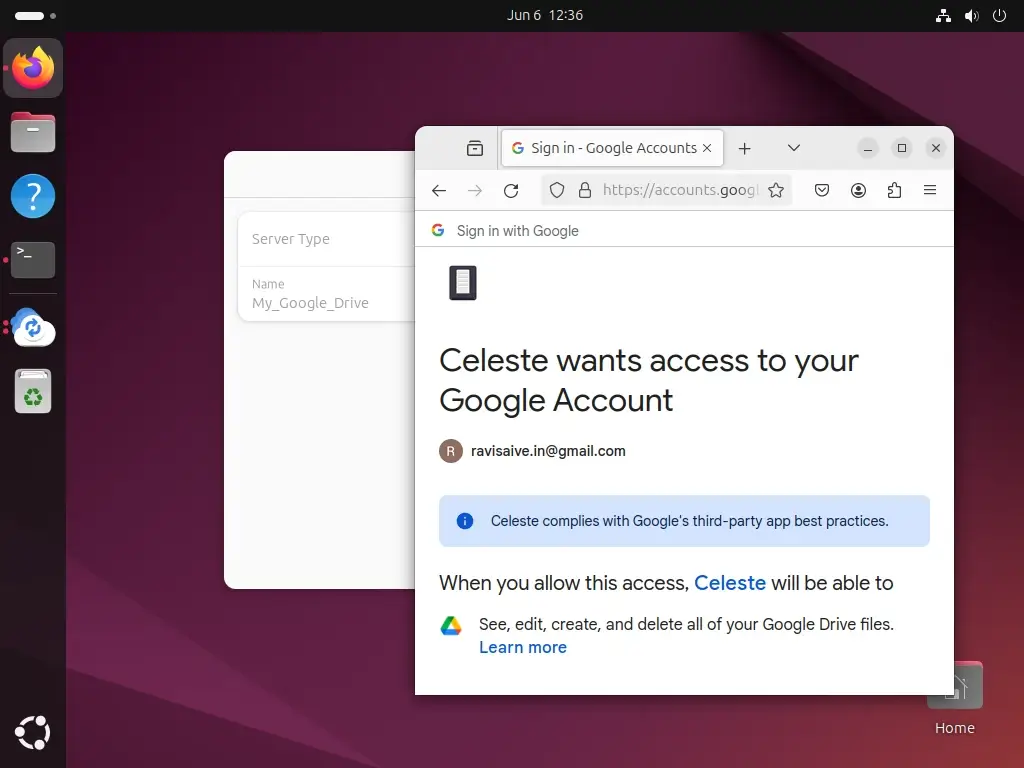
Click on on “Log In” or enter your Google Drive account credentials to authorize entry to your Google Drive account by clicking on the “Authorize” button.
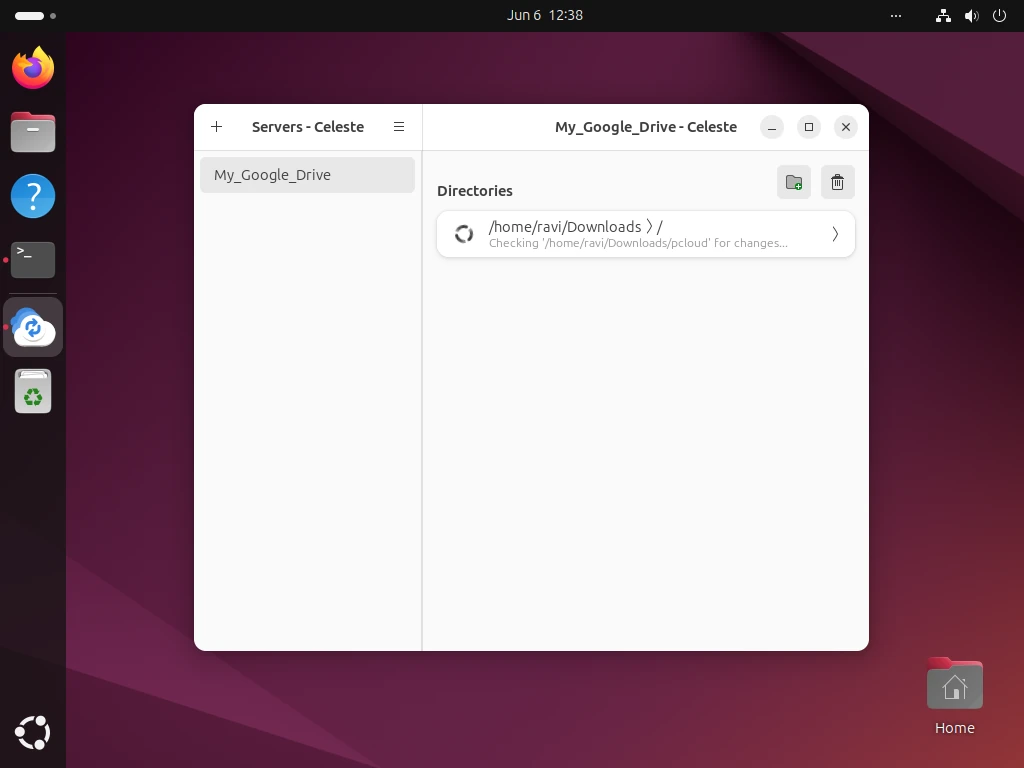
Now that Celeste is ready up, you should use it to add, obtain, and handle information in your Google Drive account. You too can create new folders and subfolders to arrange your information.
Conclusion
Celeste is a robust and user-friendly device that gives seamless integration between Google Drive and Linux techniques.
By following the steps outlined on this article, you’ll be able to arrange Celeste in your Linux machine and begin accessing and managing your Google Drive information utilizing a GUI.


![[SOLVED] ShareFile for Outlook Has Fired an Exception Error](https://mspoweruser.com/wp-content/uploads/2024/07/sharefile-for-outlook-has-fired-an-exception.png "[SOLVED] ShareFile for Outlook Has Fired an Exception Error")


/cdn.vox-cdn.com/uploads/chorus_asset/file/25479882/IMG20240606074430.jpg "We tested Aptoide, the first free iPhone app store alternative")


")
")


")
