

Just lately I encountered an odd challenge in Ubuntu 24.04.
After I ran some purposes, their icons did not present within the launcher. As a substitute, it displayed a gear/settings image.
This was notably bizarre as a result of these purposes did have icons and the thumbnails have been very effectively displayed within the exercise space.
Much more stunning was that it occurred with the Transmission torrent shopper that comes preinstalled with Ubuntu.
On this tutorial, I am going to share how I fastened this lacking icon challenge. However earlier than that, let me talk about what was improper right here.
🚧
This tutorial is simply legitimate for the GNOME desktop surroundings.
The lacking ingredient thriller
Alright! Here is the factor. Each utility you put in ought to have a .desktop file that has varied data, together with the situation of the appliance icon.
This .desktop file is important for the desktop integration. With out it, you will not be capable of seek for the put in utility within the menu, the thumbnail and icons will not be displayed.
However in my case, each ONLYOFFICE and Transmission had their desktop recordsdata within the /usr/share/purposes listing. I even made positive that the icon picture file was current.
It baffled me and I began going by way of GitHub and discussion board discussions. That is once I got here throughout this dialogue about lacking WM_CLASS property in some KDE purposes that brought about this challenge.
The purposes I used to be utilizing weren’t from KDE however this was a step in the proper path. This weblog put up confirmed my views.
📋
That you must get the WM_CLASS property and replace the .desktop file of the appliance with this worth.
Fixing the lacking utility icons from the launcher challenge
✋
Whereas I’m making an attempt to go in each step intimately, it nonetheless includes some effort in your finish. This isn’t run-this-command to repair the problem form of answer. It’s important to take my examples as a reference and use them in your state of affairs. Primary information of the Linux command line is required.
Step 0: Run the purposes in query
You will need to run the purposes which have lacking icons. It’s important.
Step 1: Get the WM_CLASS property of the appliance
All this can be a tad bit simpler in case you are utilizing Xorg as a substitute of Wayland. Run xprop WM_CLASS command in terminal, the cursor turns into crosshair and also you click on on the specified utility to get its WM_CLASS property.
However that’s not occurring right here in Wayland, so let’s take the longer route.
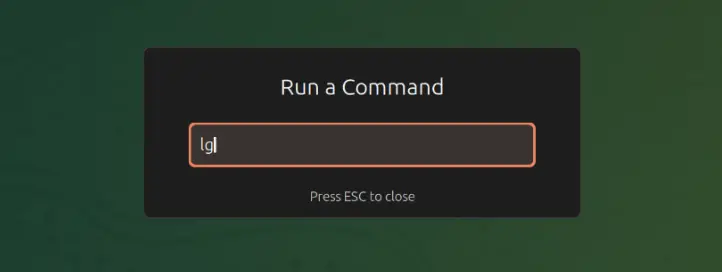
Press Alt + F2 to launch “Run a Command” dialog. Your keyboard ought to have a F2 perform key. Search for it. Typically they should run in Fn+2 manner. I allow you to uncover that.
Urgent Alt + F2 launches a dialogue field. Enter lg (lowercase LG) right here:
It’s going to deliver up GNOME’s built-in debugger and inspector software. Your mouse and keyboard has restricted perform at this stage. Right here, click on on the Window possibility and it’ll present the WM_CLASS property for every working utility Window.
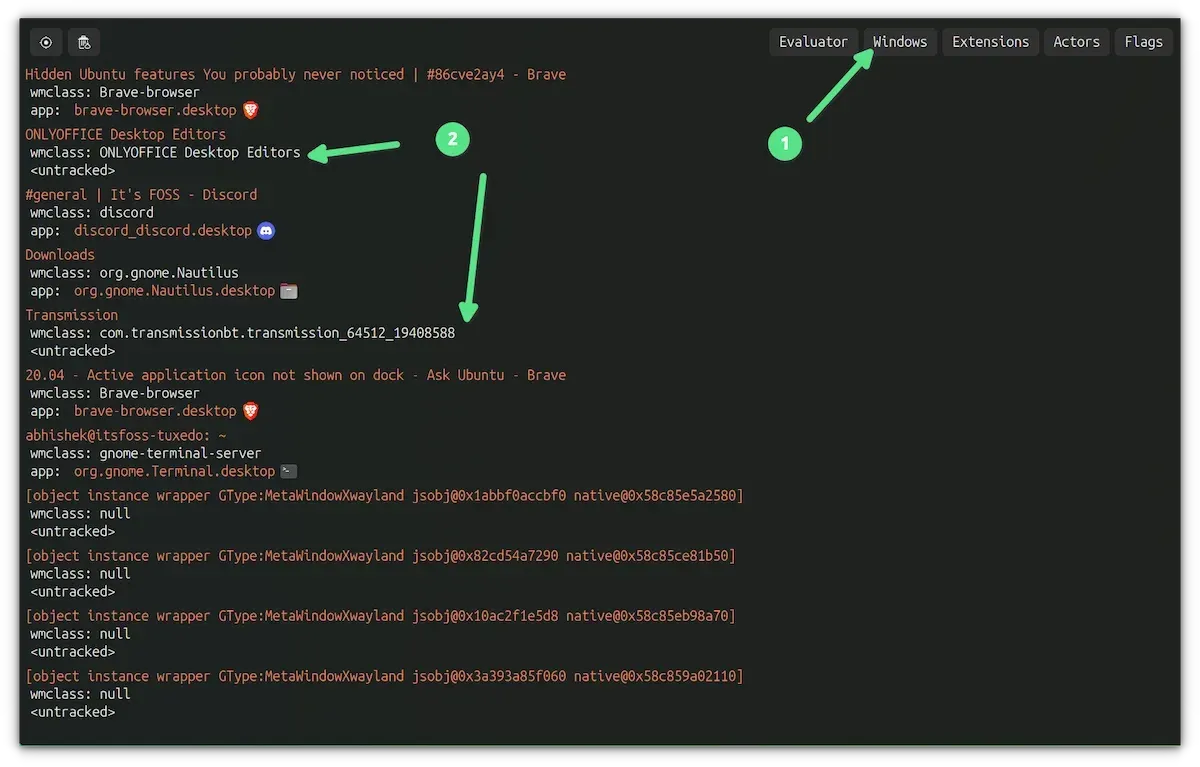
Observe that copy-paste did not work for me at this stage. I took a screenshot for reference.
Press Esc to shut the debugger.
Step 2: Edit .desktop file
📋
If you do not have a lot expertise modifying config recordsdata comparable to these, make a backup copy of the .desktop file earlier than modifying it.
The following step is to edit the appliance’s .desktop file. It’s best to discover it within the /usr/share/purposes listing. If it isn’t there, you might strive searching for it in ~/.native/share/purposes and /var/lib/flatpak/exports/share/purposes/ areas as effectively.
Now, you should utilize Nano to edit recordsdata within the terminal. That is the instance for me:
sudo nano /usr/share/purposes/onlyoffice-desktopeditors.desktop
However in case you are uncomfortable with that, you too can do it graphically. Simply go to the situation of your utility’s .desktop file.
Within the file supervisor, You’ll be able to click on Different Places after which Ubuntu to entry the basis listing.
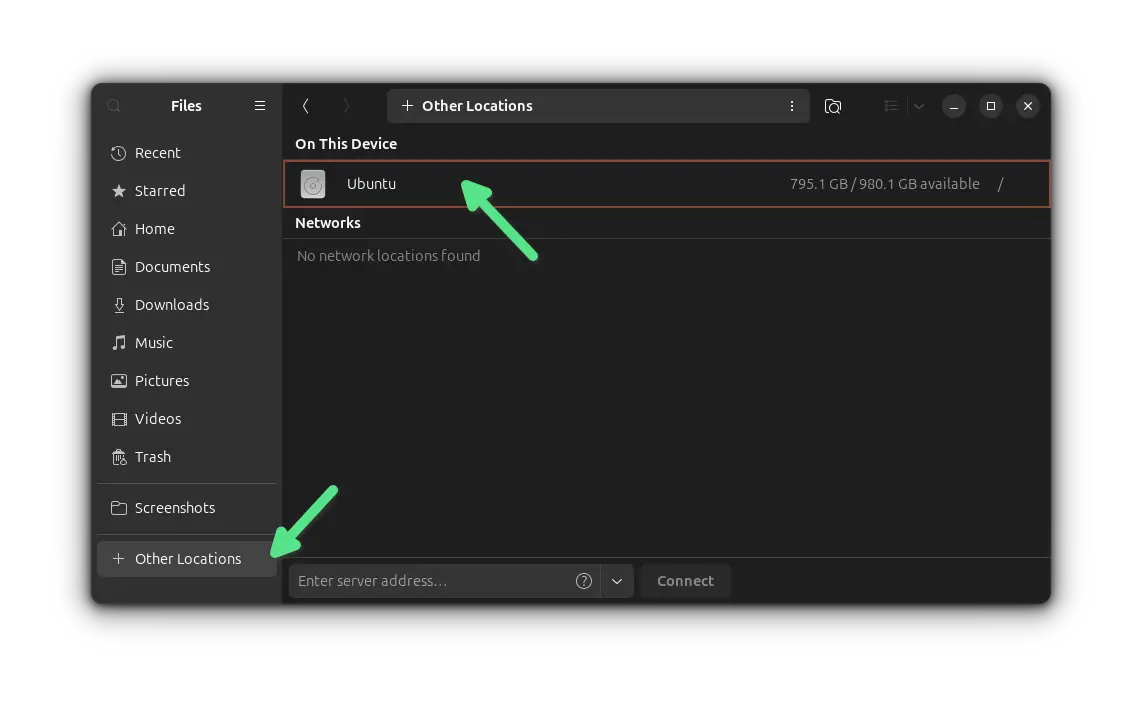
From there, you may go to the user->share->purposes folder. You may additionally simply enter /usr/share/purposes within the handle bar of the file supervisor and entry it shortly.
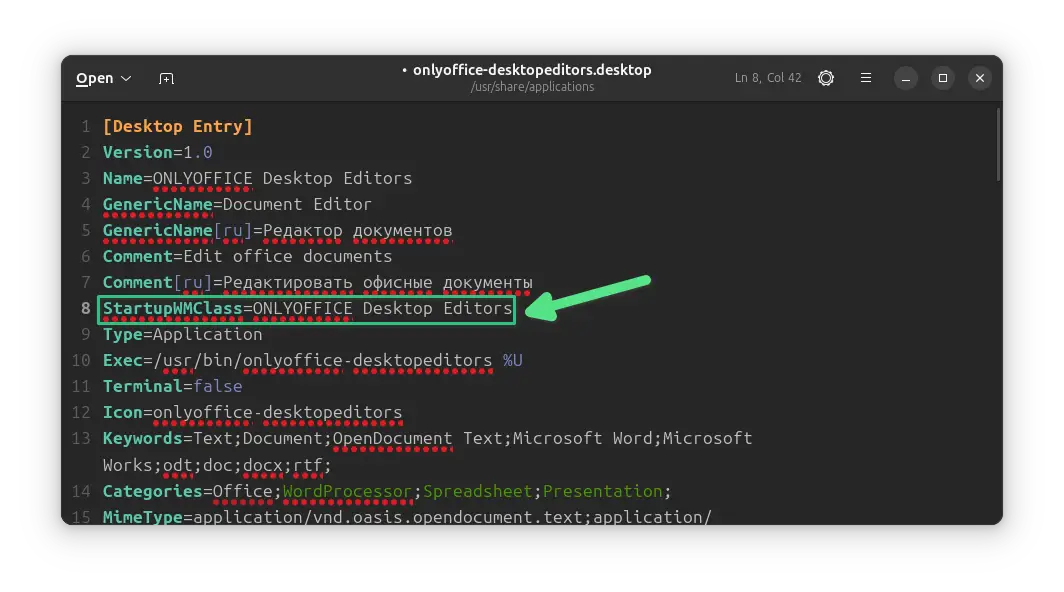
In right here, beneath the [Desktop Entry] part, add a line
StartupWMClass=Worth-you-got-in-previous-step
Save the file. You will need to enter your account password to save lots of the file.
And the impact is nearly rapid. No must reboot and even sign off. The icons get displayed within the launcher nearly as quickly as you save the file.
I skilled that you’ve restricted mouse and keyboard management right now. The WM Class textual content couldn’t be copied. So, I took a screenshot and used that screenshot as a reference to see the worth and manually kind it in.
Conclusion
It is good to get the lacking icons again. It took some effort, however it taught me a couple of new issues within the course of. That is what I like about troubleshooting. It teaches you stuff that you’d have by no means recognized in any other case.
Unsure if I ought to blame Ubuntu or GNOME. However this can be a poor consumer expertise specifically whenever you encounter it with purposes which can be put in by default.
🗨️ I hope the tutorial is just not overly sophisticated. Did it aid you repair the lacking icons drawback in Ubuntu?


![[SOLVED] ShareFile for Outlook Has Fired an Exception Error](https://mspoweruser.com/wp-content/uploads/2024/07/sharefile-for-outlook-has-fired-an-exception.png "[SOLVED] ShareFile for Outlook Has Fired an Exception Error")


")

")


")
