

In relation to Digital Non-public Networks (VPNs), not all protocols are created equal. Whereas OpenVPN and Wireguard are extremely common VPN protocols, their reputation has led to a rise within the protocol being blocked by some networks.
With SoftEther VPN, the encrypted tunnel is routed by the HTTPS port (443), successfully disguising the VPN as an SSL connection.
This is how one can arrange a SoftEther VPN over an HTTPS connection shopper on Home windows and Linux.
How Does a SoftEther VPN Work?
SoftEther, which stands for “Software program Ethernet,” is an open-source, multi-protocol VPN software program. It is lauded for its flexibility, permitting for a spread of VPN protocols, together with the more and more common VPN over HTTPS.
VPN blocking strategies primarily block generally used VPN ports or the protocols themselves. VPN over HTTPS makes use of the SSL/TLS encryption protocols. Which means the VPN connection is camouflaged as commonplace HTTP visitors. This enables it to go by most firewalls and internet proxies with out detection.
A SoftEther VPN requires each a shopper and a server. This text offers with the set up and setup of a SoftEther shopper. For the server setup information, check out how one can arrange the SoftEther VPN server. You may want the hostname or IP deal with of your SoftEther server to finish the SoftEther shopper configuration within the subsequent part, so do take a second to do that.
Earlier than we delve into the set up procedures, it is essential to notice that solely the Home windows and Linux SoftEther shoppers help VPN over HTTPS. Moreover, for each Home windows and Linux, guarantee you will have the hostname or IP deal with of the SoftEther server and username and password.
Putting in the SoftEther Consumer on Home windows
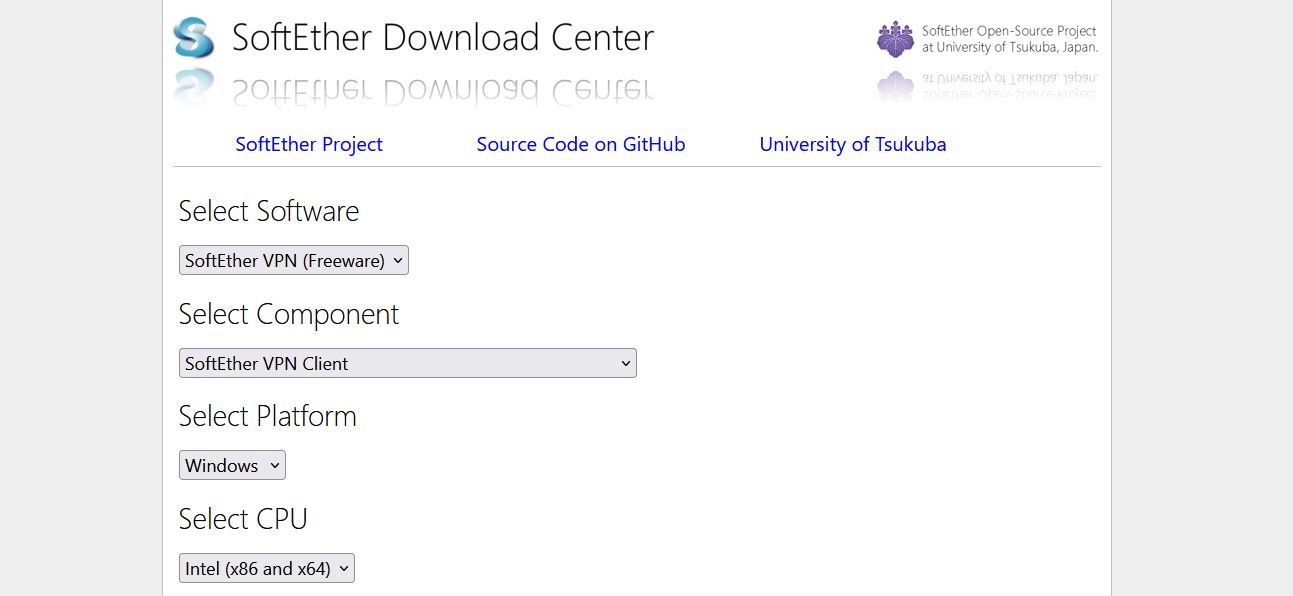
Obtain the Home windows SoftEther shopper from the SoftEther web site. You will want to pick SoftEther VPN Consumer after which Home windows from the drop-down menus. Run the installer and observe the on-screen prompts. Throughout the setup, choose SoftEther VPN Consumer when prompted.
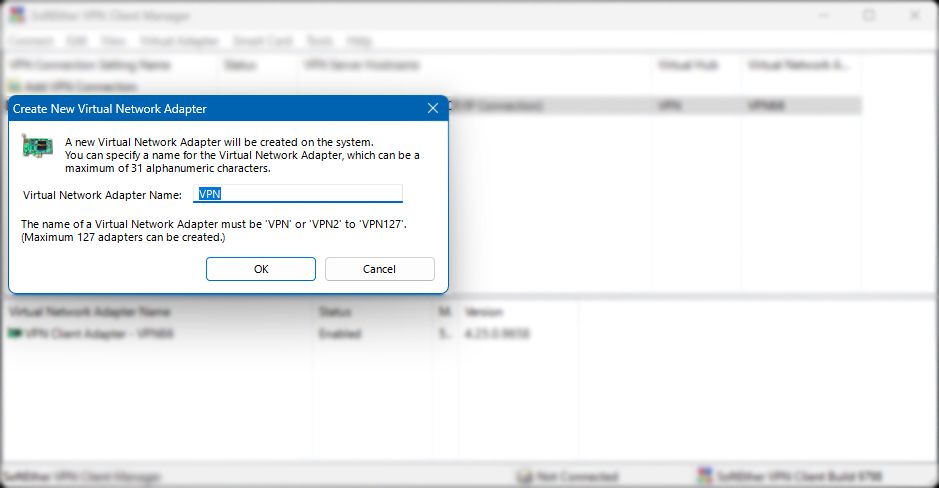
As soon as put in, launch the VPN shopper supervisor. You will want to create a digital community adapter for the VPN connection. Choose Digital Adapter, then New Digital Community Adapter. Enter a singular identify on your SoftEther VPN community adapter, then choose OK.
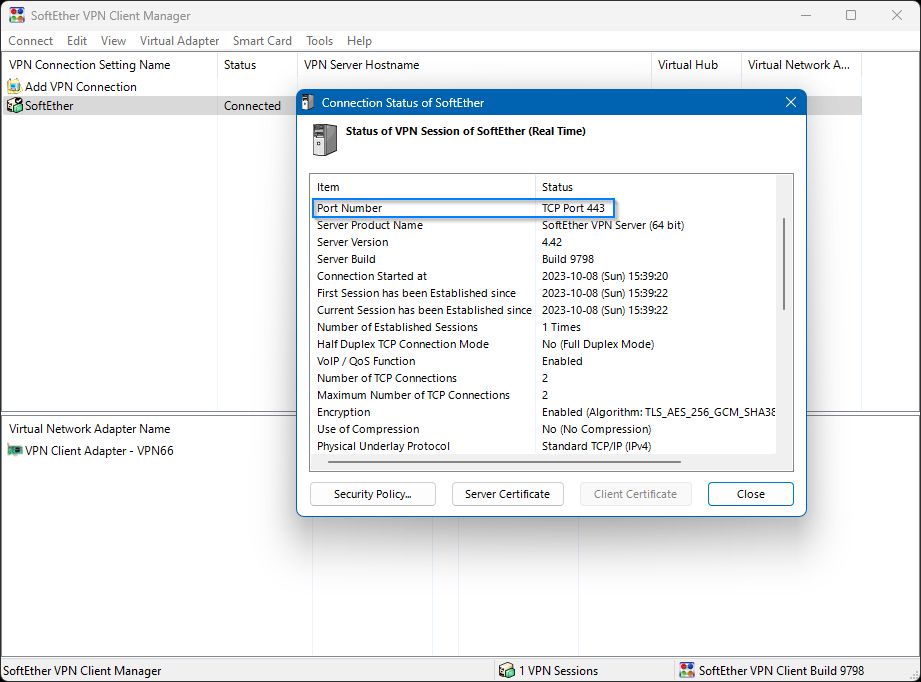
Subsequent, choose Join within the high left nook after which New VPN Connection Setting. Enter the next particulars which correspond to your SoftEther VPN Server: Setting Identify: Give your VPN shopper a reputation. Hostname: The hostname or IP deal with of your SoftEther VPN server. Port Quantity: 443 Proxy Sort: For many, selecting “Direct TCP/IP Connection” might be greatest. In case your connection is behind an online or SOCKS proxy, select the corresponding choice. Digital Consumer Adapter to Use: Select the digital community adapter you created within the earlier step. Person Authentication Settings: Choose Normal Password Authentication. Enter your VPN username and password. Click on “OK” to proceed. Proper-click the brand new connection and click on Join. If the small print have been entered accurately, the VPN ought to now join efficiently.
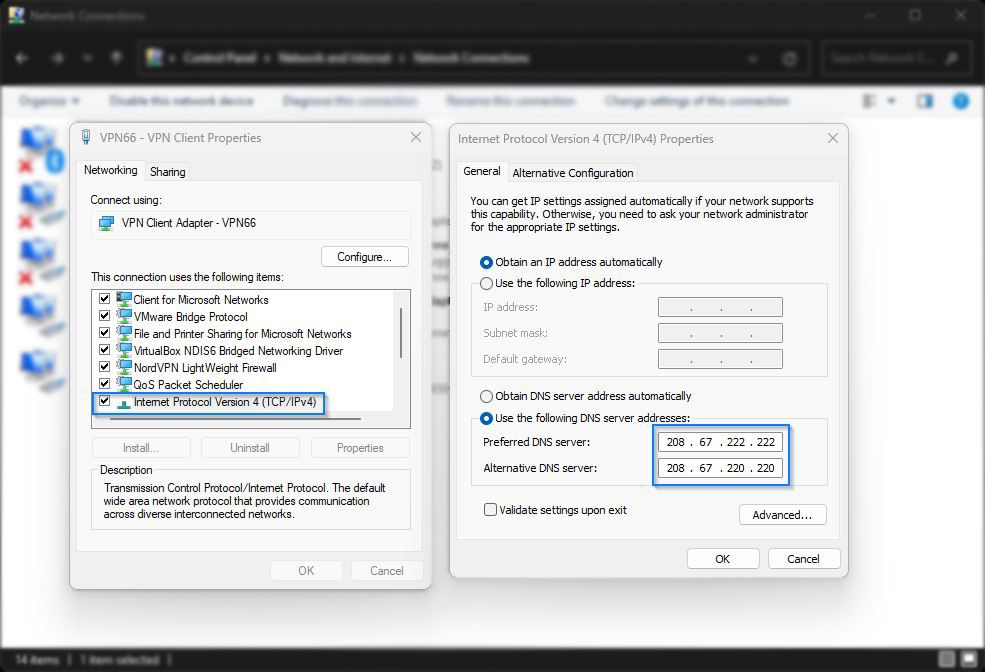
Now, if you wish to specify your personal DNS servers, you need to edit the digital community adapter settings inside Home windows.
Within the Community and Sharing Heart, click on Change adapter settings, right-click the digital adapter (it’s going to be named one thing like VPN## or comparable), click on Properties, then choose Web Protocol Model 4 Enter the DNS servers you wish to use within the Most popular DNS server part.
To check if the VPN has linked efficiently, you may go to WhatIsMyIP and test the displayed IP deal with. If it matches the IP deal with of your SoftEther VPN server, then your shopper is about up accurately.
Putting in the SoftEther Consumer on Linux
To put in the SoftEther shopper on Linux, you could open a terminal and be logged in as root. Directions for this set up are given for Debian/Ubuntu. For different distributions of Linux, please modify your instructions accordingly. Because the Linux set up course of is considerably longer than the Home windows model, we have damaged it into bite-sized chunks.
1. Replace Your Software program Repositories and Dependencies
Earlier than you start the shopper set up, first replace your software program repositories utilizing the next command.
apt-get replace -y
Subsequent, set up the required dependencies for the VPN shopper.
apt-get set up build-essential gnupg2 gcc make -y
2. Obtain and Set up the SoftEther Consumer for Linux
To do that, set up the Lynx terminal-based browser and open the SoftEther obtain web page.
apt-get set up lynx -ylynx http:
Scroll to the underside of the web page to pick the most recent model or beta. Choose Linux, then SoftEther_VPN_Client.
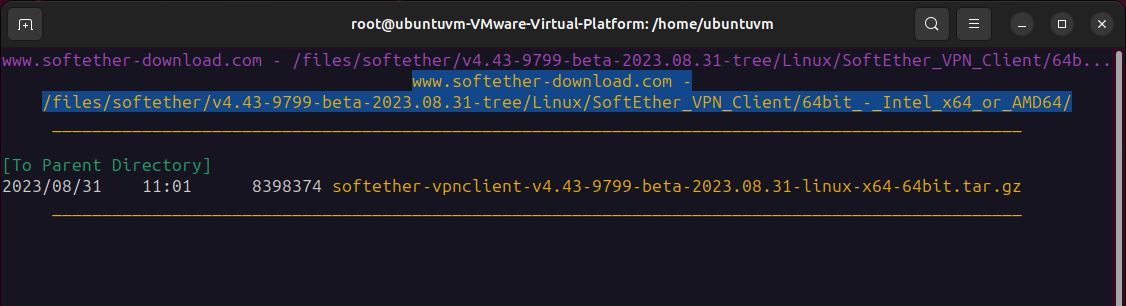
Choose your system structure, choose the softether-vpnclient-x file, and press “d” to obtain. Lastly, choose Save to disk.
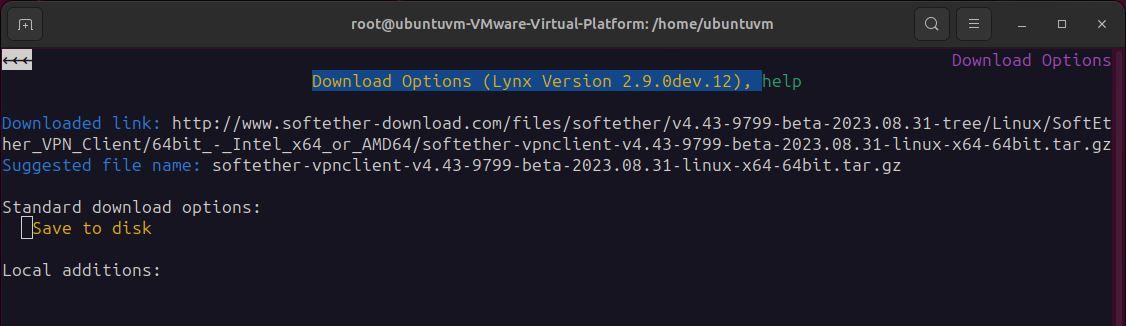
Press q to exit the Lynx browser.
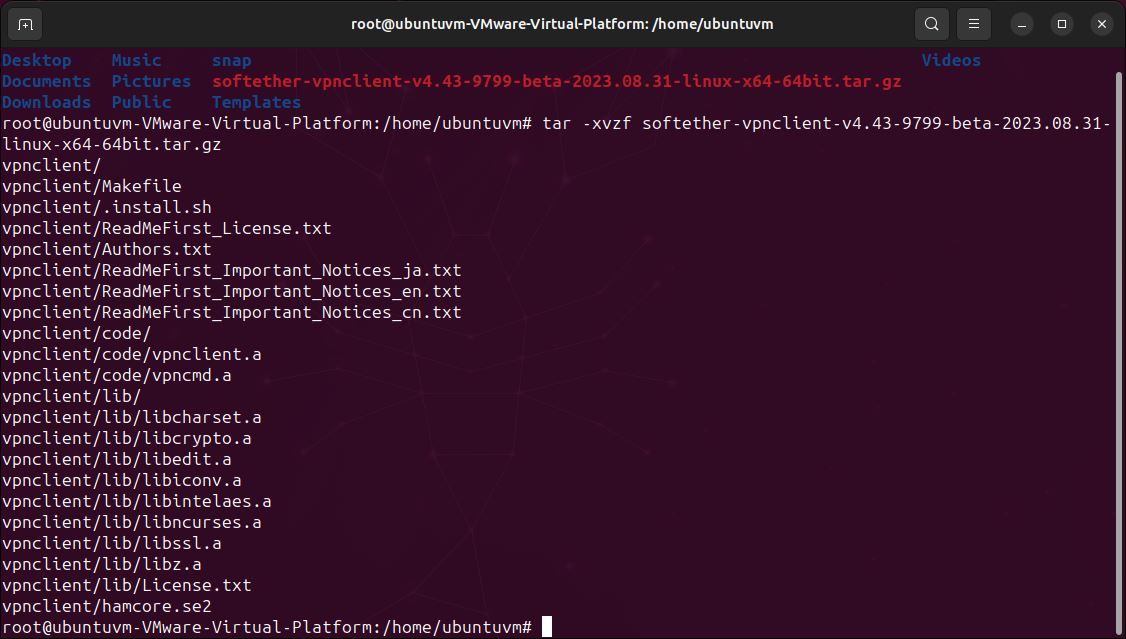
Extract the archive. Word that your file identify may be completely different you probably have downloaded a more recent model.
tar -xvzf softether-vpnclient (press tab to finish)
Navigate to the newly created VPN shopper listing:
cd ./vpnclient
Situation the make command to compile the software program and settle for the license settlement.
make
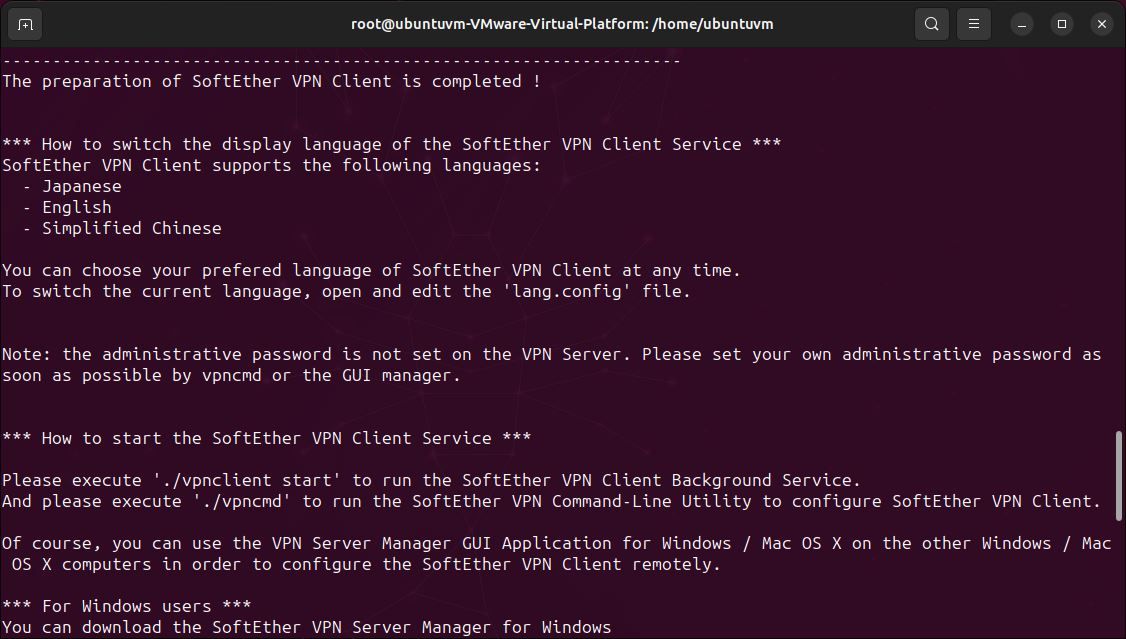
Now run the VPN shopper.
./vpnclient begin
Earlier than beginning the configuration, check your system’s compatibility with the shopper. Choose Choice 3 (Use of VPN Instruments).
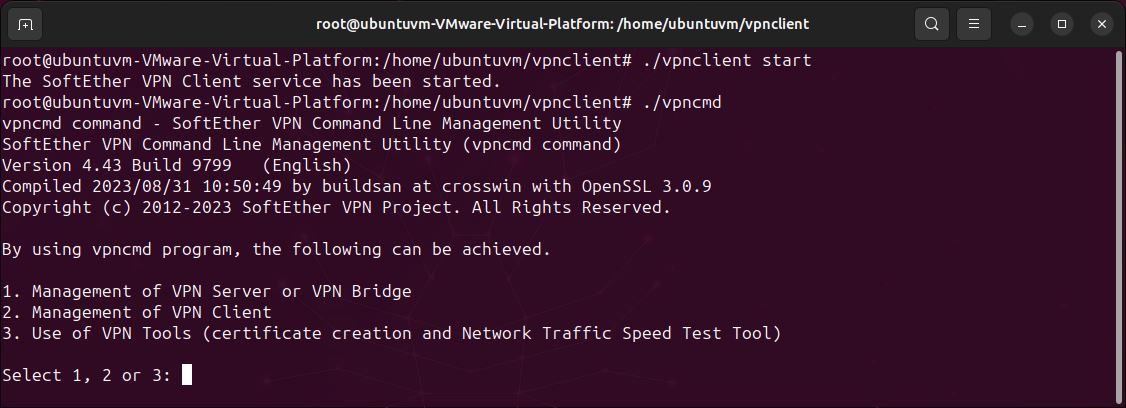
Subsequent, situation the next command:
test

If all of the assessments go with out errors, you may transfer on to configuration. Exit vpncmd by typing exit.
3. Configure the VPN Consumer
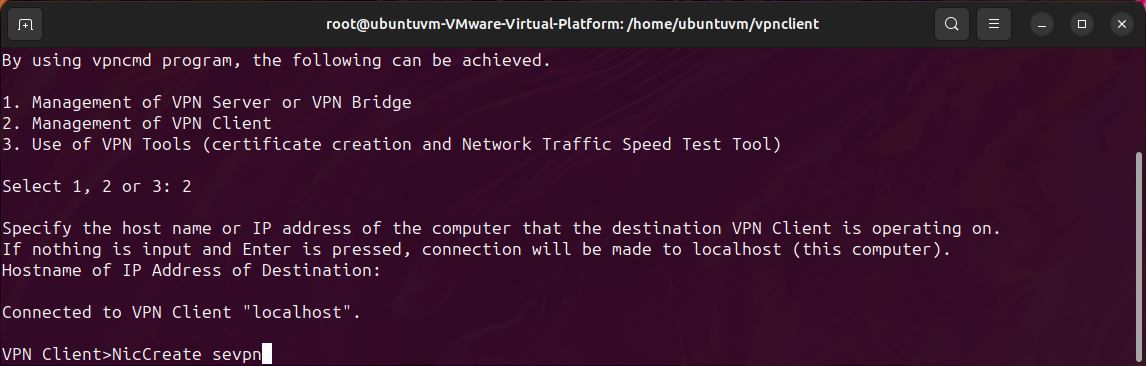
To start configuration, run vpncmd once more and choose Choice 2 (Administration of VPN Consumer). Press enter to simply accept localhost because the shopper.
./vpncmd

Create a brand new digital interface to connect with the VPN server. You need to use any identify you would like.
NicCreate <identify of interface>
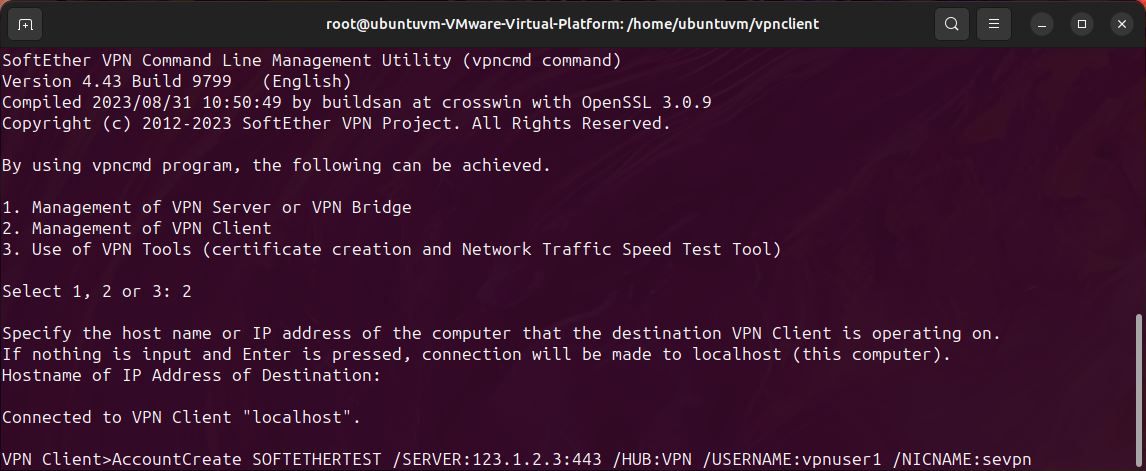
Create a brand new shopper account and provides it a reputation. You will want your SoftEther username and hub identify for this step.
AccountCreate <identify of account> /server:<IP of VPN server>:443 /HUB:<identify of vpn hub> /USERNAME:<vpn username> /NICNAME:<identify of digital community interface>
Set the password and authentication mode for the newly created account.
AccountPasswordSet <identify of account> /PASSWORD:<your vpn password> /TYPE:commonplace

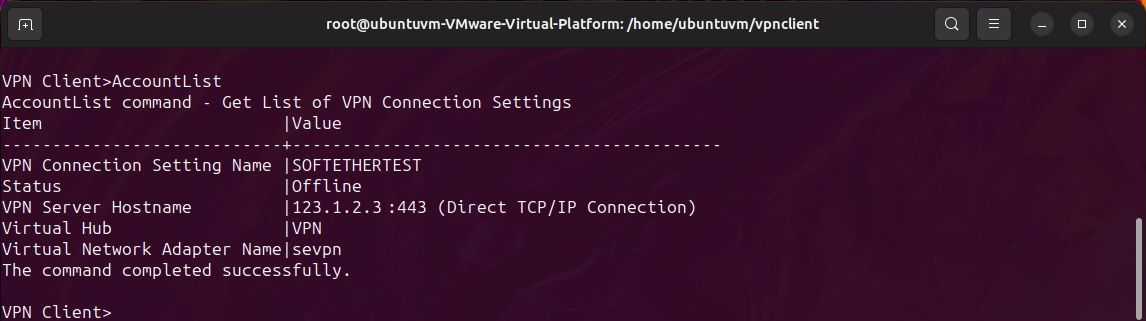
Examine the standing of the newly created account with the command:
AccountList
4. Allow IP Forwarding
The account is now able to make a connection to the SoftEther VPN server, however first, you have to to make sure IP forwarding is enabled.
cat /proc/sys/web/ipv4/ip_forward
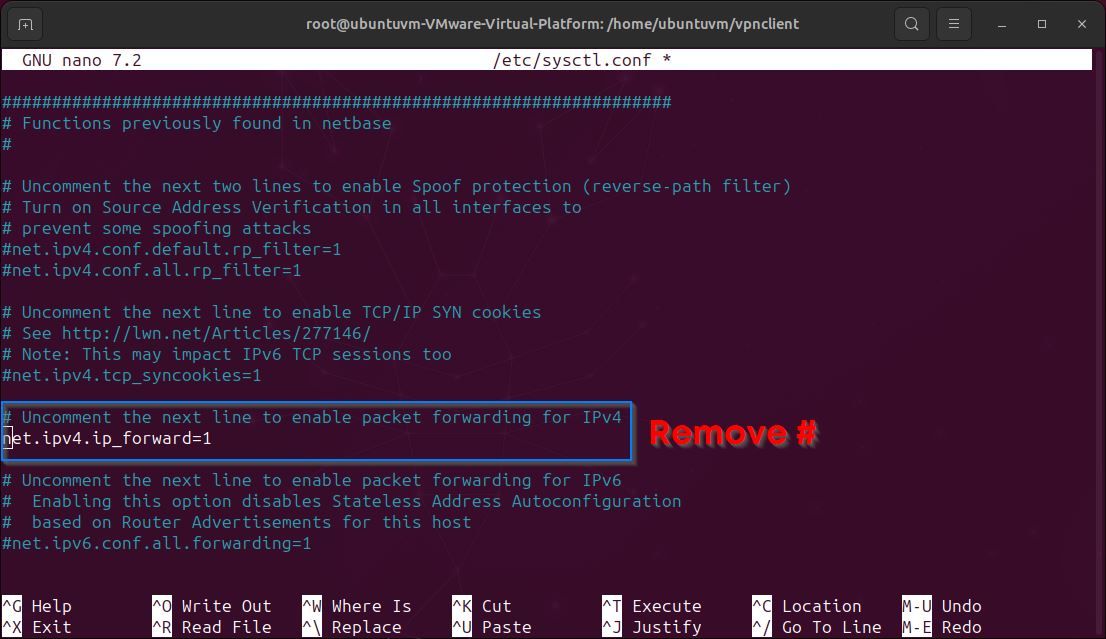
This may return a worth of 1 or 0. If the worth is 0, then IP forwarding will not be enabled. To allow it, edit the sysctl.conf file utilizing the next command:
nano /and many others/sysctl.conf
Discover the road “web.ipv4.ip_forward=1” and uncomment it. Now save the file (ctrl-o, ctrl-x).
5. Make Your First SoftEther VPN Connection
Your account is now prepared to connect with the VPN server. To take action, situation this command:
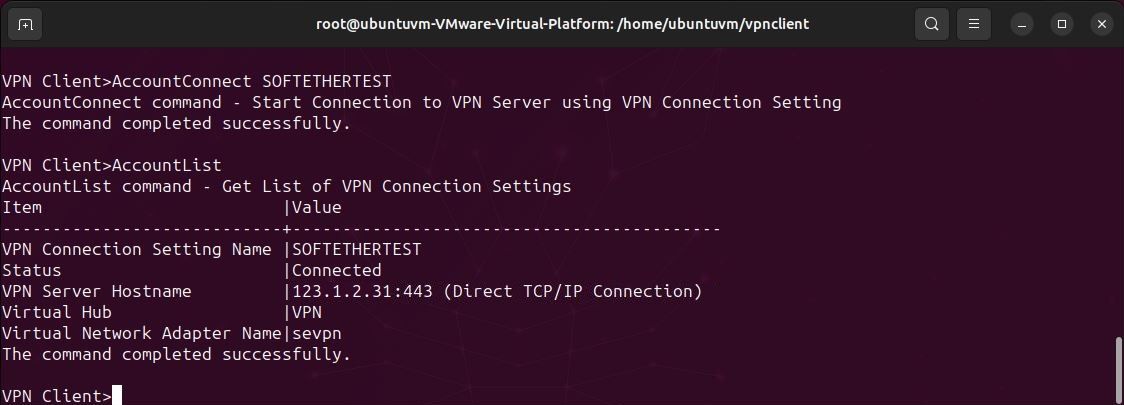
AccountConnect <identify of account>

At this level, you may verify the account has linked efficiently by issuing the AccountList command:
AccountList
Request an IP deal with from the VPN server through DHCP. Place the prefix “vpn_” earlier than the digital interface identify. For instance: “vpn_sevpn”
dhclient <digital adapter identify>
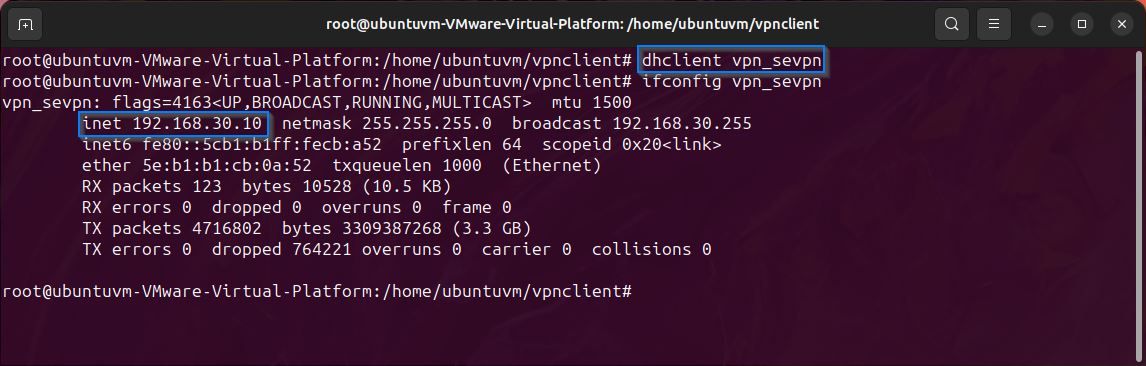
You will want to view the IP deal with assigned by the VPN server. Keep in mind this deal with, as it will be important for the subsequent step.
Right here, you may see the identify of your digital interface and the IP deal with that has been assigned. Within the picture above, it’s highlighted in blue.
iconfig <identify of interface>
6. Set Up Static Routing
Now, you need to specify the static routes so that every one visitors is directed by the VPN relatively than your default community gateway. To view your present routing desk, situation the netstat command:
netstat -rn
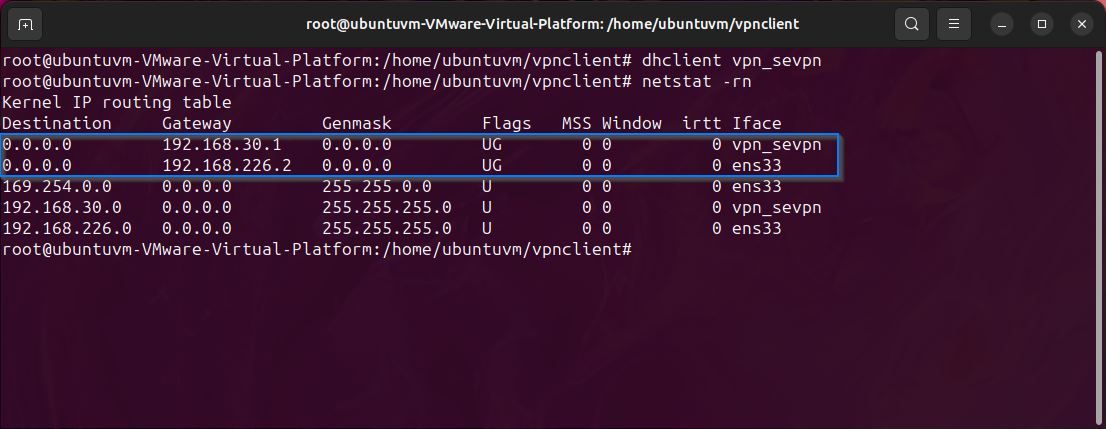
Within the picture above, you may see the IP deal with allotted by the VPN server (vpn_sevpn), and you may see the default gateway (ens33). Your routing desk will look completely different from the instance supplied, as each community differs. The default gateway IP might be completely different from the DHCP IP deal with you obtained from the VPN server from the earlier step.
After you have your default gateway IP, add a brand new path to your VPN server’s IP deal with through your default gateway. Please word that your VPN server IP is the IP of your SoftEther VPN server and NOT the IP issued from the server through DHCP.
ip route add <your VPN server IP>/32 through <your default gateway>
Delete your previous default route.
ip route del default through <your default gateway IP>

After performing these route adjustments, the routing desk will appear like the desk within the picture above. Discover that the default gateway has now modified to the IP deal with issued through DHCP from the VPN server.
Now, check your connection by pinging an exterior IP, such because the Google DNS server:
ping -c4 8.8.8.8
Lastly, test your SoftEther shopper connection is working accurately by checking your public IP deal with:
wget -qO- http:
If the IP deal with returned is similar as your VPN server IP, all the things is working accurately.
7. Disconnecting the VPN
To disconnect from the VPN, you could begin the VPN shopper configuration script once more utilizing the next command:
./vpncmd
Now situation the AccountDisconnect command:
AccountDisconnect <identify of account>

Now exit the shopper configuration and launch the DHCP lease from the digital community interface:
dhclient -r <identify of digital interface>

Subsequent, cease the VPN shopper:
./vpnclient cease
Now, edit your routing desk by eradicating the path to your VPN server:
ip route del <your VPN server IP>/32
Lastly, add a default route through your community’s native gateway:
ip route add default through <your native gateway>
Your community connection ought to now be restored.
Use the SoftEther VPN to Shield Your On-line Privateness
Efficiently establishing a SoftEther shopper and establishing a connection to its VPN server enhances your on-line safety. Your SoftEther VPN stays discreet, defying even probably the most rigorous makes an attempt at VPN detection and blocking.
/cdn.vox-cdn.com/uploads/chorus_asset/file/25661290/Screenshot_2024_10_06_at_10.48.36_AM.png "Trailers of the week: Nosferatu, The Franchise, and Squid Game 2")


")


")

")


