

There are all kinds of note-taking functions accessible for Linux.
Most of them are fundamental Markdown-based functions and will not supply end-to-end encryption.
In order for you a safe and feature-rich note-taking app, Joplin may also help.
You get talents like:
Writing in MarkdownCreating to-do listsEncrypting notesCreating notebooks and organizing notesSaving internet pagesSyncing the notes to your most popular cloud companies
Nevertheless, with the feature-set, for some customers, it might be an amazing possibility.
Right here, I shall spotlight some tips that could take advantage of out of Joplin Notes simply.
Putting in Joplin
Joplin is at the moment accessible as an AppImage. You’ll be able to both set up it by downloading the AppImage and operating it or through the terminal utilizing the command beneath (set up and configure icons for system menu):
wget -O – https://uncooked.githubusercontent.com/laurent22/joplin/dev/Joplin_install_and_update.sh | bash
As soon as completed, you may get began with Joplin.
8 Joplin Superpowers to Increase Your Be aware-Taking Expertise
Contemplating it helps you to do quite a few issues, I level out a few of the most helpful options right here:
Create a Pocket book
To create a pocket book in Joplin, you may both press the “+” button, or use File > New Pocket book.
This can open the Pocket book wizard. Enter a reputation and if you wish to apply an icon to the pocket book, hit the emoji button.
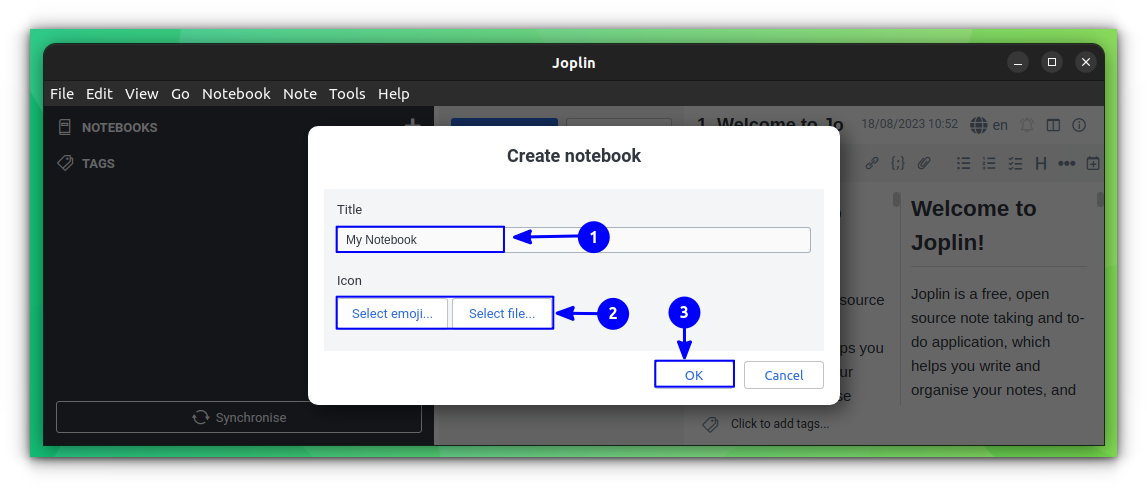
As soon as chosen, press OK to create the Pocket book.
Advised Learn 📖
High 16 Finest Be aware Taking Apps For Linux [2023]
Loads of wonderful note-taking apps for Linux. Right here’s what we suggest you to take a look at.

Create a Stack of Pocket book
In order for you a mum or dad pocket book, and multi-collection below it, you may make the most of the sub-notebook function. There are a number of methods to do that:
Navigating by the menu
On this technique, first spotlight the pocket book to which you wish to create a sub-notebook. Then go to File > New Sub-Pocket book.
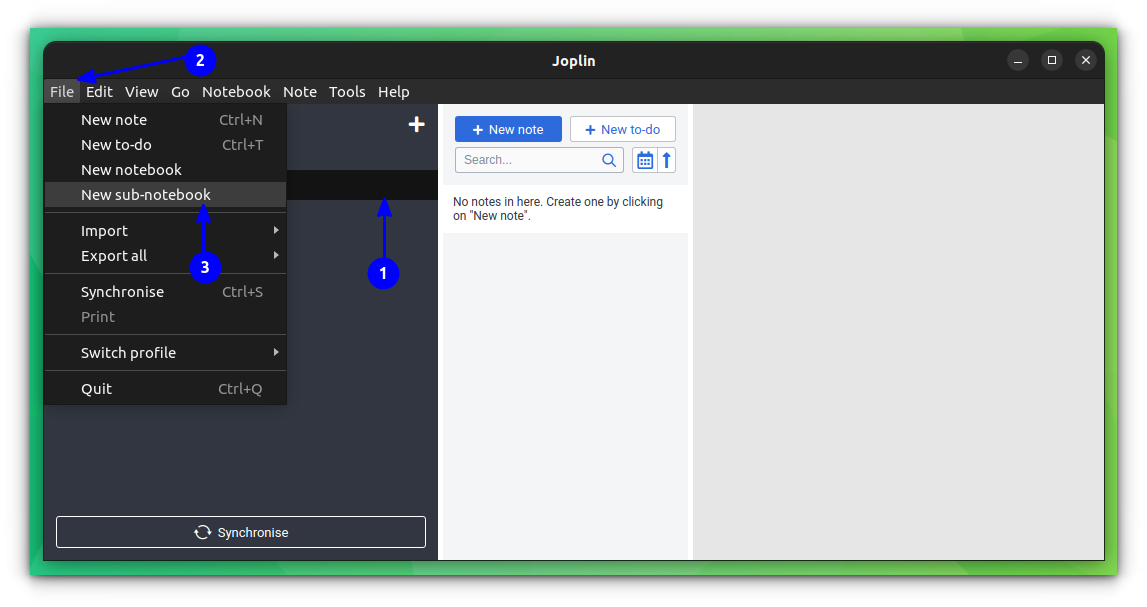
Title it and provides icons or emojis if wanted.
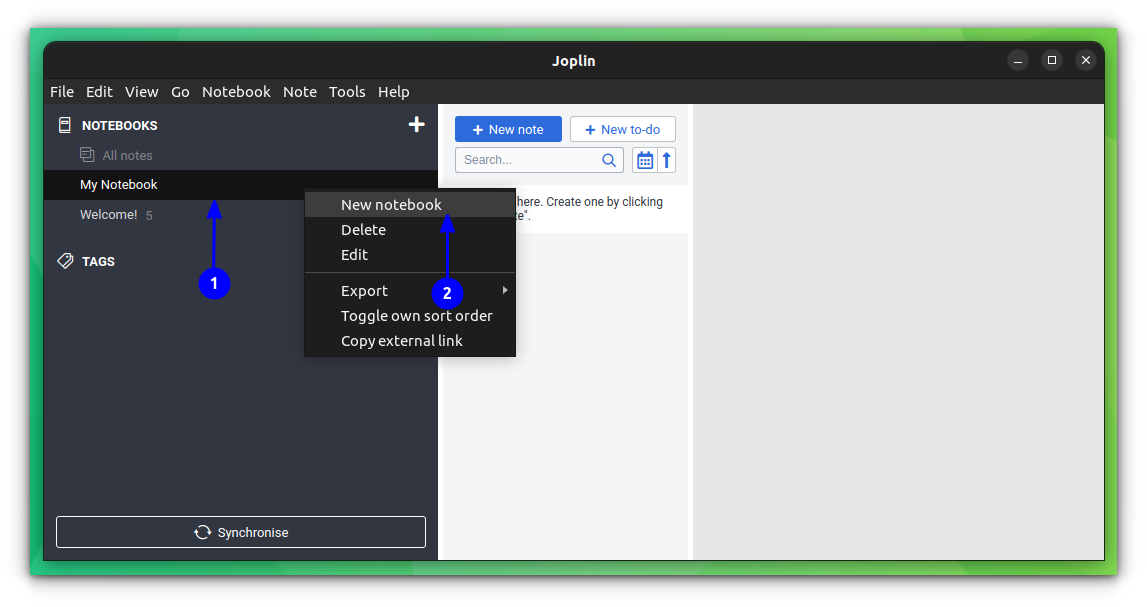
Utilizing the right-click menu
You’ll be able to right-click on a pocket book, after which click on on New Sub-notebook to create a sub-notebook for that pocket book.
By Drag and Drop
When you’ve got already many notebooks and wish to organize them correctly into sections, merely drag and drop a pocket book to a different to make it a sub-notebook.
Handle the Structure and Look
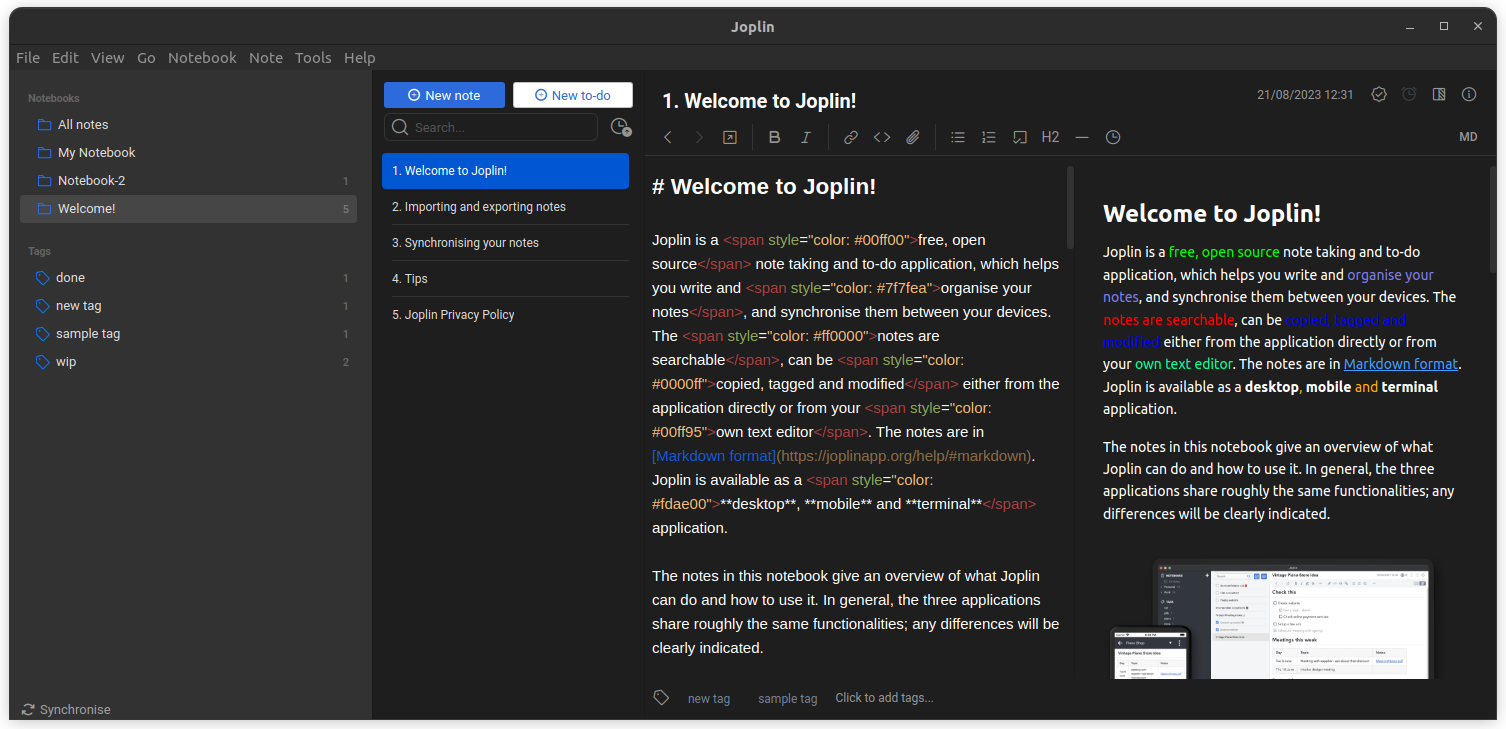
By default, Joplin has a three-column structure. A sidebar with notebooks, one other sidebar with a notes checklist, after which an editor and a preview part. In the event you require, you may rearrange them, by eradicating sidebars, toggling editors/preview, and so on.
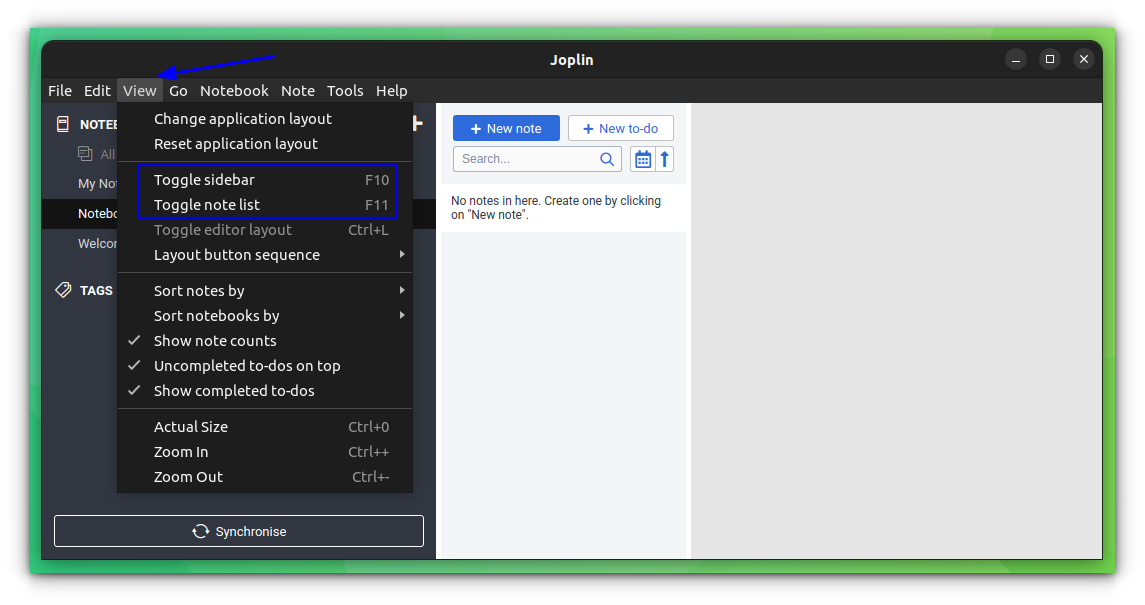
Tweaking the Sidebar
You’ll be able to disguise the sidebar or notes checklist pane from the principle menu, by going to View > Toggle sidebar or Toggle notice checklist.
Tweaking the Look
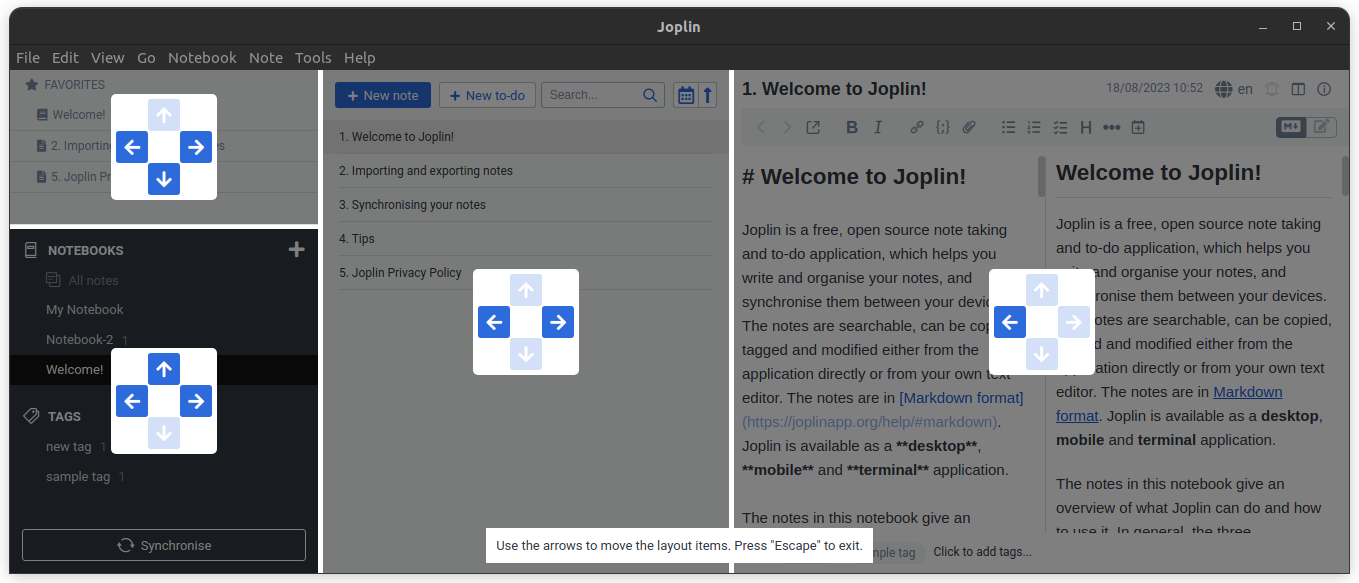
To rearrange the looks, go to View > Change Software Structure.
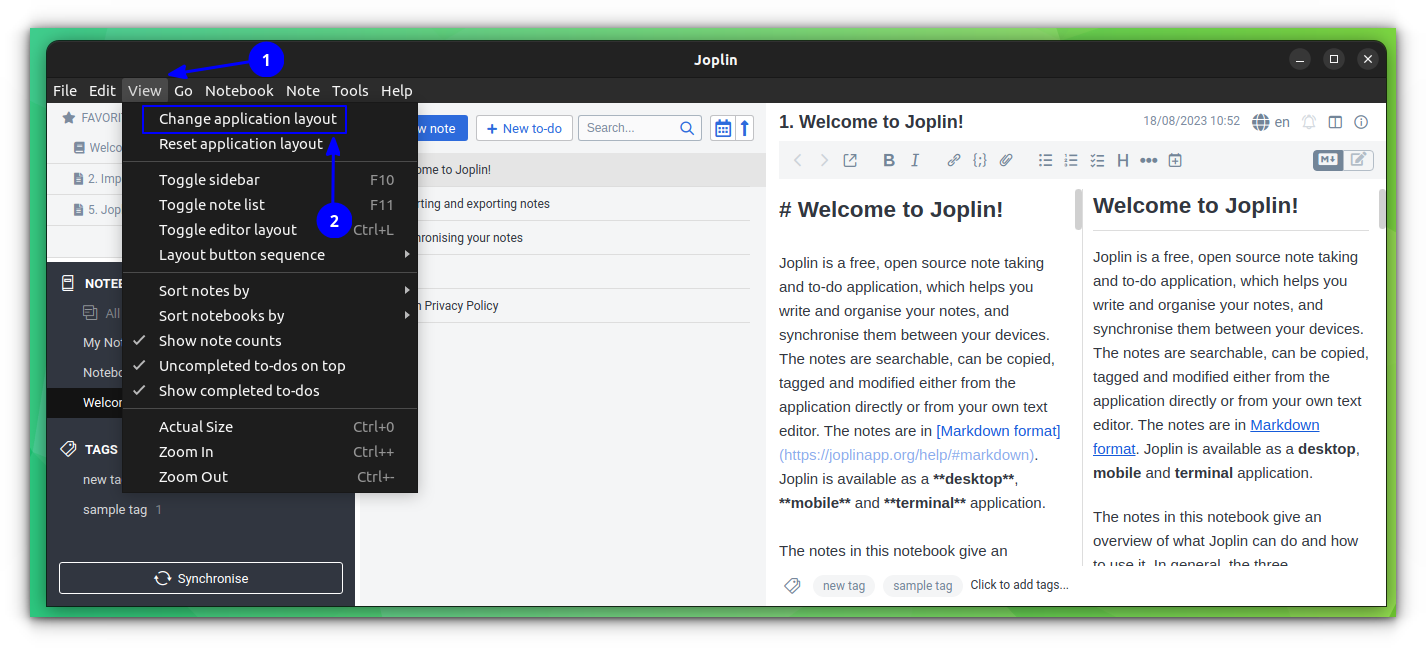
On the structure editor window, use the arrow button to rearrange what ought to seem the place, in response to your liking.
Apply Tags to Notes
Tags might be actually useful to retrieve info from a large checklist of notes. Joplin can create and add a number of tags to notes effortlessly. First, open a notice, that you just wish to apply the tag. Subsequent, enter the identify of the tag you need, on the underside a part of the notice.
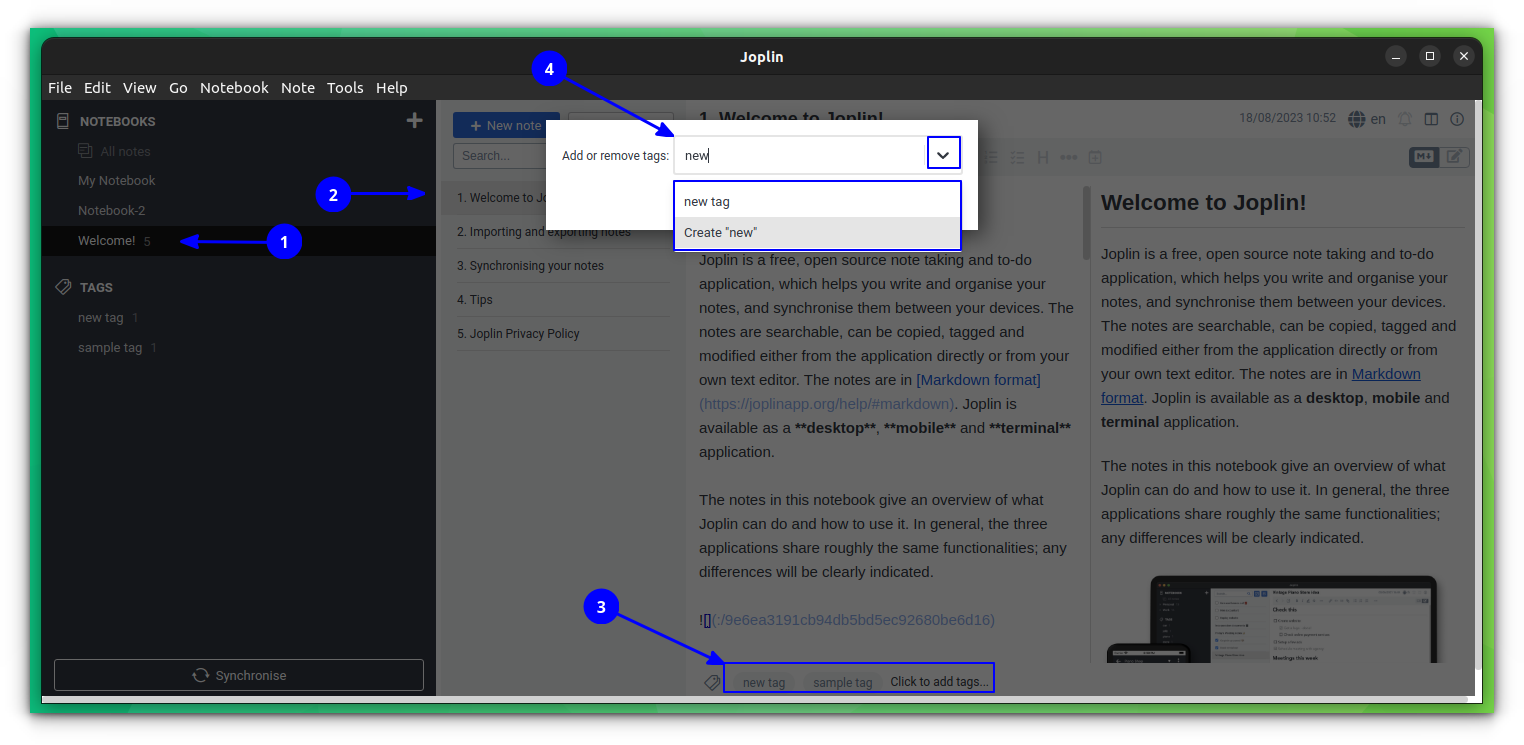
Right here, both create a brand new tag by specifying a brand new identify, or use the drop-down button to entry current tags.
Use A number of Profiles
A number of profiles in Joplin can help you preserve separate situations of the appliance, every with its set of notes, configurations, and synchronization settings. This may be helpful if you wish to maintain completely different units of notes remoted from one another.
To create a brand new profile, click on on File > Change Profile.
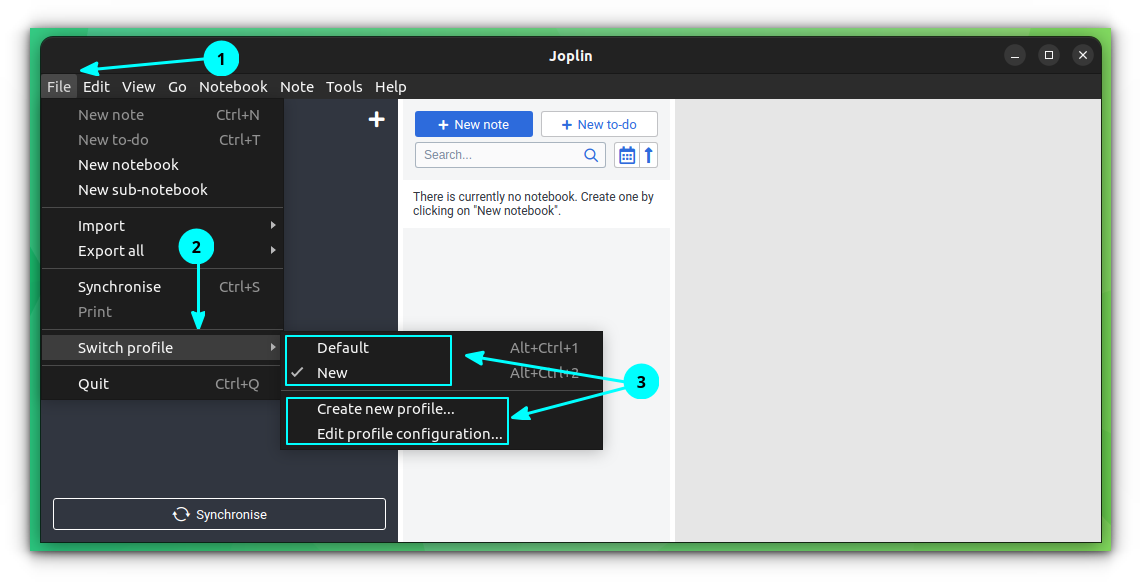
You’ll be able to create a brand new profile through the use of the Create New Profile Button. Enter the identify of the profile and hit Create. When you’ve got current profiles, you may change between them as properly. For every profile change, you want to restart Joplin.
Search Inside Notes
In Joplin, we will both search inside notes or seek for one thing amongst all of the notes.
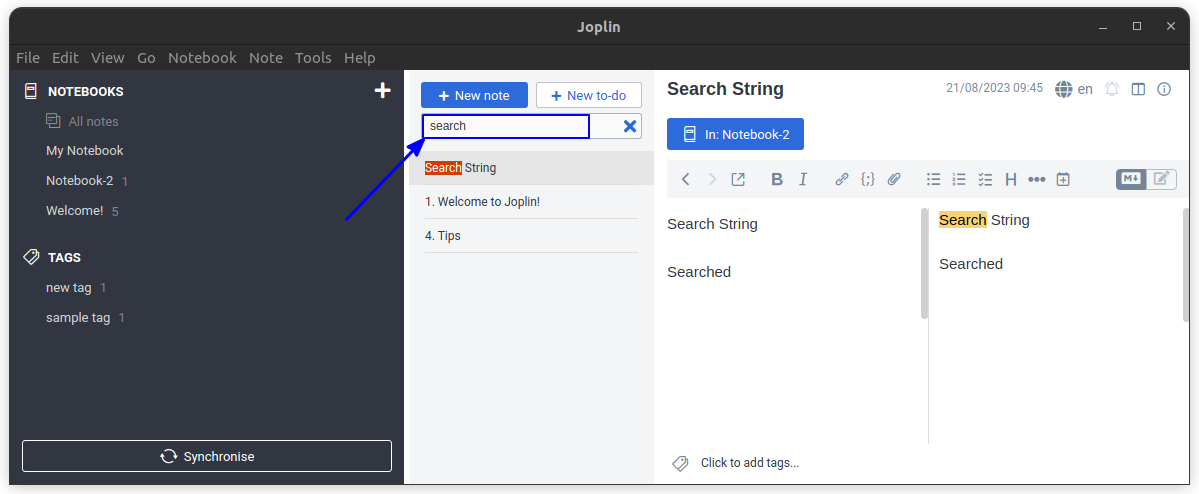
Search Via All the pieces
Press F6 in your keyboard to entry the search field. Then enter the string you wish to seek for.
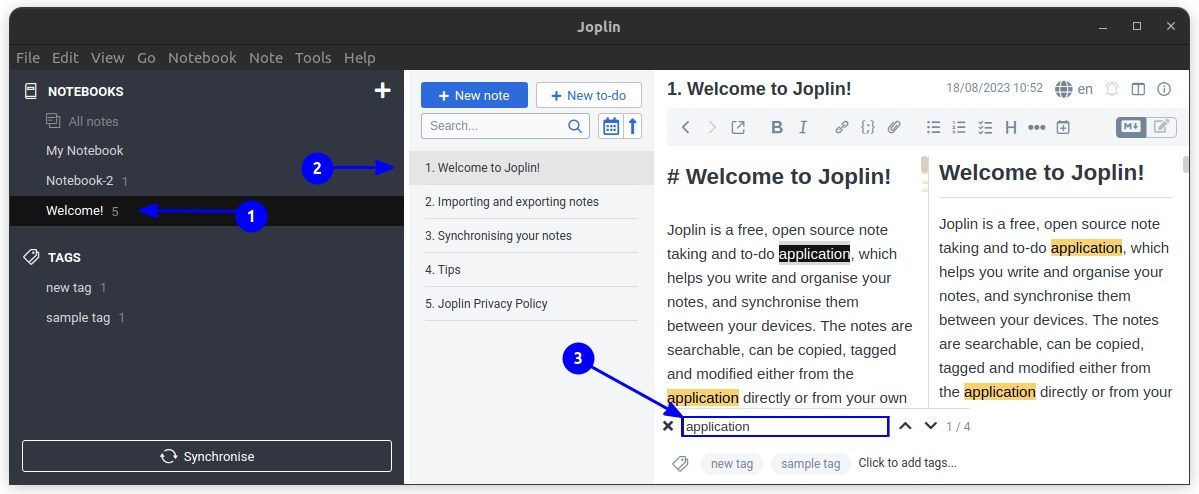
Search Inside a specific Be aware
Press CTRL + F in your keyboard to open a small search field on the underside of your notice. Enter the search string there to look.
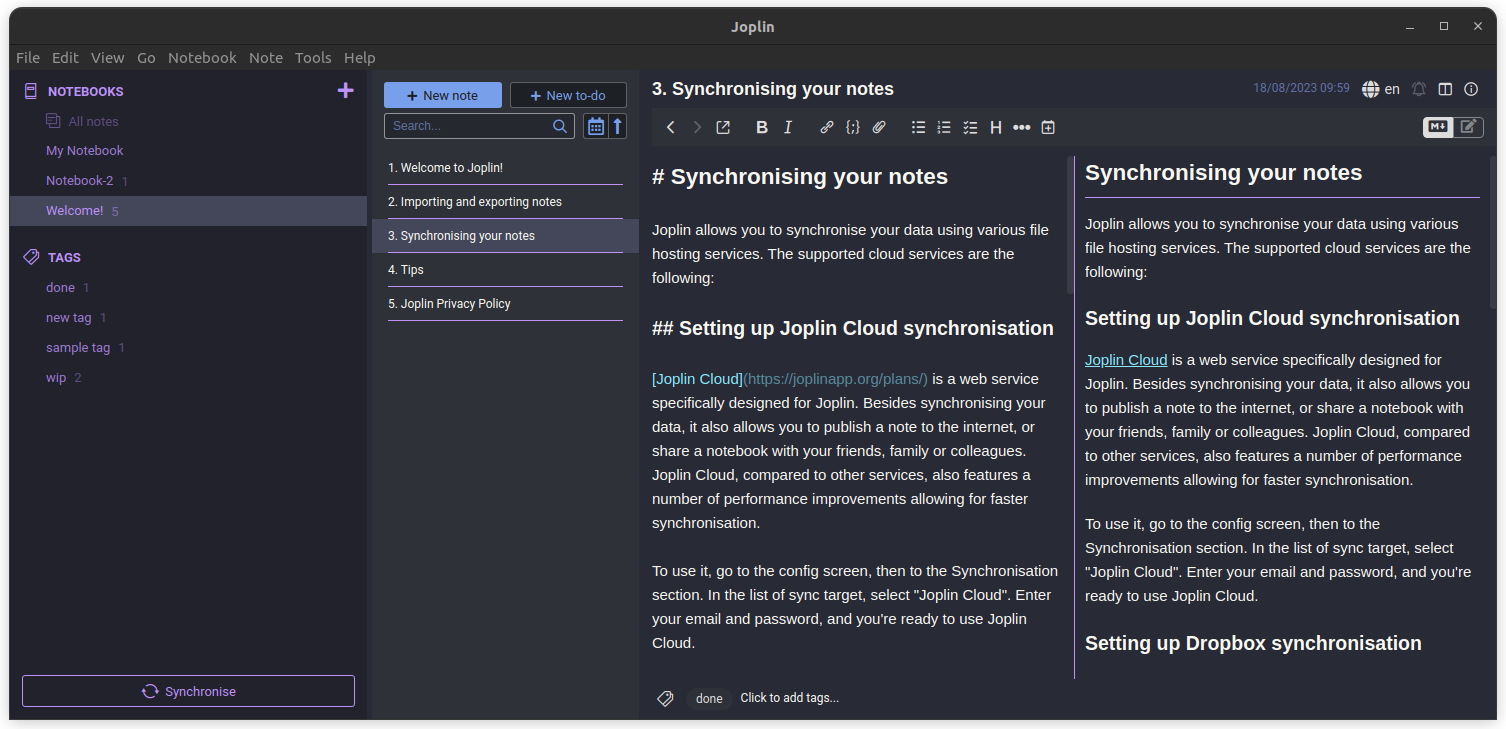
Synchronization with Finish-to-end Encryption
Synchronization with end-to-end encryption throughout several types of cloud suppliers is without doubt one of the high options of Joplin. To start out a sync, first, go to Instruments > Choices > Encryption. Right here, set a Grasp password, which will likely be used to encrypt all of your notes.
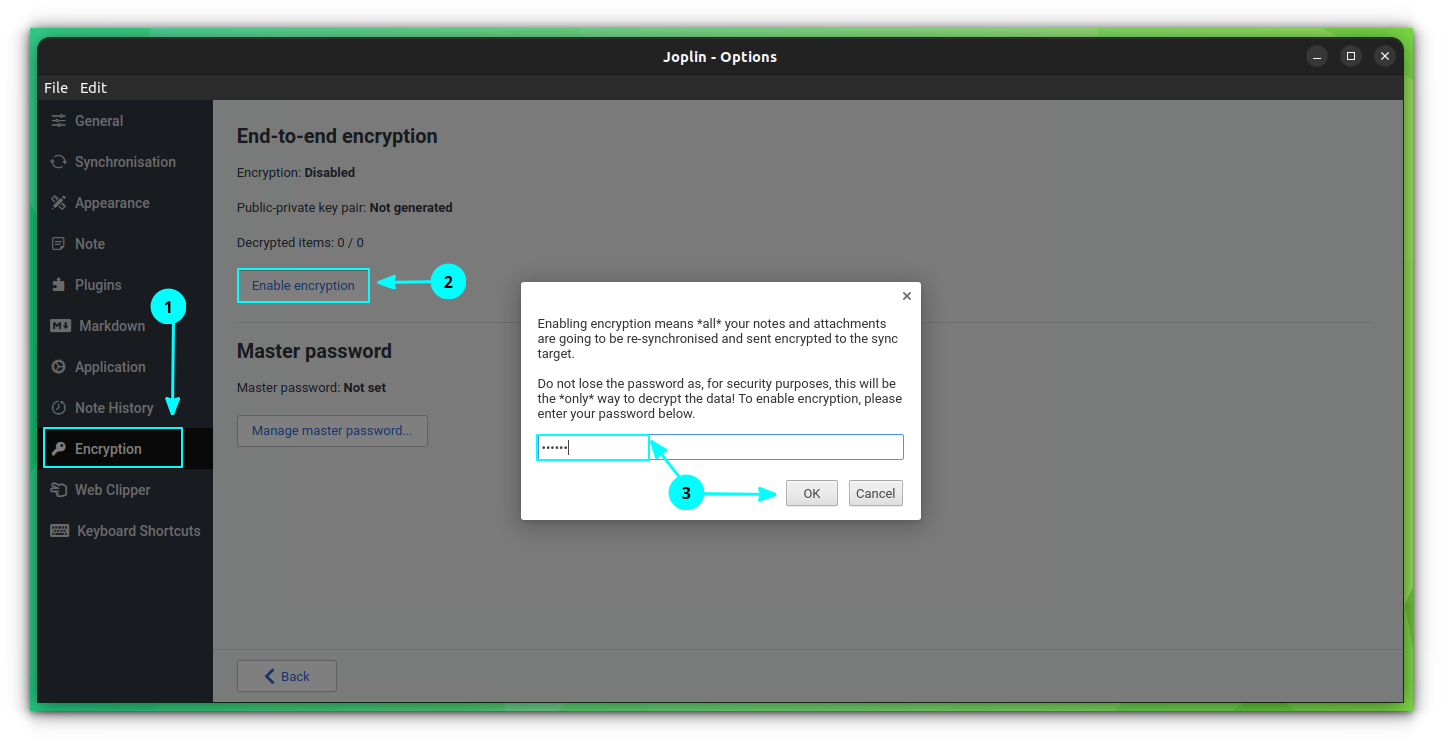
Don’t lose this password.
Now, go to the Synchronization tab and choose the open-sync wizard button. It’ll present you the accessible cloud sync choices. There are different supported methods additionally, like WebDAV Nextcloud, and so on., which you’ll take a look at as wanted.
Some choices embrace Joplin Cloud, Dropbox and OneDrive. It’s also possible to select to self-host.
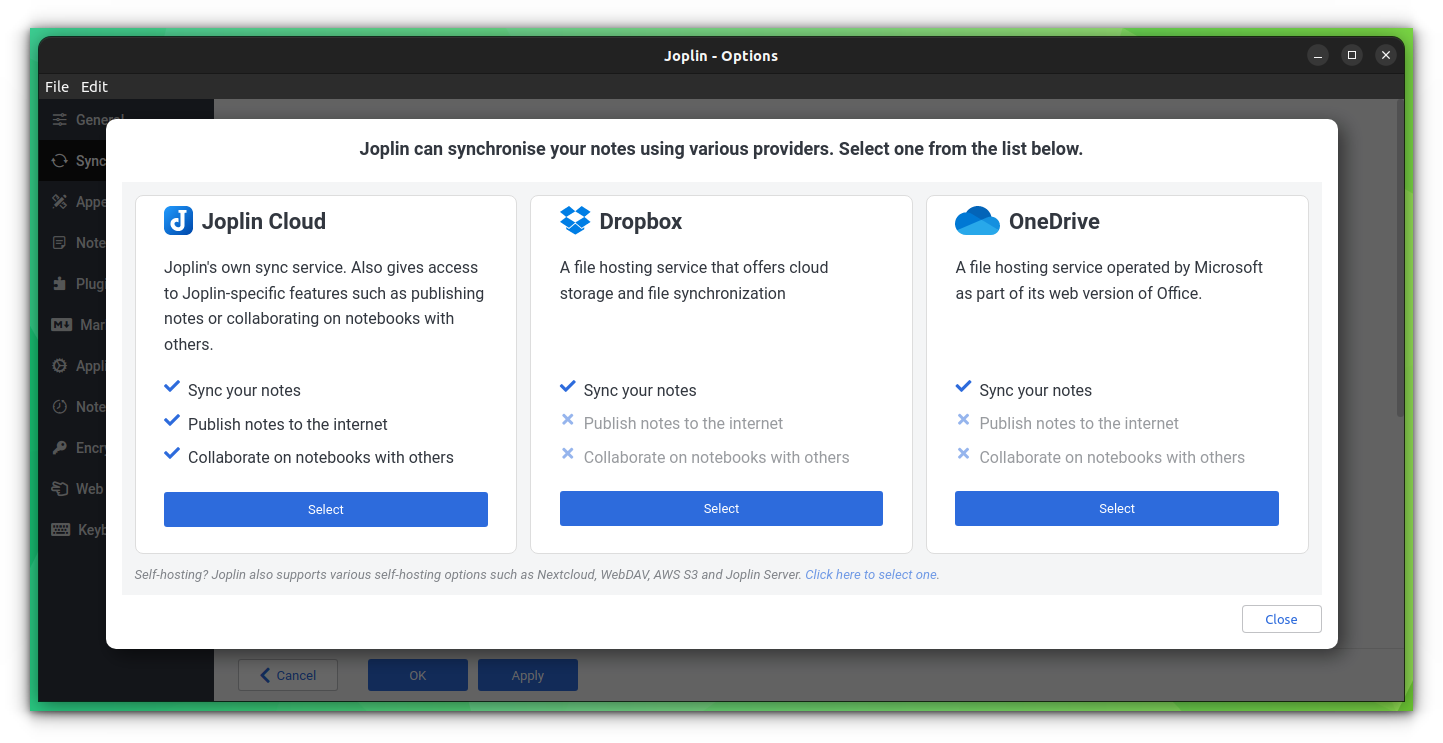
Comply with the on-screen directions to finish the sync course of.
Advised Learn 📖
7 Finest To Do Listing Apps for Linux Desktop [2023]
An excellent to-do checklist app helps you manage your work and be extra productive by specializing in significant work. Listed here are one of the best to-do checklist apps for Linux desktop.

Internet Clipper
Joplin affords an internet clipper for each Firefox and Chrome, with which you’ll take screenshots of webpages (or save webpages). You’ll be able to entry the settings on Instruments > Choices > Internet clipper.
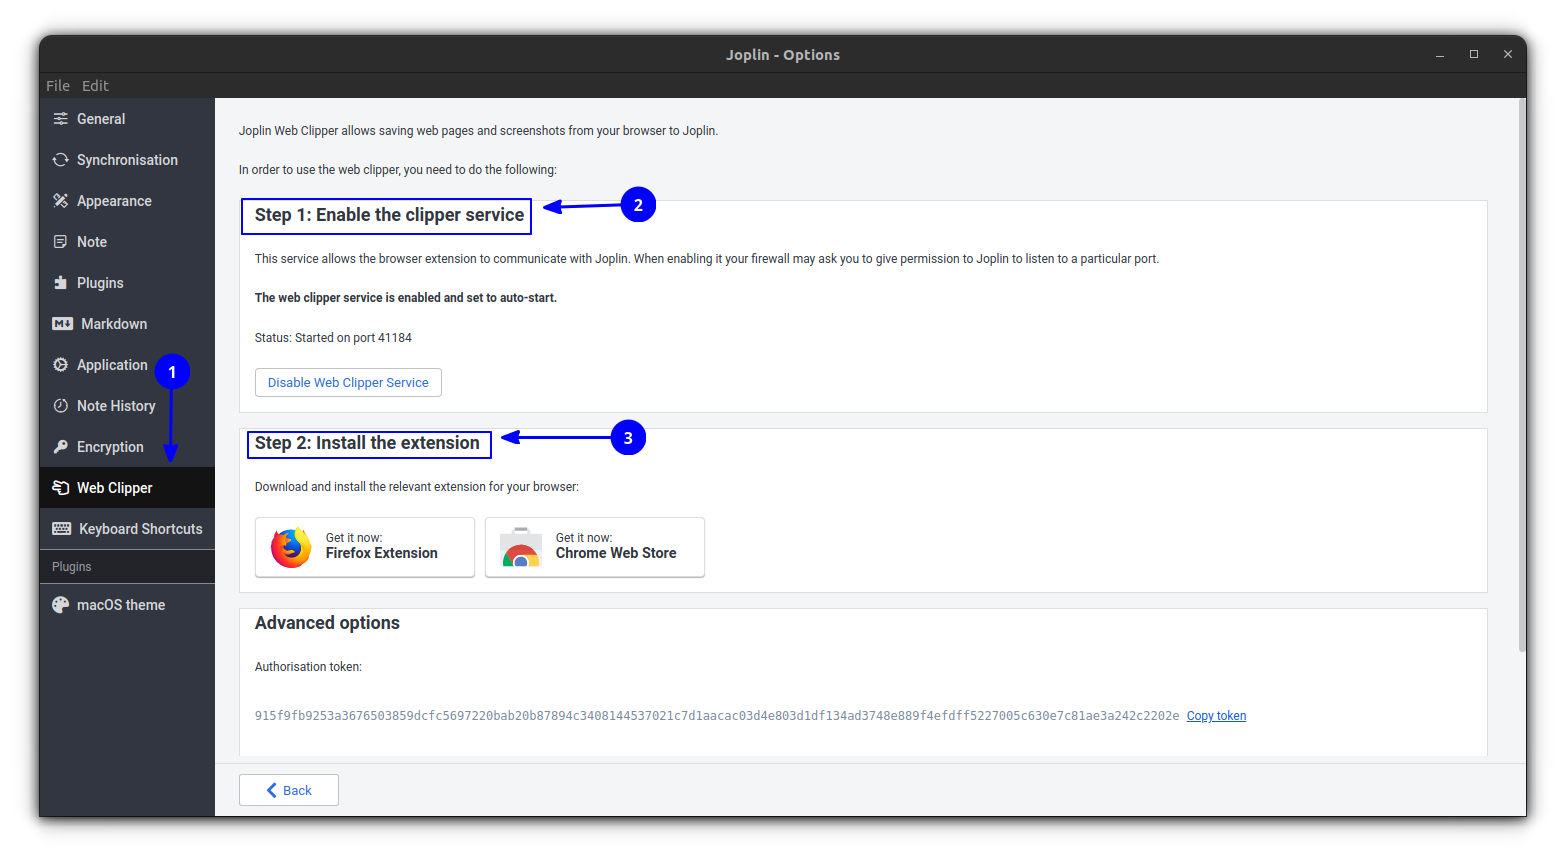
Relying in your browser, set up the suitable extension to get began.
Enhance the Efficiency Utilizing Exterior Plugins
Joplin supplies some cool plugins to make your expertise even smoother. Moreover, with some plugins, you may add extra options, that aren’t by default enabled in Joplin.
Putting in a Third-party Plugin in Joplin
Joplin options an enormous variety of third-party plugins, you may set up them effortlessly. Some theme plugins are additionally accessible, and people will likely be listed on the finish of the article.
To put in plugins, open Joplin and choose Instruments > Choices.
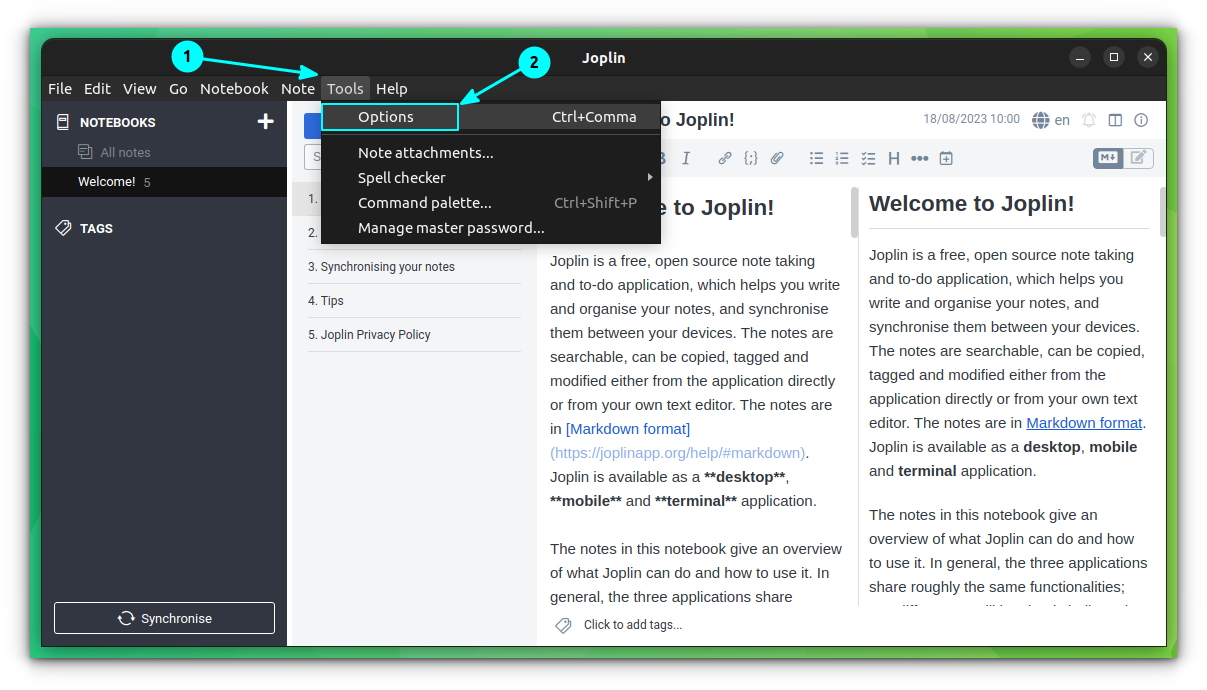
From there, head to Plugins. Now, click on on the gear icon as proven beneath. Right here, you’re going to get two choices, set up plugins from file or browse plugins.
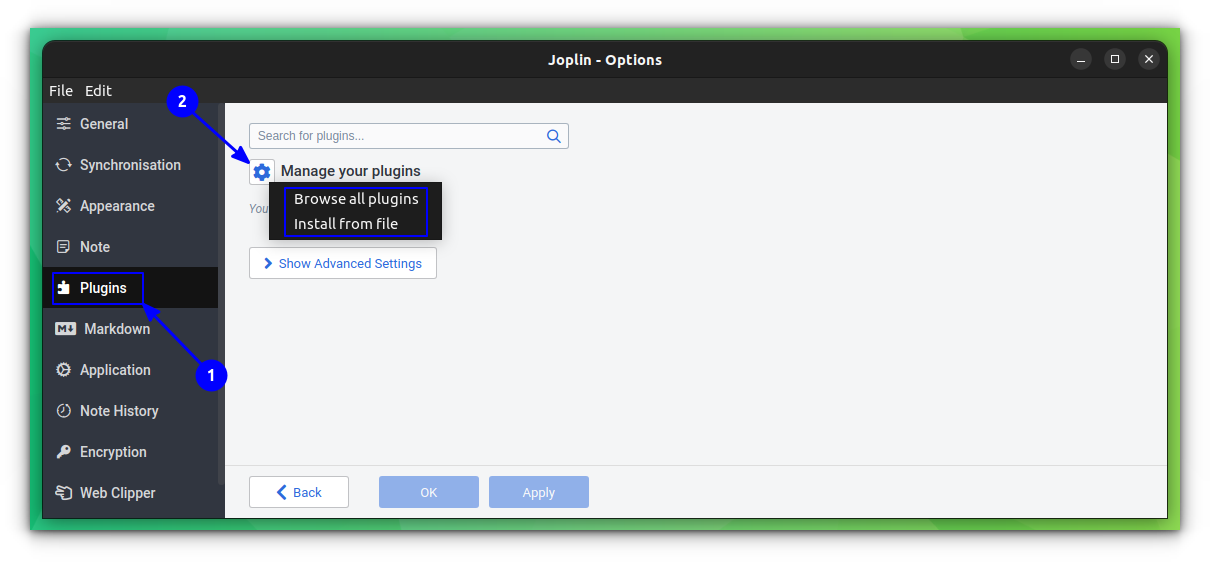
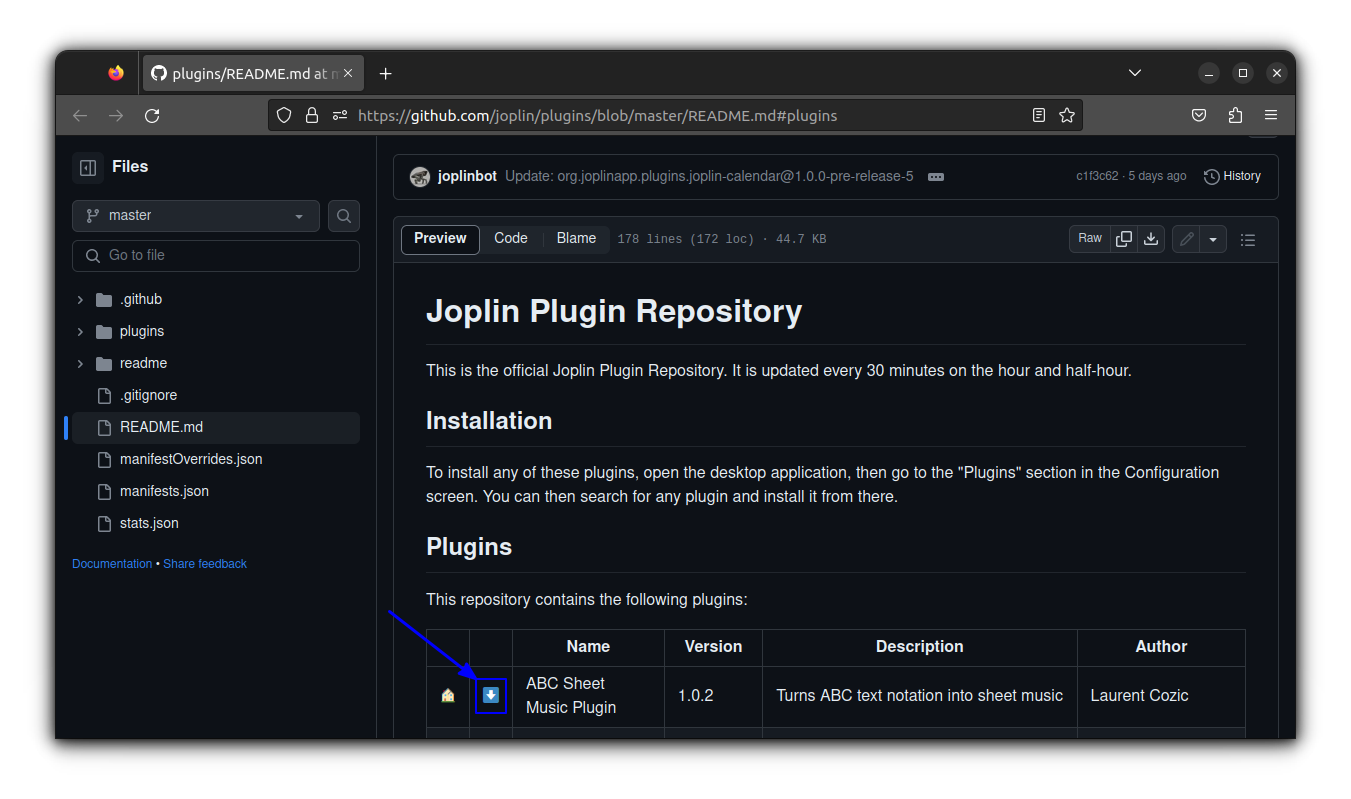
In the event you click on on the Browse all plugins button, it should carry you to the plugins obtain web page. Click on on the obtain button comparable to the plugin you need. It’ll obtain a .jpl file.
When you obtain a plugin file, once more head to Instruments > Choices > Plugins, click on on the gear icon and choose set up from file possibility. Open the plugin file you downloaded earlier.
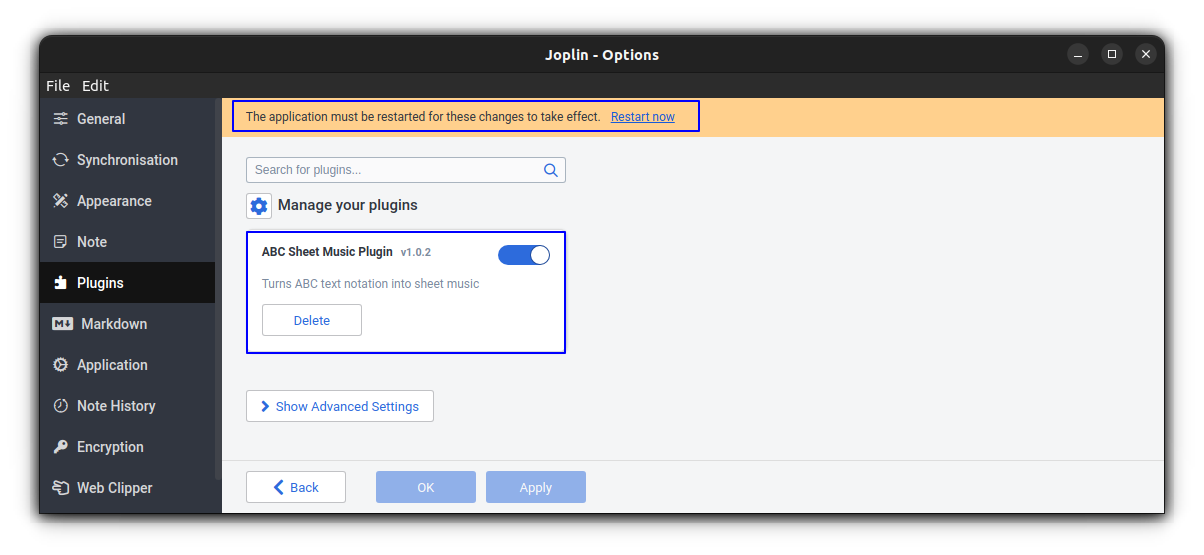
Now, restart Joplin to make the adjustments into impact.
💡
All of the plugins talked about right here can be found to obtain from the official repository.
Plugin 1: Favourite Notes
Do you wish to pin notes or notebooks with the intention to entry it rapidly? Use the Favorites’ plugin for this. Obtain and set up this plugin. Now, whenever you reopen Joplin, you may see the Favorites panel on the right-hand facet (default place).

You’ll be able to add a notice or pocket book to favourite by right-clicking on them and choose Add to favourite, or simply drag and drop to the favorites panel.
Plugin 2: Be aware Graph with Visualization of Inner Linking
One of many options that information administration functions like Obsidian affords is, the notice graph, a visible overview of notes and its hyperlink. There’s a related function accessible in Joplin as a plugin. First, obtain it and set up the Graph plugin to Joplin.
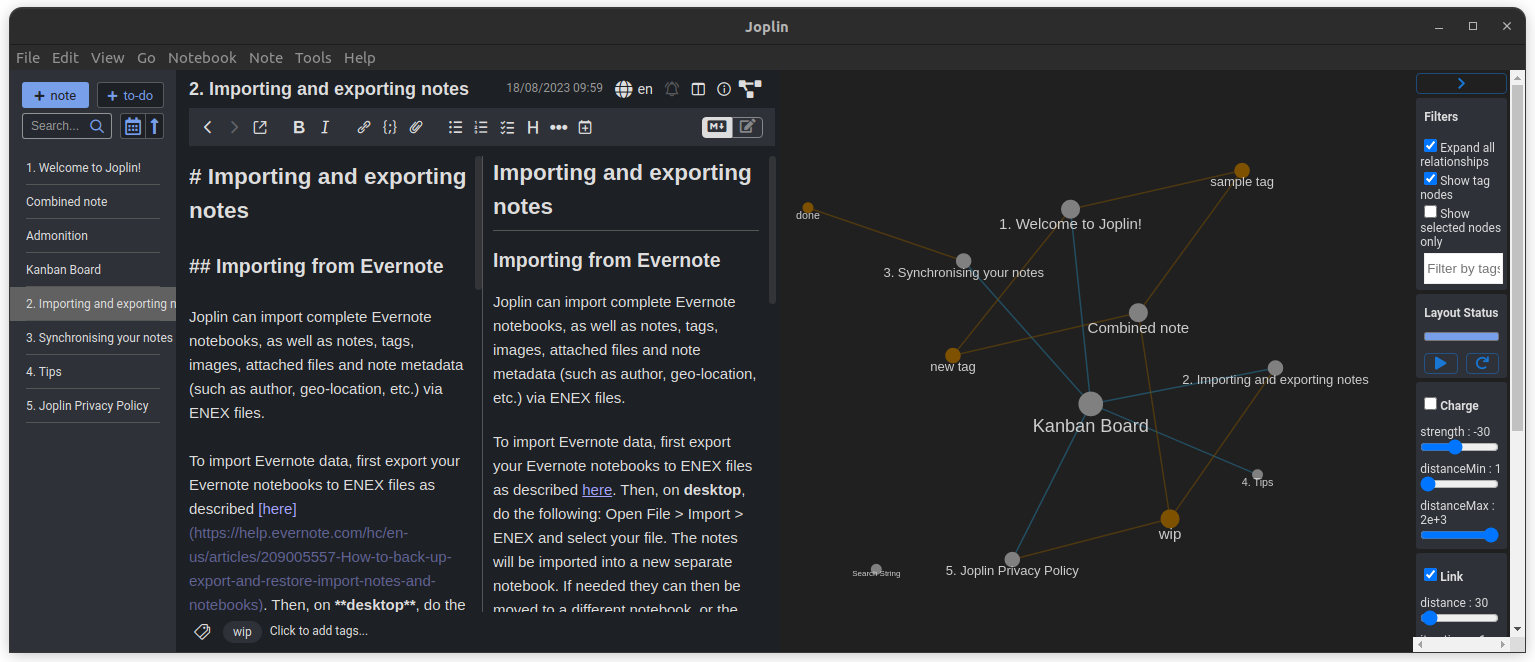
It’s also possible to see a number of choices to tweak on the fitting facet.
Plugin 3: Kanban Board
Kanban boards could make you productive, particularly if in case you have a mess of duties. In Joplin, kanban board function is on the market as a plugin. First, you want to obtain and set up the plugin. Then, restart Joplin.
🚧
The board will likely be accessible inside a pocket book and its sub-notebooks solely.
Thereafter, open an empty notice within the required pocket book and enter the code beneath:
“`kanban
columns:
– identify: Backlog
backlog: true
– identify: Work in progress
tag: wip
– identify: Completed
tag: completed
“`
You’re going to get a board, and you’ll change the present area names or add new fields by modifying the above code chunk.

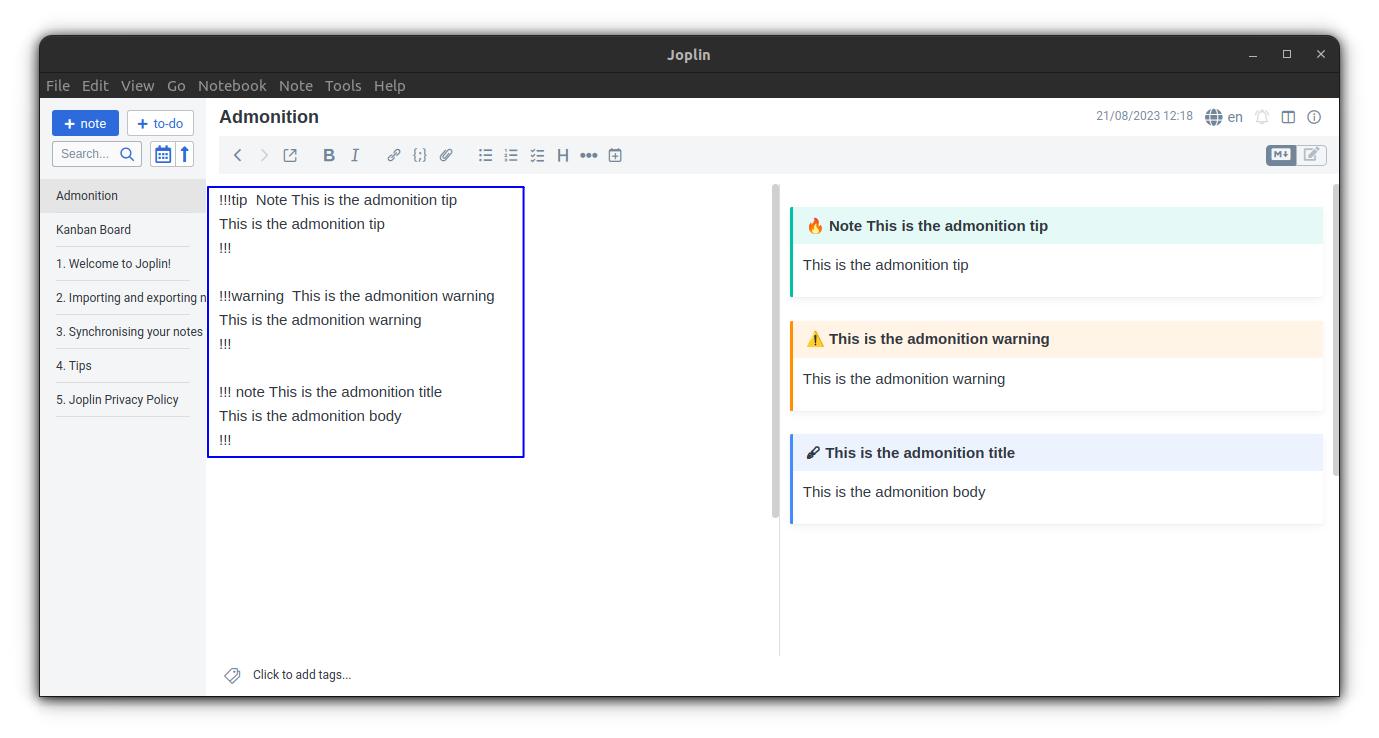
Plugin 4: Admonition Blocks
Notes might be improved utilizing particular blocks, equivalent to ideas, warnings and so on. Obtain and set up the Admonition plugin. Restart Joplin. Now, whenever you wish to add a particular block, use the code beneath:
!!!identify Your Title Goes Right here
That is the admonition physique
!!!
For instance, so as to add a tip, use:
!!!tip notice That is the admonition title
That is the admonition physique
!!!
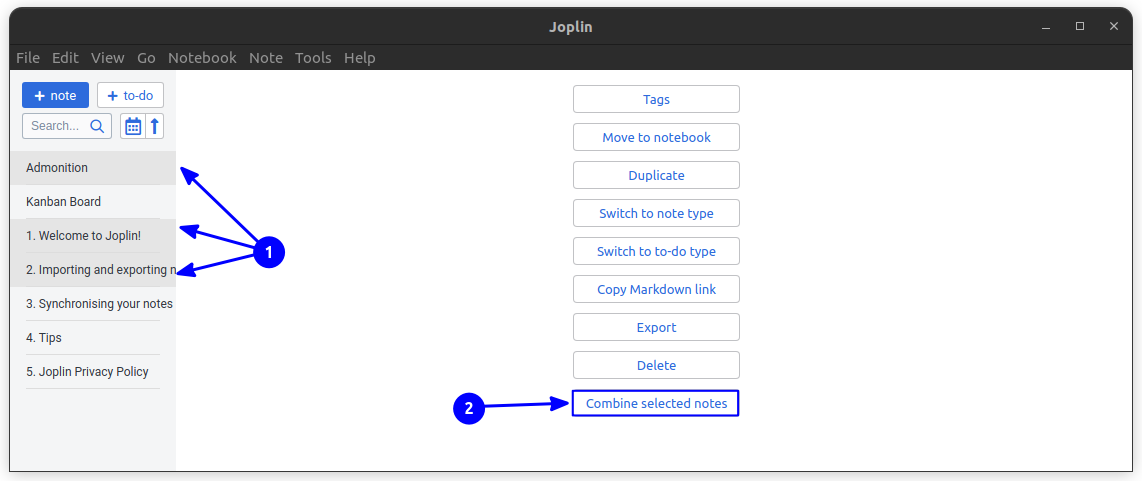
Plugin 5: Mix Notes
Use this extension to mix notes. As soon as put in, choose the notes you wish to mix by CTRL+click on. Now, you may see a brand new part with numerous choices on the fitting. Click on on mix notes to mix them into one notice.
Plugin 6: Coloured Textual content in Notes
Making use of completely different colours to the textual content inside a notice will likely be useful for college kids to focus on vital a part of notes. In Joplin, to perform this, obtain and set up the Textual content Colorize plugin.
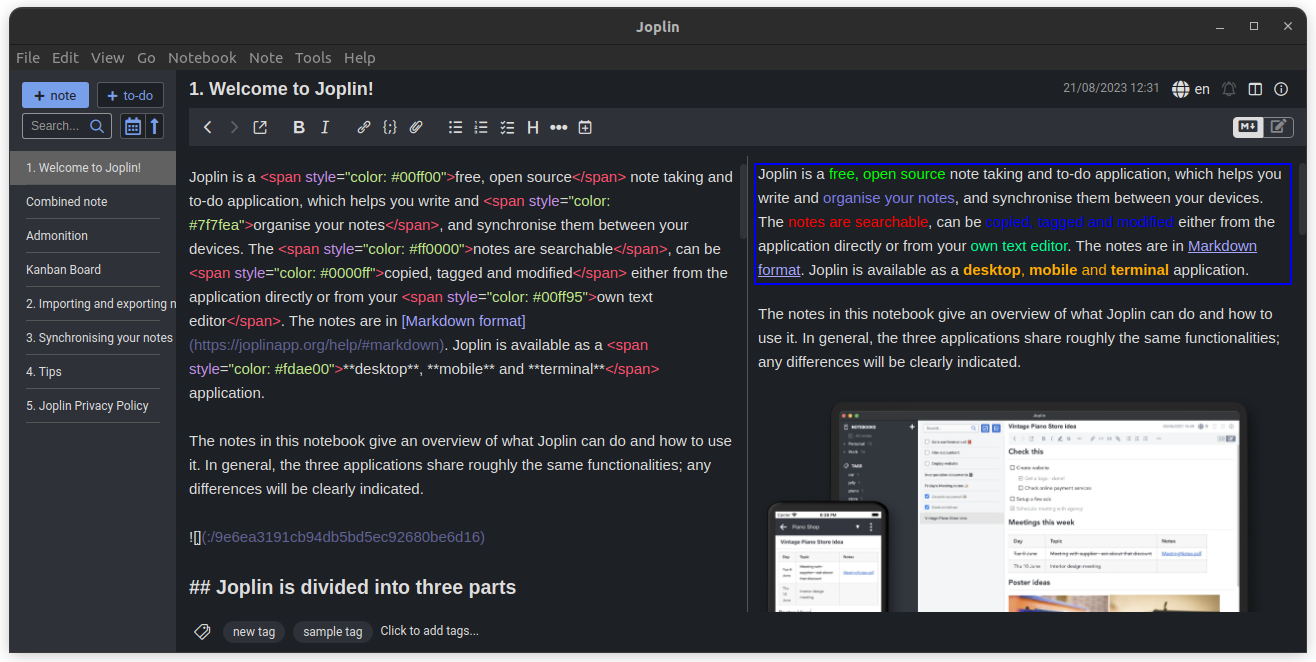
Now, on the markdown editor interface, choose the textual content you wish to change shade and press CTRL+SHIFT+C. You’re going to get a shade palette. Choose a shade and press both apply as textual content shade or “Apply as BG” to set it as a spotlight shade.
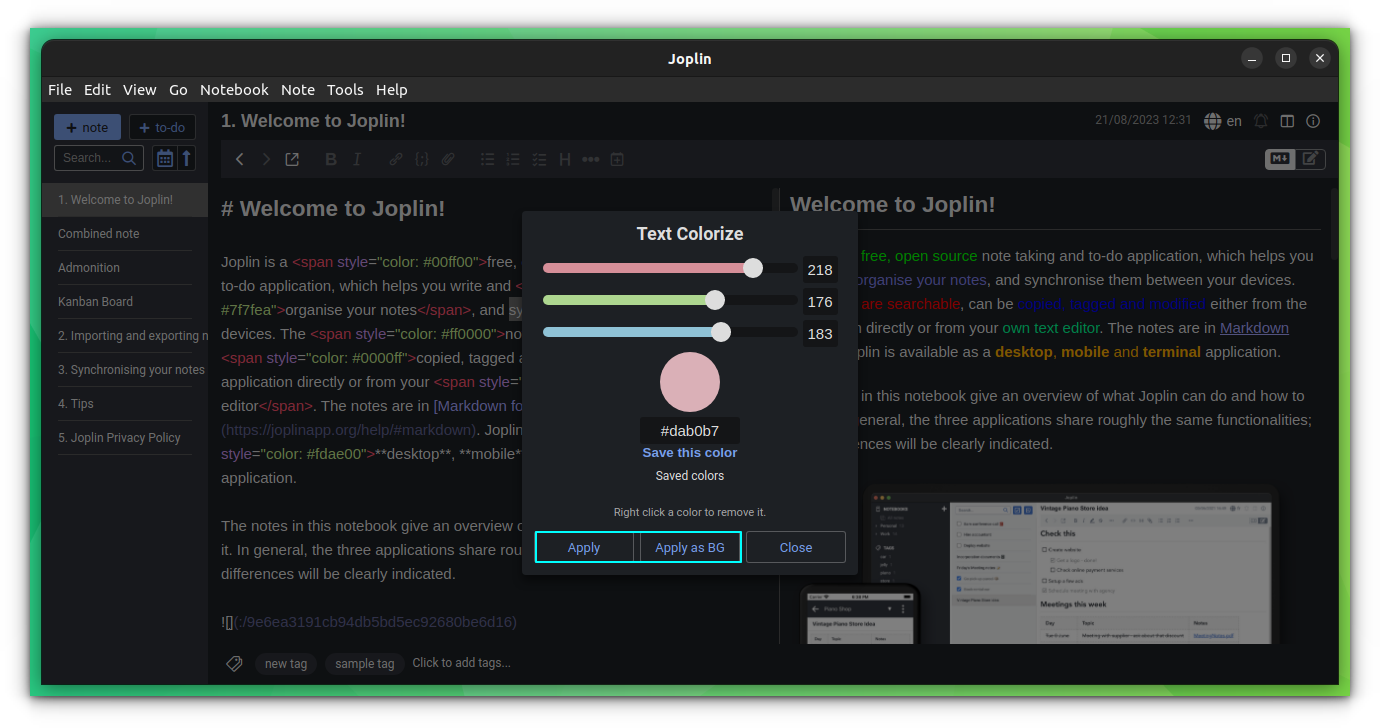
That is it. You’ll be able to see the consequence beneath.
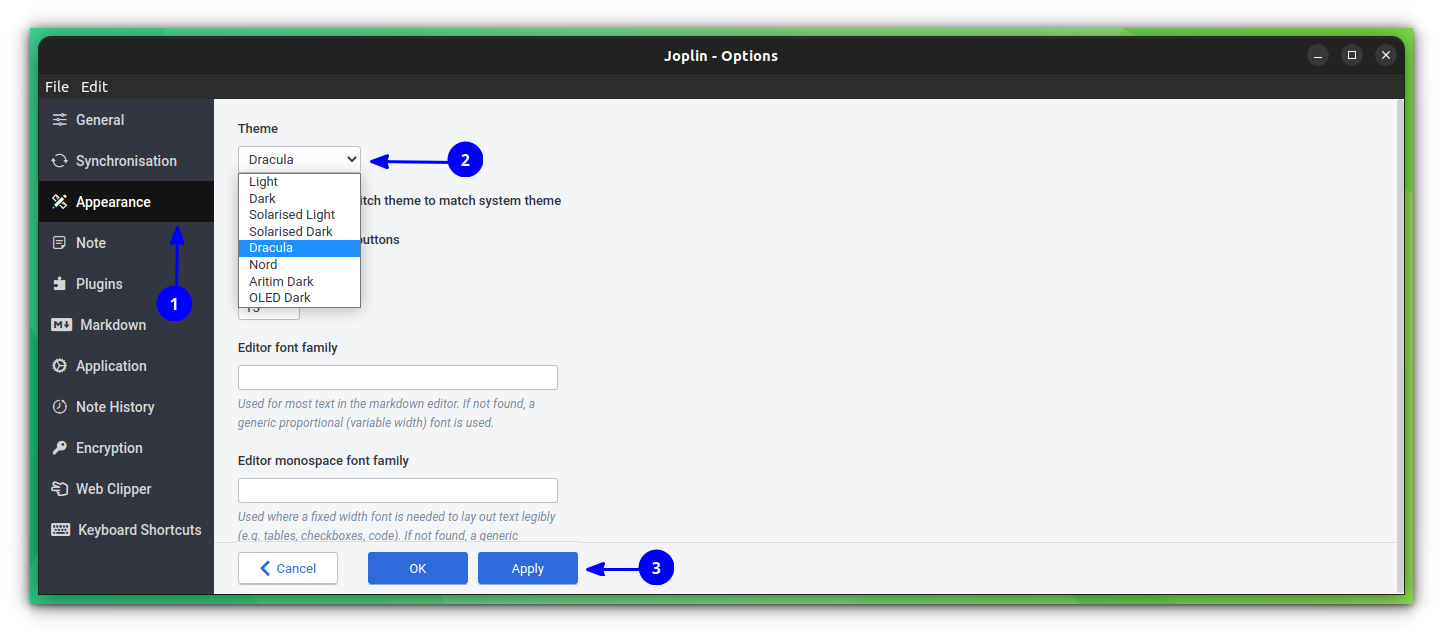
Theme Joplin with third-party themes
By default, Joplin supplies some presets, like Darkish, mild and so on. To change between them, go to Instruments > choices > Look. From there, selected your theme and click on apply.
If you want to discover different themes over the default choices, I spotlight two choices beneath.
🚧
Don’t use a number of third social gathering themes concurrently. This could trigger points. You’ll be able to disable any theme plugin on Instruments > Choices > Plugins and use the toggle button.
Apply a GitHub Theme
This can be a minimal GitHub theme for Joplin. Obtain the theme utilizing the button beneath and set up it.
Now restart Joplin to get impact.
Give Joplin a macOS Look
This theme will give a macOS impact for Joplin.
Wrapping Up
Joplin Notes is a breeze to make use of. Positive, some could not need all of the functionalities it affords. However, should you have no idea what you would possibly require in your note-taking journey, you can’t go flawed with Joplin Notes.
💬 How is your expertise with Joplin Notes? Did I miss itemizing any of the vital options that you just discover useful? Let me know your ideas within the feedback beneath.


![[SOLVED] ShareFile for Outlook Has Fired an Exception Error](https://mspoweruser.com/wp-content/uploads/2024/07/sharefile-for-outlook-has-fired-an-exception.png "[SOLVED] ShareFile for Outlook Has Fired an Exception Error")


")


")

")


