

Secure Diffusion has taken the AI artwork world by storm, empowering customers to generate beautiful and imaginative visuals with only a few textual content prompts. This opens thrilling potentialities for creatives, together with crafting impactful industrial posters.
On this submit, we’ll delve into utilizing Secure Diffusion to design a compelling poster for a product. After ending this submit, you’ll be taught:
Learn how to put together a photograph of a product to be used in Secure Diffusion
Learn how to create an interesting industrial poster with none refined drawing approach
Let’s get began
Secure Diffusion Venture: Business PosterPhoto by Wexor Tmg. Some rights reserved.
Overview
This submit is in 4 elements; they’re:
Venture Concept
Creating the First Draft of the Poster
Sprucing the Poster
Different Tips
Venture Concept
Let’s think about you’re employed for a beauty firm, and a brand new fragrance is coming quickly. You could have an image of the fragrance bottle, as follows, and also you wish to create a poster for it. To make issues easy, let’s assume this poster has no textual content, and also you wish to think about the graphics solely.
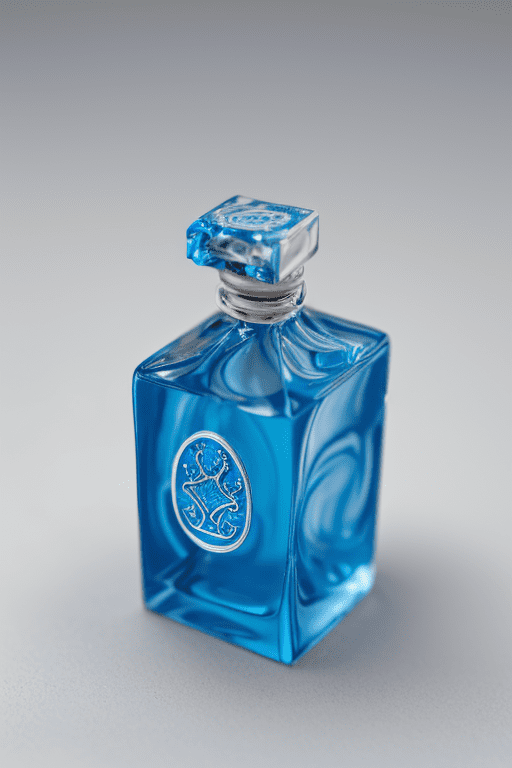
A bottle of fragrance for the mission (not actual product, an creativeness generated by Secure Diffusion)
It is a small blue bottle. The theme of this product is “ocean,” the poster design is as much as your creativeness.
Creating the First Draft of the Poster
First, let’s deal with the background as a result of it units the model and ambiance of the general poster. A easy immediate works:
Deep within the ocean, a faculty of fish swimming in a distant background, coral at backside

Testing the immediate to confirm the mannequin and different parameters generates the image that meets your expectation.
This seems good. Let’s add the product.
First you might want to use Photoshop of GIMP to create a template. This is a crucial step that you will note the explanation later. You arrange the canvas (e.g., 512×768 pixel), in white background, and put the product on it. Word that you might want to resize and rotate the product and put it on the canvas in the identical approach as you prefer to it to be within the ultimate poster. An instance is as follows:
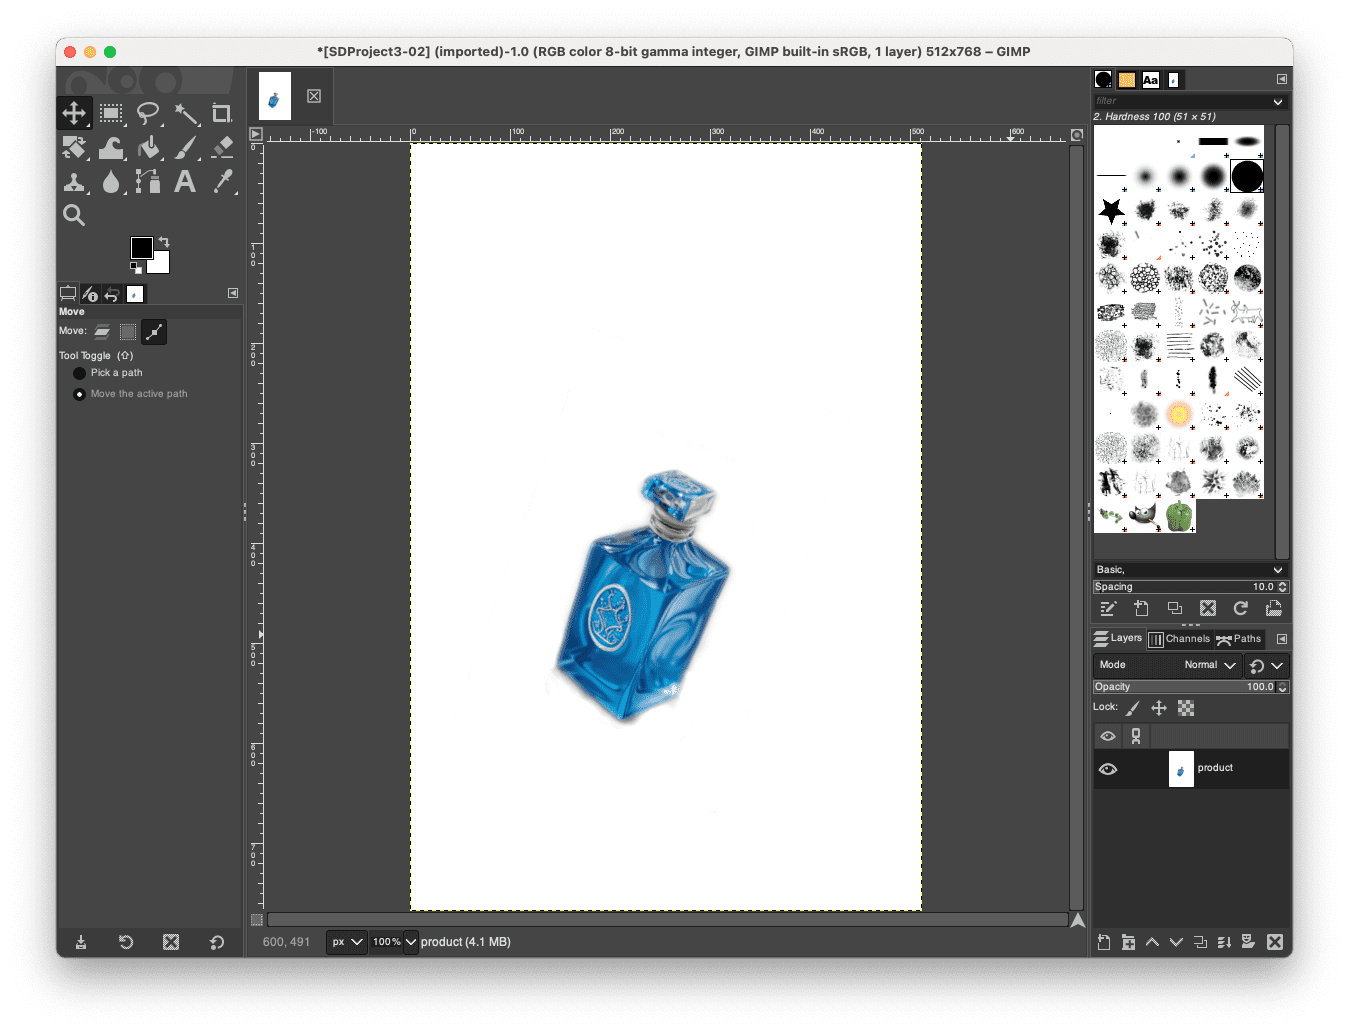
Making a template of the poster in GIMP
Save this image. Then return to the Secure Diffusion Net UI. At ControlNet, add this image and choose Canny because the management kind. Set the width and top of the picture generated to be 512×768 pixels. Modify the immediate to say the bottle, corresponding to
Deep within the ocean, a faculty of fish swimming in a distant background, coral at backside. A bottle suspending within the water.
Run generate and you will note an image like the next:

Creating an image of a bottle in ocean with the assistance of ControlNet
You see that the generated image is completely different from the one with out ControlNet. That’s anticipated since you modified the diffusion course of quite a bit. You possibly can attempt to enhance the batch depend and batch dimension to generate a couple of and choose the very best.
However right here you could have a critical situation: The bottle is just not the identical as the unique. On this case, it’s best to export the picture and do some enhancing. Bear in mind the template picture you created firstly? As a result of it’s a white background, you possibly can simply set the background clear in Photoshop or GIMP. Make the newly generated image as a background layer, the unique template as the highest layer, and take away the white background. This makes the proper product on the background, and it matches completely on the scale and place since you used the Canny kind ControlNet in producing the image. You will notice an impact like the next:
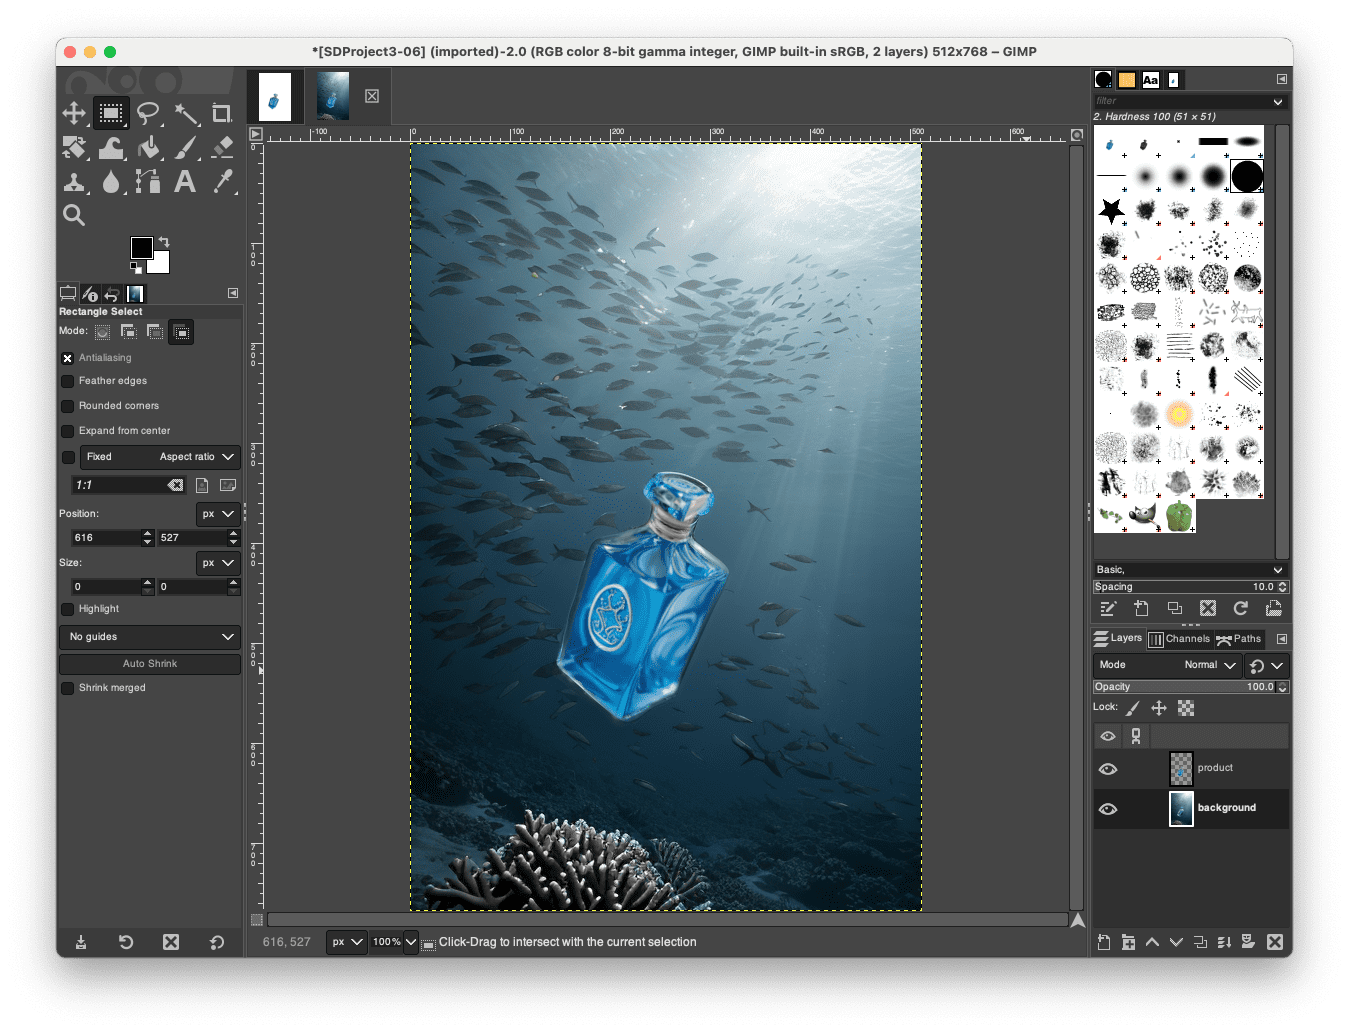
Utilizing GIMP to overlay the precise product over the generated image
Seems to be proper however not excellent. The bottle might blended into the background awkwardly. And the decision is just too low to be a poster. However let’s reserve it as an intermediate image first.
Sprucing the Poster
The trick to do minor contact as much as the output is to make use of img2img technology in Secure Diffusion. You present the picture with no immediate, and set the denoising energy to low however not zero worth, then you’re asking Secure Diffusion to regenerate the identical image with some minor change. Normally, these are the touch-ups on the elements that look unnatural.
On this instance, you add the picture at img2img tab, and set the resize mode to “Simply resize” (in order that facet ratio is preserved). Then choose the “Resize by” tab and max out it to 4x scale. Most sampling strategies work however you need extra sampling steps (so every steps are small to keep away from drastic change to the image). You possibly can decrease the CFG scale a bit, however set “Denoising energy” to 0.33.
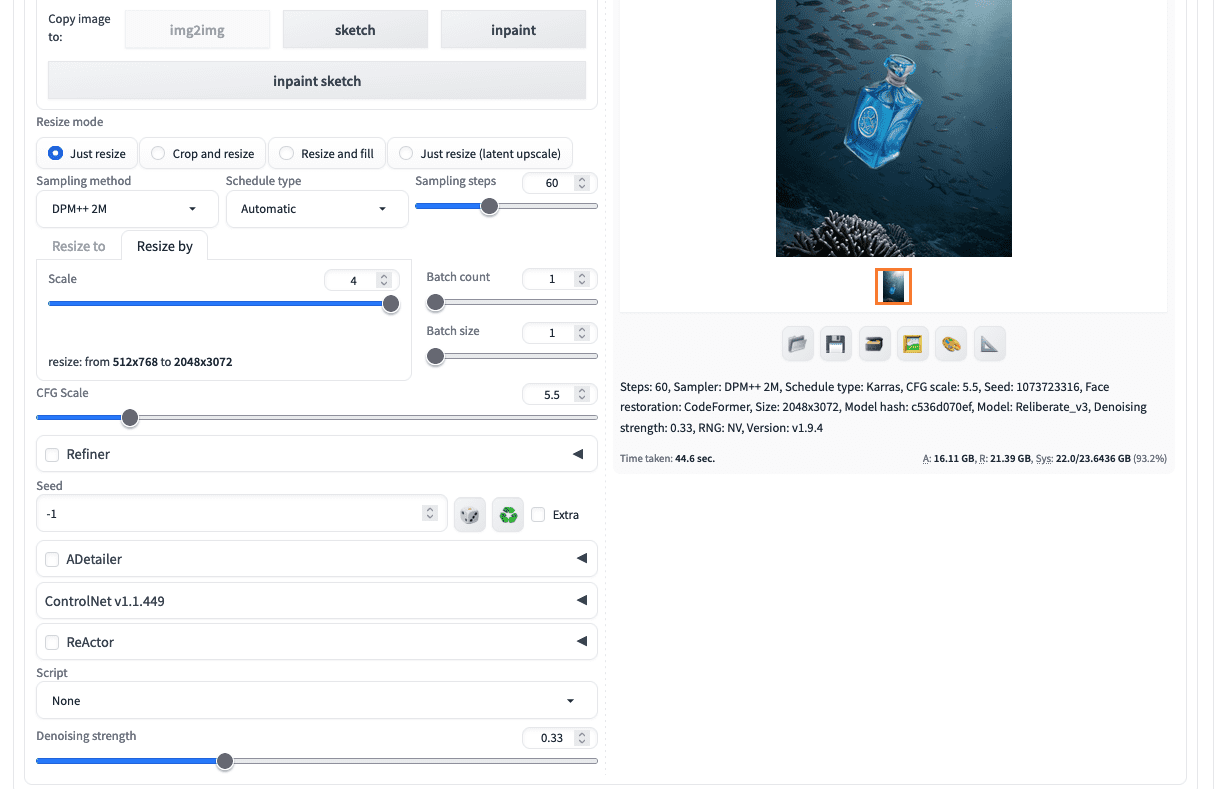
Resizing the poster as a method of retouching
The result’s as follows:

The generated poster
Different Tips
That is an instance of a multi-step workflow. You possibly can discover the numerous options in Secure Diffusion and mix them in a number of steps to create a tremendous consequence.
For instance, you need to use two ControlNet models within the txt2img step: One for the topic and one for the background. You should utilize Canny for the topic as above. However as a substitute of writing an in depth immediate to create the background, you possibly can present a pattern image to the second unit of ControlNet and set the management kind to IPAdapter. On this approach, the pattern image’s coloration scheme and magnificence will probably be adopted. You should utilize an easier description of the background because the immediate. The diffusion course of will know what to generate.
Bear in mind once you use a couple of ControlNet models, you should decrease the management weight of all models as a result of the full affect to the ultimate output is the sum of all of the weights.
Additional Readings
This part gives extra assets on the subject if you wish to go deeper.
Abstract
On this submit, you skilled a workflow to contain a number of steps in Secure Diffusion to create the ultimate output. You used txt2img to create an image and img2img perform to shine the output. You additionally used exterior image editor to assist creating pictures to be used with ControlNet. Not a single device to get all of the job completed, however you discovered learn how to use Secure Diffusion as a constructing block for a bigger mission.


")

")


")


