

Steady Diffusion is a strong instrument that helps you generate photos. It’s enjoyable to play with the generative AI instrument. However it will be helpful if the instrument may enable you in an actual job. On this put up, you will notice how one can leverage the ability of Steady Diffusion to work on one thing life like and sensible. After ending this put up, you’ll be taught:
The reasoning course of to determine how one can use Steady Diffusion
Augmenting different instruments with Steady Diffusion in your artistic challenge
Let’s get began
Steady Diffusion Venture: Phrase ArtPhoto by Zach Key. Some rights reserved.
Overview
This put up is in three components; they’re:
Venture Concept
Creating the Image
Identical Concept on a Totally different Theme
Venture Concept
Think about you’re engaged on a challenge and wish some phrase artwork. It may be a banner to your web site or the important thing visible in a poster. Phrases must be seen, however graphics are additionally necessary. How are you going to mix letters into photos? You need to make the consequence very interesting, not on the degree you could simply create with Photoshop or Microsoft Phrase.
Let’s take into account the theme of “inexperienced” to preserve the surroundings. We would like an image of the character and the phrase “inexperienced”. Let’s see how it may be created.
Creating the Image
It’s straightforward to create a scene of nature with an acceptable immediate in Steady Diffusion. Overlaying textual content onto an image shouldn’t be too tough as a result of you may simply add textual content with a drop shadow to an image background in PowerPoint. However making the scene mix with the textual content would wish some ability, even with Photoshop, and it takes a big period of time, too.
The concept of offering a immediate to manage the image era however on the similar time imposing extra constraints on the image is what ControlNet can do. To make use of ControlNet, you want a picture. Let’s create one with GIMP.
Assume the goal image is 768×512 pixels (keep in mind the default decision for SD1 fashions is 512×512 pixels; you shouldn’t make the dimensions too totally different). You’ll be able to arrange the canvas to this dimension in GIMP and make a textual content “GREEN” in black colour on a white background. Then save the image as PNG.
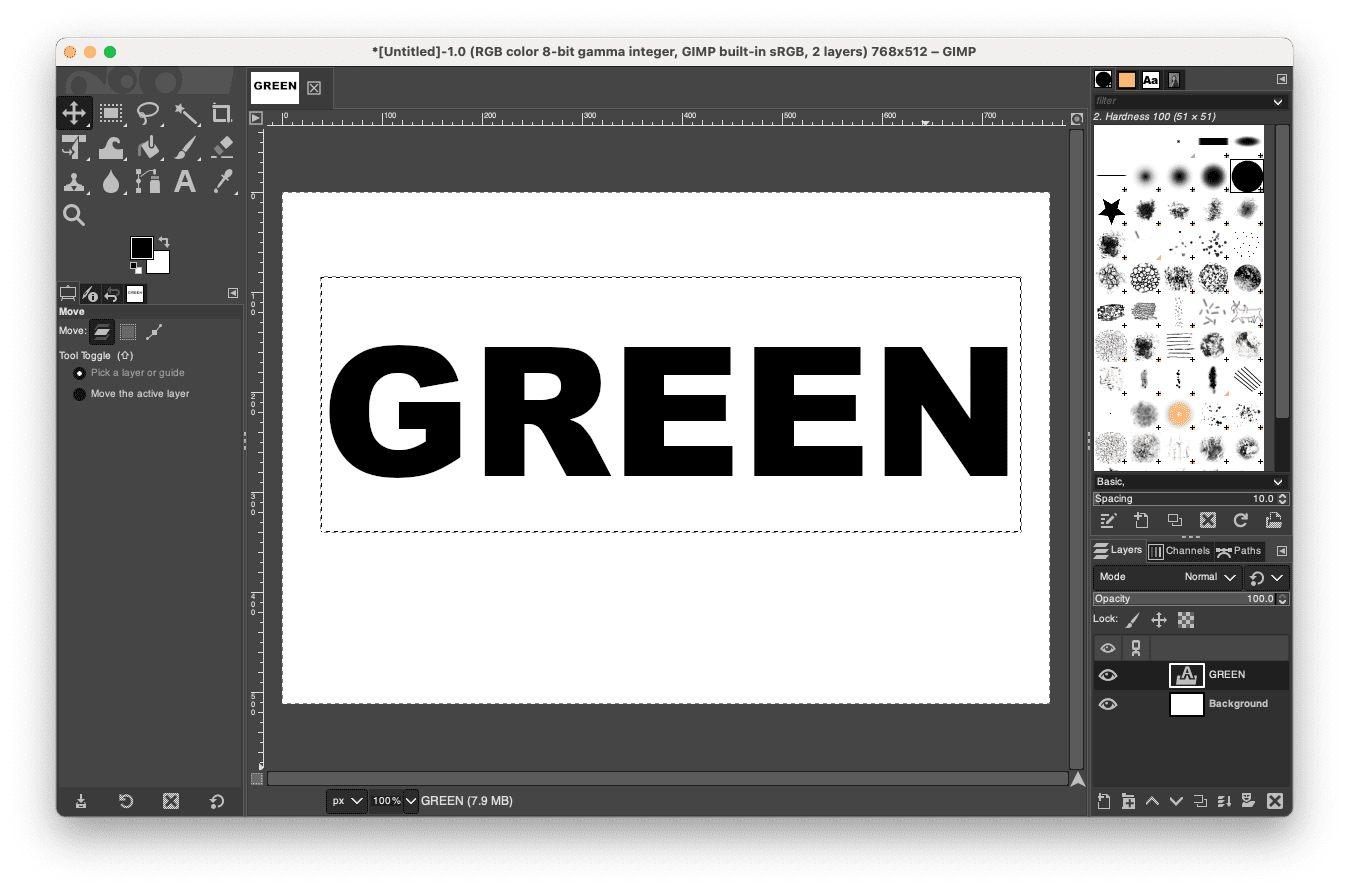
Creating an image with white background and black textual content “GREEN”.
Word that you’re not necessary to make use of GIMP to create such image. It’s also possible to sort the textual content on Microsoft Phrase and make a screenshot. The one downside with this method is that you’re not straightforward to manage the decision.
Let’s go to the Steady Diffusion Net UI. It is best to use “text2img” operate and decide a Steady Diffusion 1.x mannequin (resembling Deliberate_v6). As a result of we need to generate a nature scene, you may set the immediate:
nature scene of a forest, extremely detailed, epic
and maintain the detrimental immediate empty. Set the picture dimension to 768 pixels in width and 512 pixels in top. With such a immediate (and is determined by the mannequin you select, the CFG scale, and the sampler), you may generate an image just like the follows:
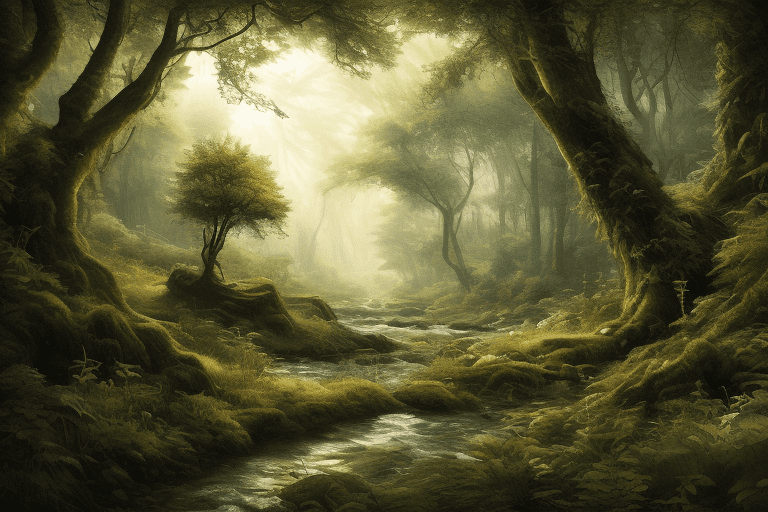
An image of forest. Generated utilizing Steady Diffusion by the creator.
It seems good. Now you confirmed the immediate works and the output meets what you anticipated. Let’s transfer on to ControlNet. Allow the ControlNet, and add the image that you just created with GIMP. Set the “Management Sort” to “All”, then on the preprocessor, choose “invert (from white bg & black line)” and the mannequin choose a depth mannequin (e.g., “control_v11f1p_sd15_depth”). Then click on generate and see how this works. You may even see the consequence as follows:
An image generated with unhealthy mixing of textual content to its background.
The textual content “GREEN” doesn’t appear to mix into the image. The textual content has some texture, however it’s nonetheless awkwardly imposed on the image. It’s because you haven’t used the ControlNet proper. That is the consequence when ControlNet drove the image era for too lengthy. You’ll be able to tune down the significance of ControlNet with a management weight of 0.7 as a substitute of 1.0. However most significantly, you need the ControlNet to be concerned just for the primary 60% of the steps within the diffusion course of. On this method, the latter 40% of the steps use solely your immediate, however the define of the image has already been established.
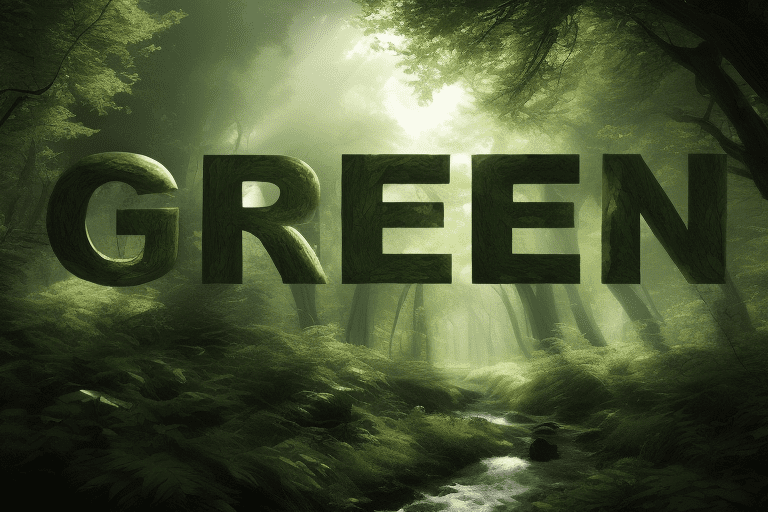
Simply with this modification, it is best to see a greater mixing of the textual content and the image. However typically, you might even see the textual content distorted since you gave an excessive amount of freedom for the diffusion course of to vary your image on the final 40% of the steps. It is going to be tough to manage, however you may set a bigger batch dimension or generate a number of batches to verify your luck with a number of random seeds. The next is an instance of what you may get:

Phrase artwork generated by Steady Diffusion that textual content blended properly into background.
This image is utilizing a CFG scale of 5 on the “Euler a” sampler with Karras schedule on 25 steps. ControlNet has weight of 0.7 with beginning management step 0 and ending management step 0.6. Half of the images generated may have some letters malformed, however this is without doubt one of the greatest from the opposite half. You’ll be able to see how the bushes shaped the letters. You’ll take a very long time to attract such an impact with Photoshop.
Identical Concept on a Totally different Theme
“Inexperienced” is just not all the time about nature. With a unique immediate however maintaining all different parameters the identical, you may get a unique image. Let’s “go inexperienced” and promote consuming greens. By simply altering the immediate to
vegatables on kitchen desk
You will get the next image:
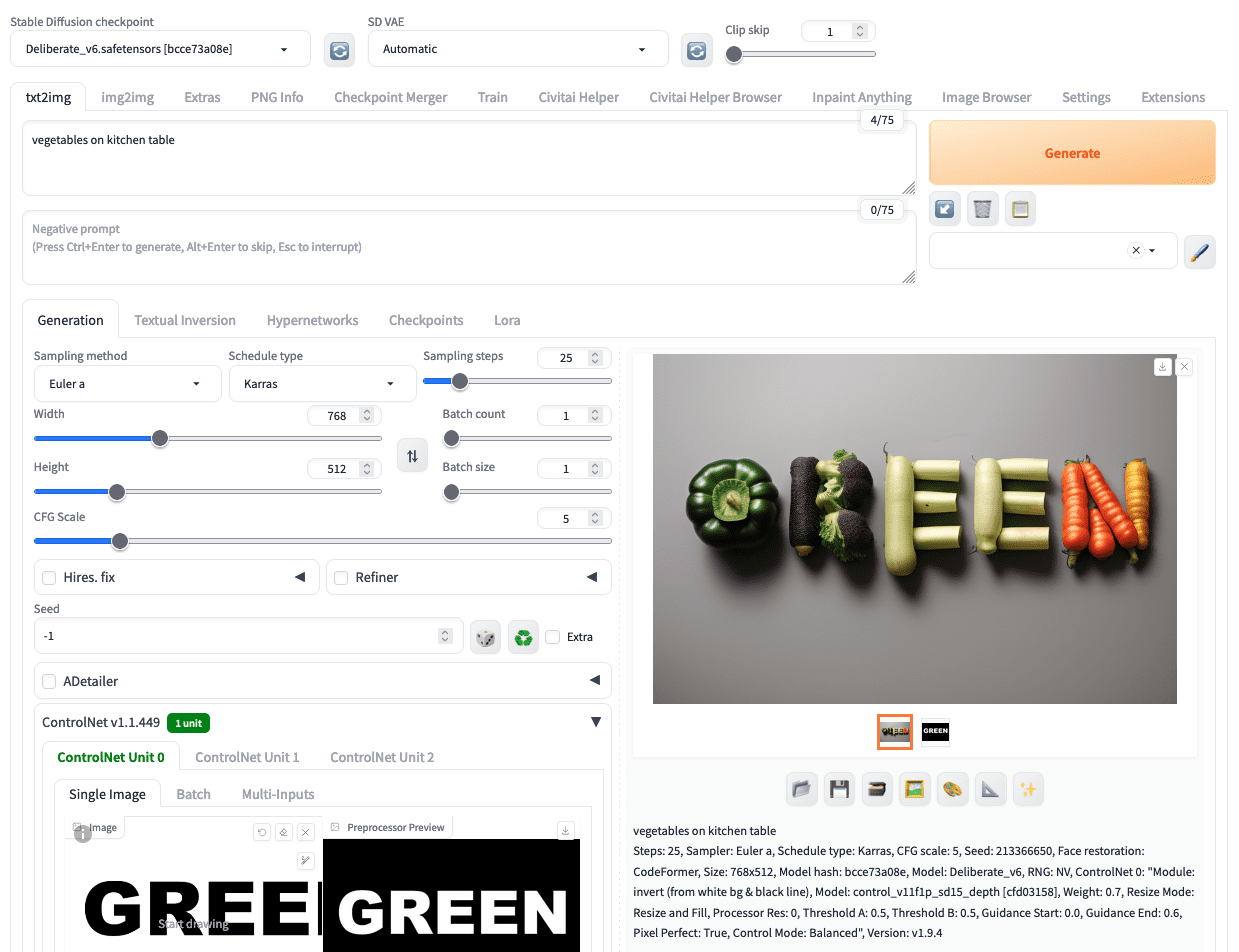
Reusing the identical template to generate a unique image in Steady Diffusion.
That is, actually, the lesson it is best to be taught on how one can use Steady Diffusion successfully: By experimenting with totally different parameters and discover the most effective, you may simply tweak the workflow a bit to create a completely new image with the identical top quality consequence.
Additional Readings
This part gives extra assets on the subject if you wish to go deeper.
Abstract
On this put up, you’ve got seen how one can create a phrase artwork image that blended textual content into the background naturally. The result’s interesting and it isn’t straightforward to create manually by drawing. Nonetheless, you may shortly produce such detailed consequence utilizing Steady Diffusion with ControlNet plugin.


")

")


")


