

Are you bored with the problem posed by a crowded native storage, making file retrieval really feel like a scavenger hunt?
Fear not! At the moment, we embark on the transformation of your Raspberry Pi right into a Community-Connected Storage (NAS) resolution.
Say farewell to the complexities of an overloaded native storage. As an alternative, envision your Raspberry Pi, outfitted with a Samba Server, seamlessly organizing recordsdata for environment friendly collaboration, simultaneous entry, and dependable backups.
What’s Samba?
Samba is a software program suite that permits seamless file and print companies interoperability utilizing Server Message Block (SMB) / Frequent Web File System (CIFS) file sharing normal which is broadly supported by varied working methods like Home windows, MacOS, Linux and even Android.
There are different NAS oriented options obtainable for Raspberry Pi like Open Media Vault. I discover SMB share to be the simplest to arrange and in case you are new to community storage, I believe it’s best to do this hassle-free methodology.
Necessities
Raspberry PiSD Card (8 GB+)Raspbian OS put in (instructions talked about right here work on that)Ethernet Cable (Elective)Keyboard & Mouse (Elective)Exterior HDD/ SSD
✋
The USB ports on Raspberry Pi is probably not adequate sufficient to energy up an Exterior Onerous Drive. So, I’d counsel you to make use of an exterior energy provide or purchase a HDD docking station.
Putting in Samba and it is dependencies
First, be certain that to put in Raspbian OS in your Raspberry Pi. I will not focus on these steps right here.
The primary order of enterprise when begin engaged on Linux is to make sure that you’ve gotten all the newest packages put in.
sudo apt replace && sudo apt improve -y
To put in the Samba packages you simply must apt-get as they’re obtainable within the repository.
sudo apt-get set up samba samba-common-bin
The work shouldn’t be finished right here since you might want to create a folder which can be shared. This folder might be situated even on exterior drive mounted to Pi.
Making a shared folder
For this tutorial, I’m mounting an exterior drive and creating a brand new folder inside /media listing.
I’m going to provide this folder all of the permission i.e. learn/write/execute (rwx) in order that anybody on my sub-network with the entry to my server can share recordsdata simply.
sudo mkdir -m 1777 /media/hdd/shared
Enhancing the SMB Config file
After you have created the folder, it is time to configure your SMB share. You have to do is edit smb.conf file to make your share seen on the community.
sudo nano /and so forth/samba/smb.conf
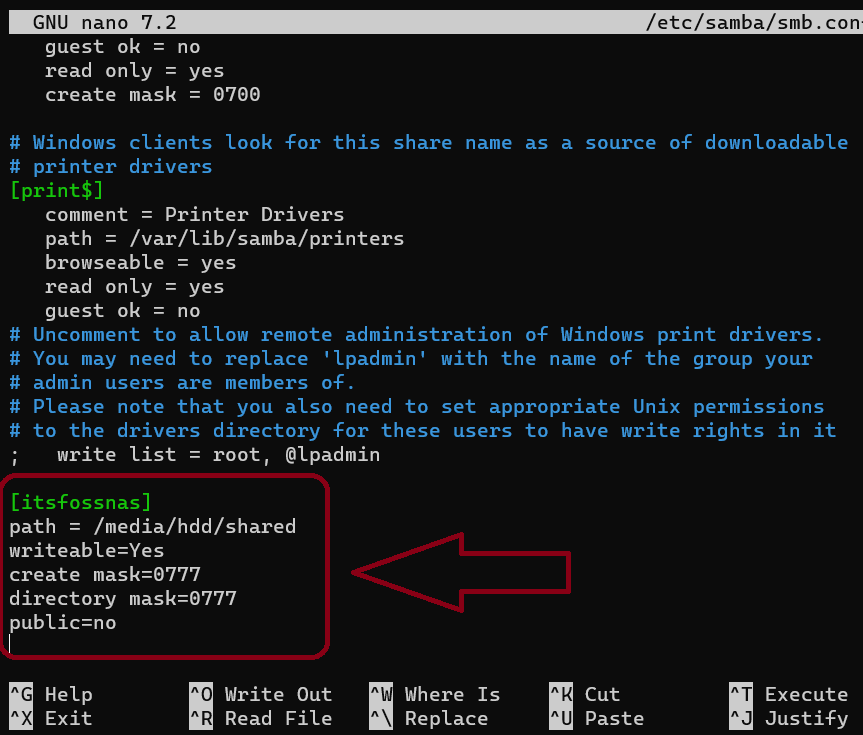
Inside this config file, you might want to add the next code on the backside:
[itsfossnas]
path = /media/hdd/shared
writeable=Sure
create masks=0777
listing masks=0777
public=no
Then save and exit out of Nano utilizing CTRL + X then press Y .
Right here, [itsfossnas] is the title of my share and it will be used to connect with the community share with the handle like localhostitsfossnas.
Making a Person for Samba share
Making a person for Samba share is essential for entry management, safety, and customized settings.
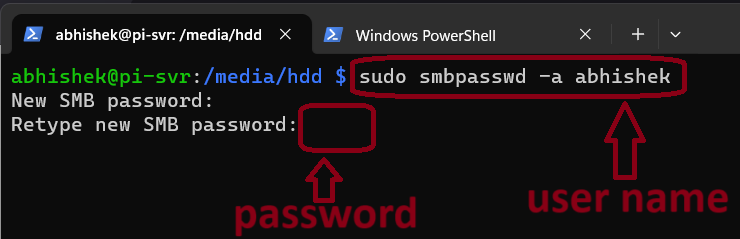
I’m going to create a person known as abhishek on this instance.
sudo smbpasswd -a abhishek
When you press Enter, it is going to immediate you to create a password for this person.
Lastly, you might want to restart the samba service:
sudo systemctl restart smbd
Samba will restart routinely when each time you boot up your Pi.
Now it is time to connect with your Samba share and to try this, you might want to find the Pi on the community.
The simplest methodology is to sort hostname -I on the terminal or you may test the DHCP file of your router which is able to present the IP handle assigned to your Pi.
Mounting your Samba Server on Home windows
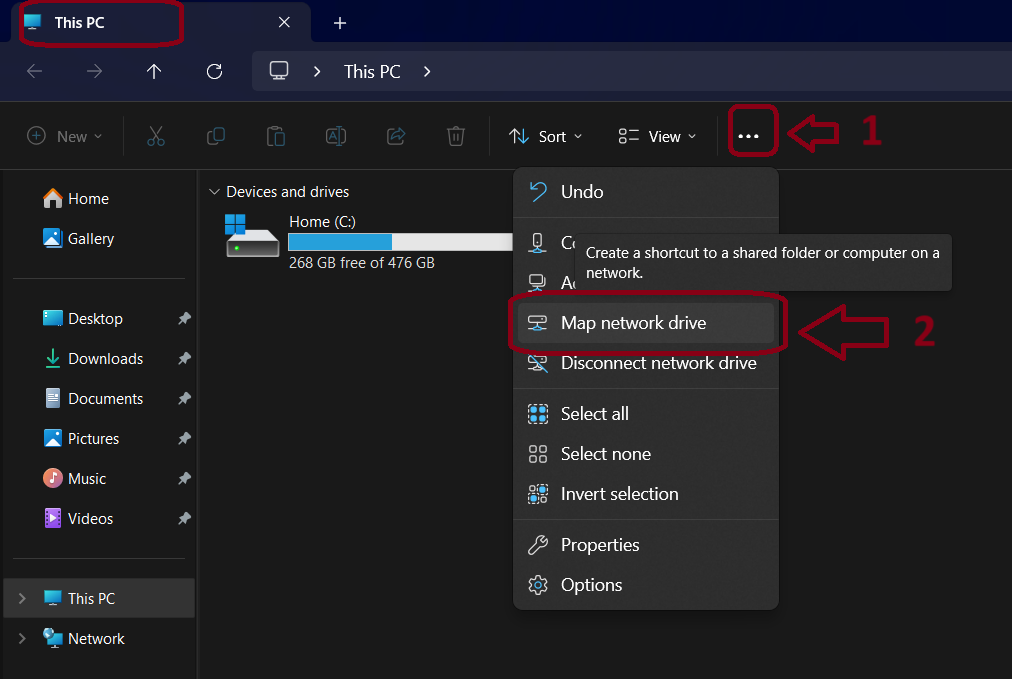
To mount your server in Home windows is sort of easy. Contained in the file explorer app, on the high you’ll need to click on the menu icon … and an inventory of choices will pop up in your display screen from which, You need to choose Map Community drive .
I’m utilizing Home windows 11 on this tutorial.
After that, it is going to ask you to set the drive letter on your share and the handle of your Server. In my case, it’s 192.168.1.11itsfossnas .
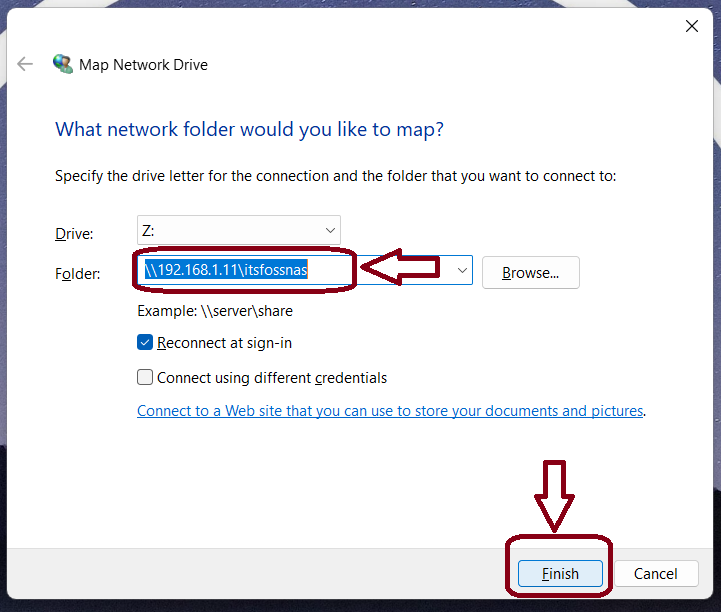
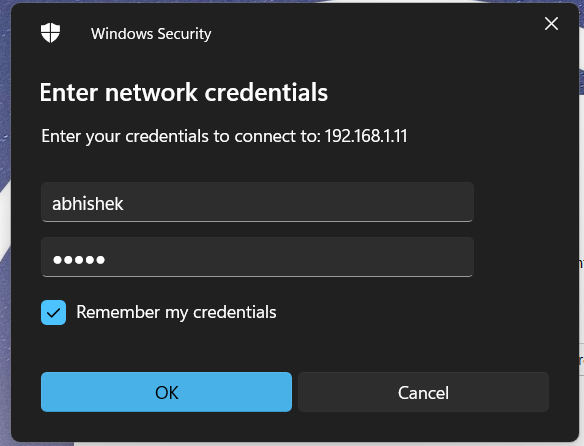
Lastly, it is going to immediate you to enter you Login credentials i.e. the Username and the Password we set on the above step and as soon as you’re finished, simply press Okay.
Your drive is now mounted efficiently.
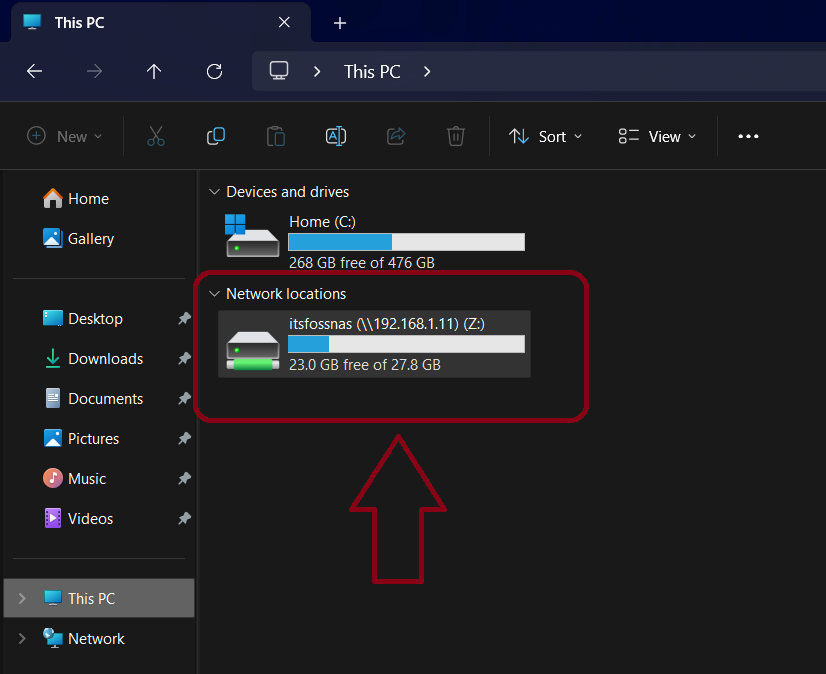
The speeds will range based mostly on whether or not you’re on WiFi or linked through Ethernet cable.
Conclusion:
I will not say that this can be your everlasting storage and backup resolution however it’s fairly spectacular that how such a small system can accomplish that a lot.
I believe it is nice for studying about Community Storage choices earlier than you go all in and purchase an costly NAS.
Hope you’ve gotten realized one thing new. Be happy to share your expertise or your DIY storage options with us within the feedback.


![[SOLVED] ShareFile for Outlook Has Fired an Exception Error](https://mspoweruser.com/wp-content/uploads/2024/07/sharefile-for-outlook-has-fired-an-exception.png "[SOLVED] ShareFile for Outlook Has Fired an Exception Error")


")

")


")


